Form Services and SPD Workflows…
For those of you who are developers and have to program XSL and XSLT, you have my deepest sympathies. I thought that regular expressions were bad, but this takes the cake! Despite my best efforts as a SharePoint architect/consultant, I seem to invariably have to deal with programming issues more often than I’d like.
In saying that though, XSL/XSLT is very powerful of course and I fully appreciate why the Data View web part is popular among developers. Anyway, I digress. This post is about forms services and SharePoint Designer workflow, but I had to dabble into this world to solve my problem. A word of warning though, this is a workaround but it’s not that clever.
The Symptom
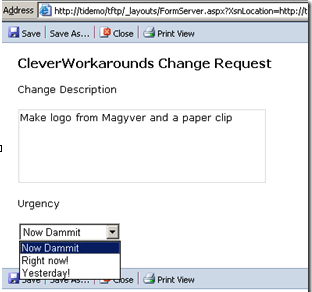
You create a SharePoint designer workflow and attach it to a forms library, configured to run in forms server mode (in the browser). You create a “Collect Data From a User” workflow action, and when the workflow recipient clicks on the task, the “Related list item” field in the task is not rendered in the browser.
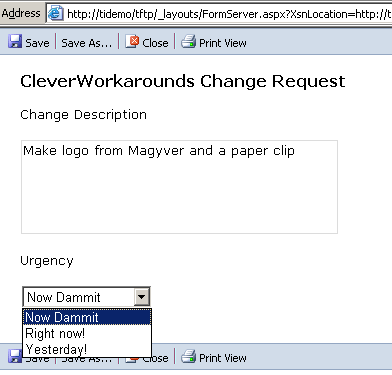
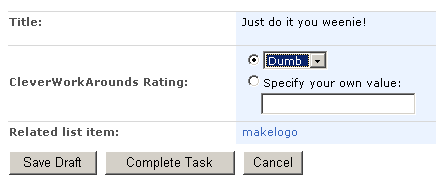
Below is a sample of the form being rendered correctly when being filled in and then not being rendered correctly when it is accessed via editing the associated “Collect data from a user” task.
The Problem
The ‘related list item’ link always references the original list/library and item that the workflow was triggered from. It has no idea that this is a URL rendered via forms services. The default URL for the above example when referred to as an item in a form library is
http://tidemo/tftp/forms/makelogo.xml
Yet when rendered within forms server, the URL is:
http://tidemo/tftp/_layouts/FormServer.apsx/XmlLocation=/tftp/forms/makelogo.xml&DefaultItemOpen=1
So, the problem is that the wrong URL is being passed into the task item as the ‘related list item’. Forms services is never referred to.
The Workaround
Modify the task ASPX page (specifically XSLT code) created by the workflow to reference the forms server version of the related list item URL. This involves some modifications to XML/XSLT to achieve and we have to deal with the encoding of spaces and potentially other characters.
Problem Details
The issue is related to the way the “Collect Data From a User” workflow action was written. This is one of three built in SPD workflow actions that create a task entry. This workflow action works by creating a custom task form. The custom task form is the ASPX file that is presented to the user when they view or edit their task. Being a custom ASPX file, it can be customised to with additional form fields as you see fit. Below is an example of constructing such a task action.
Creating the workflow
Start SharePoint Designer and open the site in question. From the file menu, choose New and Workflow from the list and assign it to your infopath form library.

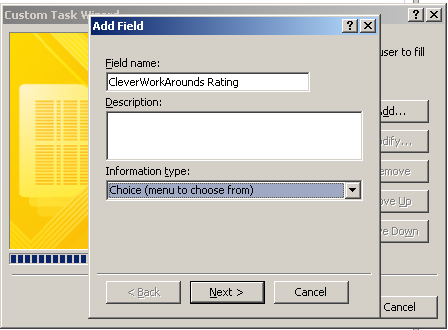
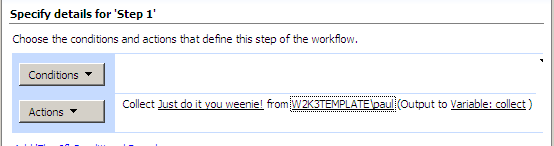
Create a “Collect Data from a User” action and give the task a name in the custom task wizard.
![clip_image002[1]](http://www.cleverworkarounds.com/wp-content/uploads/2008/02/clip-image0023.jpg)
Click NEXT and then add any custom fields that you want the user to fill in as shown below.
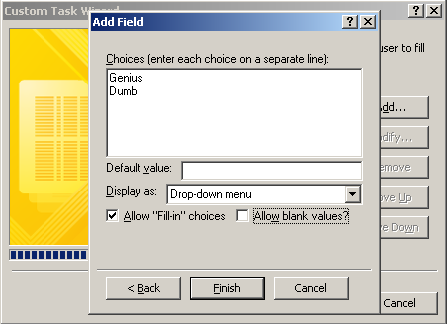
Now set the person to assign the task to and you are ready to go!
Testing the workflow
So now we fill in a form and test the workflow that a task has been created. As you can see on the next two screens, the workflow is in progress once the form has been filled out.
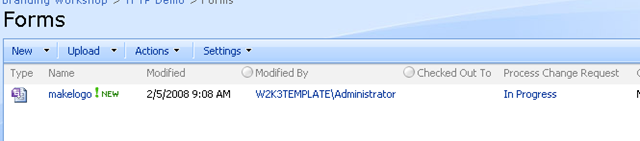
If we examine the task list, we can see the task created by the workflow action.
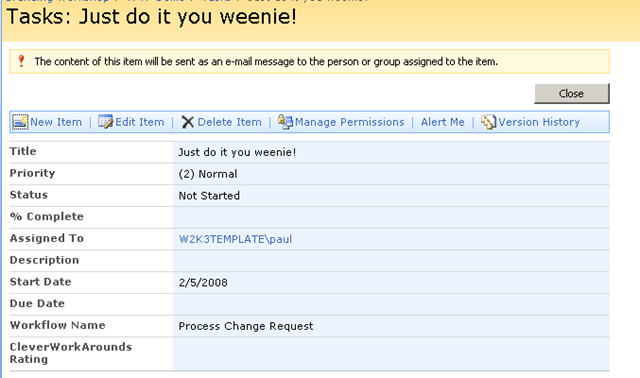
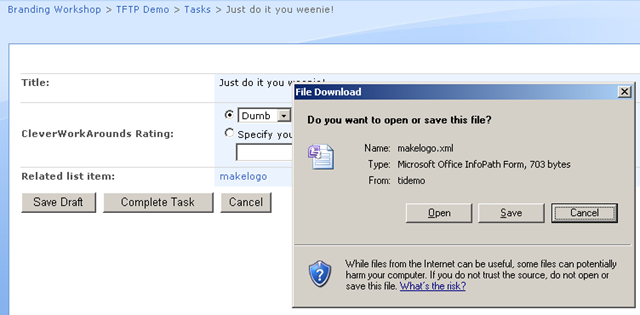
Clicking EDIT item and we see the custom task form that I described in the previous section with the ‘related list item’ link.
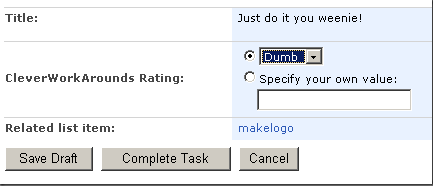
Clicking the ‘related list item’ ideally would re-load the form via forms server, but instead, because the URL is wrong it loads the Infopath client or prompts you to choose an application to open the file with.
Before I detail the steps to working around this problem, let’s have a quick interlude on how the custom task form is done.
Theory Interlude…
(If the theory doesn’t concern you, skip to the next section entitled “The Fix #1”).
In Office SharePoint Designer 2007, when you create a ‘collect data from user’ task, it creates a custom task form in the form of an ASPX file. This appears in the folder for that workflow. The file name of the custom task form corresponds to the name that you give the task in the Custom Form Wizard.

Inside this ASPX file is a Data View Web Part in form (read/write) mode. (As a result, it is also referred to as the data form web part). Additionally, unlike when separate ASPX pages are created for creating, editing, and viewing list or library details, this custom ASPX page contains all of this logic in the one file. How does it manage to do this? The answer is the Data Form web-part and XSL combined.
If we open up this ASPX file, we see the following structure (snipped and reordered for readability) .
First up is the definition of the DataForm WebPart. A Dataform webpart operates on data sources and those datasources (<DataSources> section) can be controlled via parameters (<Parameterbinding> section).
<WebPartPages:DataFormWebPart runat="server" IsIncluded="True" FrameType="None" NoDefaultStyle="TRUE" ViewFlag="0" Title="{974032E5-108E-419B-AECE-881778387B8B}" __markuptype="vsattributemarkup" __WebPartId="{633C30DC-0989-4D2B-95BD-C4090132D106}" id="TaskForm" pagesize="1">

<DataSources>

 [snip datasource code and parameterbindings]

</DataSources>

<ParameterBindings>

  [snip]

</ParameterBindings>
Inside the DataForm webpart we have our XSL/XSLT code that controls how the data renders on the page. Again I have stripped much of the code to best explain the logic. In the code below, we have a number of xsl:template XSLT elements. This element contains rules to apply when a specified node is matched. The match attribute is used to associate the template with an XML element. The match attribute can also be used to define a template for a whole branch of the XML document (i.e. match=”/” defines the whole document).
The rule here is to call another xsl:template called “dvt_1”. The template called “dvt_1” then calls the “dvr_1.header”, “dvt_1.body” and dvt_1.commandfooter” elements and passes parameters to those elements so that the display is rendered dynamically based on the values in the datasource.
<xsl:template match="/" xmlns:x="http://www.w3.org/2001/XMLSchema" xmlns:dsp="http://schemas.microsoft.com/sharepoint/dsp" xmlns:asp="http://schemas.microsoft.com/ASPNET/20" xmlns:__designer="http://schemas.microsoft.com/WebParts/v2/DataView/designer" xmlns:SharePoint="Microsoft.SharePoint.WebControls">

   <xsl:call-template name="dvt_1"/>

</xsl:template>

<xsl:template name="dvt_1">

   [snip]

<xsl:call-template name="dvt_1.header">

   [snip]

<xsl:call-template name="dvt_1.body">

   [snip]

<xsl:call-template name="dvt_1.commandfooter">

   [snip]

</xsl:template>
If you examine the code you will see examples of HTML and XML combined. A full description of XSL/XSLT and related concetps like XPath is way beyond the scope of this post, but the only template that I will draw your attention to is this one below: “dvt_1.rowedit”. This is the section of code that sets the URL of the ‘related list item’.
<xsl:template name="dvt_1.rowedit">

   <xsl:param name="Pos" />

   <tr>

      <td>

         <table border="0" cellspacing="0" width="100%">

            <tr>

               <td class="ms-formlabel" valign="top" nowrap="true" width="25%"><b>Title:</b>

               </td>

               <td class="ms-formbody" valign="top" width="75%">Just do it you weenie!<br></br><br></br>

               </td>

            </tr>

[snip some other table rows]

            <tr>

               <td class="ms-formlabel" valign="top" nowrap="true" width="25%"><b>Related list item:</b>

             </td>

             <td class="ms-formbody" valign="top" width="75%"><a href="{substring-before(@WorkflowLink, ', ')}"><xsl:value-of select="substring-after(@WorkflowLink, ', ')"></xsl:value-of></a>

             </td>

            </tr>

         </table>

     </td>

</tr>

</xsl:template>

  [snip the rest]

</WebPartPages:DataFormWebPart></asp:content>
So, now we have found the area we need to modify, let’s go back to the work!
The Fix #1
So to recap, we need to turn this:
http://tidemo/tftp/forms/makelogo.xml
into this:
http://tidemo/tftp/_layouts/FormServer.apsx/XmlLocation=/tftp/forms/makelogo.xml&DefaultItemOpen=1
The line of code that generates the URL is this:
<a href="{substring-before(@WorkflowLink, ', ')}">

<xsl:value-of select="substring-after(@WorkflowLink, ', ')"></xsl:value-of>

</a>
@WorkflowLink is a variable that returns the path to the related list item in the format:
<full url path>, <file name>
e.g.
“http://tidemo/tftp/forms/makelogo.xml,makelogo”
So if you look carefully at the code above, it uses the text to the left of the comma separator to create the hyperlink using the {substring-after(@WorkflowLink, ‘,’) code. It then uses the text to the right of the comma to create the link display using the <xsl:value-of select=”substring-after(@WorkflowLink, ‘, ‘) code.
So my first attempt at a fix was to change the code to hard-code the forms server URL like this:
<a href="http://tidemo/tftp/_layouts/FormServer.aspx?XmlLocation=/Forms/{substring-after(@WorkflowLink, ', ')}.xml&DefaultItemOpen=1">
<xsl:value-of select="substring-after(@WorkflowLink, ', ')"></xsl:value-of>
</a>
The only thing to note here is that I had to encode the & in &DefaultitemOpen=1 to & so that XML parser didn’t get upset at me. So we click the ‘related list item’ link now and then see that the infopath form renders in the browser (Yay!)
I then encountered a problem. As soon as I used a space in the name of the form as the example below shows, bad things happened.
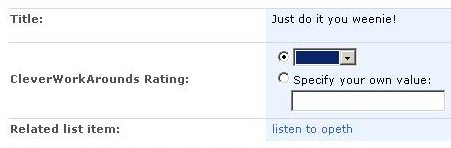
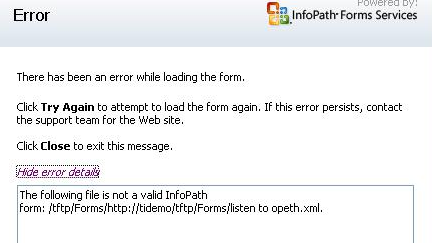
The Fix #2
The above problem is caused by the fact that the space makes forms server unhappy. So what if we try changing all occurrences of spaces in a name to its %20 equivalent?
No problem in theory, but string manipulation using XSL is… shall we say… ugly. Maybe there is a better way, but the method I found was this:
We have to pass @WorkFlowLink variable to our own custom xsl:template as shown below and then pass it the string to search and replace (in this case encoding a space ‘ ‘).
<xsl:variable name="myString" select="substring-after(@WorkflowLink, ', ')"/>

<xsl:variable name="myNewString">

   <xsl:call-template name="replaceCharsInString">

      <xsl:with-param name="stringIn" select="string($myString)"/>

      <xsl:with-param name="charsIn" select="' '"/>

      <xsl:with-param name="charsOut" select="'%20'"/>

   </xsl:call-template>

</xsl:variable>

<xsl:variable name="myNewRealString" select="string($myNewString)"/>
So the above section shows code that needs to be pasted into the source code BEFORE the reference to @Workflow.
<a href="{substring-before(@WorkflowLink, ', ')}">

<xsl:value-of select="substring-after(@WorkflowLink, ', ')"></xsl:value-of>

</a>
Here is the template that actually does the string substitution from here . http://www.dpawson.co.uk/xsl/sect2/replace.html)
<xsl:template name="replaceCharsInString">

  <xsl:param name="stringIn"/>

  <xsl:param name="charsIn"/>

  <xsl:param name="charsOut"/>

  <xsl:choose>

    <xsl:when test="contains($stringIn,$charsIn)">

      <xsl:value-of select="concat(substring-before($stringIn,$charsIn),$charsOut)"/>

      <xsl:call-template name="replaceCharsInString">

        <xsl:with-param name="stringIn" select="substring-after($stringIn,$charsIn)"/>

        <xsl:with-param name="charsIn" select="$charsIn"/>

        <xsl:with-param name="charsOut" select="$charsOut"/>

      </xsl:call-template>

    </xsl:when>

    <xsl:otherwise>

      <xsl:value-of select="$stringIn"/>

    </xsl:otherwise>

  </xsl:choose>

</xsl:template>
So finally, we have the above 2 sections of code pasted into the custom form and then we can modify the HTML from this:
<a href="{substring-before(@WorkflowLink, ', ')}">

<xsl:value-of select="substring-after(@WorkflowLink, ', ')"></xsl:value-of>

</a>
To this:
<a href="http://tidemo/tftp/_layouts/FormServer.aspx?XmlLocation=/Forms/{$myNewRealString}.xml&DefaultItemOpen=1">
<xsl:value-of select="substring-after(@WorkflowLink, ', ')"></xsl:value-of>
</a>
So assuming that the $myNewRealString variable exists and uses this as the URL instead. This time the form rendered fine 🙂
It still sucks
Why does this suck? Oh, so many reasons!
First up, I am hardcoding aspects of the URL and hardcoding is bad! I am sure that with more XSL manipulation I could easily pull that from another variable and create the URL I need. Although it is uncool, it is not beyond hope. As a quick and dirty workaround, it has its uses I guess.
The second is that we have more than a space to potentially encode. Other characters often encoded are:
Dollar (“$”)
Ampersand (“&”)
Plus (“+”)
Comma (“,”)
Forward slash/Virgule (“/”)
Colon (“:”)
So depending on the naming convention for forms, we may have to have repeated sections of code calling replaceCharsInString with the character and encoded version.
Even that is not the clincher.
According to Microsoft, the custom task form can be customized for layout and appearance only. You can attach a different master page or modify the styles. However, to change what fields appear on the form, you must use the Custom Task Wizard in the Workflow Designer. You cannot change the form fields by editing the Data Form Web Part directly. If you make other customizations to the Data Form Web Part, those changes are lost each time the workflow is recompiled.
Ouch! I did actually know that, but it just means this method introduces a governance layer of additional tasks to perform during change control/configuration management. The customisations would have to be reapplied each time the workflow is republished.
CleverWorkArounds Rating: Why did I bother?
Less Sucky?
The least sucky way to do this is to create your own workflow action, rather than use the existing ones. If I have time I will investigate this method where rather than write my own custom action, I would use the technique of handlers to modify the behaviour of the “collect data from a user” activity.
Robert Bodge has written about the clever way to do it here: (http://thorprojects.com/blog/archive/2007/09/26/697.aspx) This is a much better method, however you will have to do some work yourself. He gives you the basics on what to do and code, but leaves you to get it compiled and working yourself. If I have time and inclination I’ll give it a go. Thanks Robert!
Conclusion
Do I have a moral to this story? Not really, but hopefully at least we all have learnt something 🙂


February 7th, 2008 at 8:59 am |
[…] Form Services and SPD Workflows… […]
July 15th, 2008 at 6:31 pm |
life saver! thx!
January 18th, 2009 at 6:09 am |
[…] Problema con Infopath webform y el Workflow Task Form Estimados encontre esta solucion: http://www.cleverworkarounds.com/200…spd-workflows/ Cualquier otra info les agradezco. Saludos "news.microsoft.com" <jcs6x> wrote in […]
February 6th, 2009 at 12:50 am |
Great tutorial! Worked perfectly in my situation and solved my problem. Thanks!
May 9th, 2009 at 7:00 pm |
Simple,Precise and generalize solution for this is to set querystring parameter.
See following for more detail:
http://urenjoy.blogspot.com/2009/05/related-list-item-doesnt-open-browser.html
May 10th, 2009 at 1:19 am |
Terrific solution urenjoy. Nice work
June 22nd, 2009 at 11:50 pm |
What happens if you just append the link with ?OpenIn=Browser
September 21st, 2010 at 8:48 pm |
[…] incorporating any custom fields created. (If you want more detail about that then visit the “Theory Interlude” section of this […]
November 3rd, 2010 at 3:44 am |
Is it possible to use one field in a CollectDataFromAUser.aspx page to control the visibility of another field? For example, I want to have a Yes/No dropdown control whether or not a subsequent field is displayed. If yes, that field gets hidden. If no, that field is visible.
December 2nd, 2010 at 1:08 pm |
It is best to create a new workflow action rather than using the old one!