More SharePoint Branding – Customisation using JavaScript – Part 6
God help me, I’m up to part 6 of series about a technology I dislike and still going. For those of you that have just joined us, then you might want to go back to the very beginning of this series where I used JavaScript to improve the SharePoint user experience. Since then, I’ve been trying to pick a path through the thorny maze of what you could term, ‘sustainable customisation’.
By that, I mean something that hopefully will not cause you grief and heartache the next time a service pack is applied!
So no mood for jokes this time – I want to get this over with so let’s get straight to it and finish this thing!
So where are we at?
- Part 1 looked at how we can use JavaScript to deal with the issue of hiding form elements from the user in lists and document libraries.
- Part 2 examined some of the issues with the part 1 JavaScript hacks and wrapped it into a web part using the content editor web part.
- Part 3 then examined the various issues of adding this new web part to certain SharePoint pages (NewForm.aspx, EditForm.aspx and DispForm.aspx). I also covered using SharePoint Audience targeting to make the hiding/unhiding of form elements personalised to particular groups of users.
- Part 4 started to address a couple of remaining usability issues, and introduced ‘proper’ web-part development using Visual Studio and STSDEV. I created a project to perform the same functionality in part 3, but would not requiring the user to have any JavaScript knowledge or experience.
- Part 5 then used STSDEV to create a solution package that allowed easy debugging, deployment and updating of the web part developed in part 4.
So what could we possibly have left to cover? Basically this article will revisit the web part code and make some functionality improvements and then I will cover off some remaining quirks/issues that you should be aware of.
[Quick Navigation: Part 1, Part 2, Part 3, Part 4, Part 5 and Part 6]
Code Enhancement 1 – Debug Breakpoint
One thing that can be annoying when using this web part is debugging. A small typo in the list of columns to hide and the functionality can break and be difficult to troubleshoot. I have two enhancements that improve this situation.
The first is very simple. If you add a line like this in your JavaScript code
debugger;
When script debugging is enabled on your browser, a number of 3rd party debug tools such as Microsoft Script Debugger, Microsoft Script Editor, Visual Studio.Net and Venkman will treat this as a breakpoint and allow you to step through the code and perform client side debugging. This is handy of course, so wouldn’t it be nice for the web part to have a property that enables a breakpoint?
The code for this is insanely easy. We define a boolean property in our web part that optionally outputs the line ‘debugger;’ just before the rest of our code runs. Using the XML Serialisation as described in Part 5, we can expose this property as a checkbox in the web part properties when used in SharePoint.
Below is a code sample of the property and its use.
private bool _breakpoint;

// Create a custom category in the property sheet.
[Category("Custom Properties")]
[Personalizable(PersonalizationScope.Shared)]
[WebDisplayName("Enable Breakpoint?")]
[WebDescription("Add's breakpoints to Javascript code for script debuggers")]
[WebBrowsable(true)]
[XmlElement(ElementName = "BreakPoint")]
public bool BreakPoint {
    get
    {
        return _breakpoint;
    }
    set
    {
        _breakpoint = value;
    }
 }
In the render method, where applicable, we then add this line
if (_breakpoint)
{
      output.WriteLine("   debugger;");
}
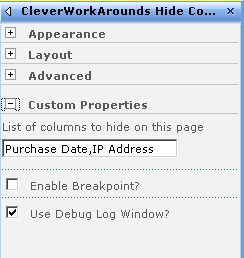
So after rebuilding and redeploying this project using STSDEV, the web part properties now reflect this new property.
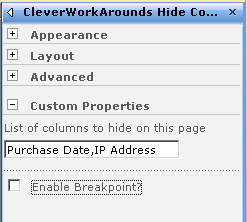
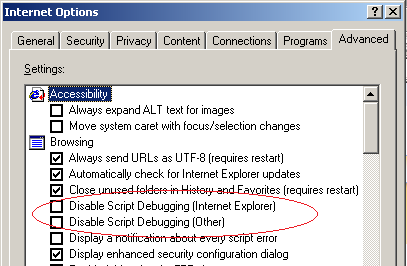
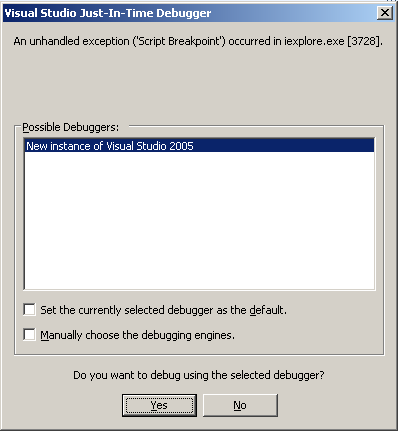
Check the “Enable BreakPoint” box and click okay. If your browser has script debugging enabled (found in Internet Options/Advanced tab in IE), you will be prompted to launch a debugger then the breakpoint is executed. Below you can see both the IE property page that controls script debugging and the prompt to debug the page when Visual Studio is installed.
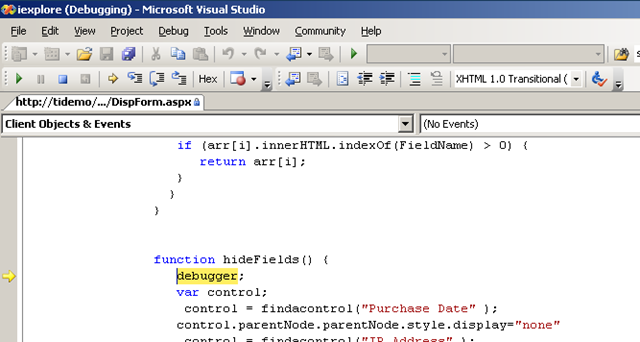
Choose a new Instance of Visual Studio and you will then be able to see and step through the JavaScript code as shown below
Code Enhancement 2 – Debug Log Window
Sometimes, you will not have the benefit of being able to use a JavaScript debugger and you need a simpler method to display debug information. How about we add a debug log window that can conditionally be invoked when it is enabled in the web part properties?
Fortunately for us, Bret Taylor has done the hard work for us with a complete JavaScript debug log function.
So in JavaScript code, we can for example, add a line like:
log("This is log message ");
So once again, we can set this as a boolean property. If the property is set to true, the webpart can write the JavaScript log function to the browser and then call that function at various places in the rest of our code.
Below is a code sample of the property and its use
private bool _DebugLogWindow;

[Category("Custom Properties")]
[DefaultValue(false)]
[Personalizable(PersonalizationScope.Shared)]
[WebDisplayName("Use Debug Log Window?")]
[WebDescription("Select to set value to True.")]
[WebBrowsable(true)]
[XmlElement(ElementName = "DebugLogWindow")]
// The accessor for this property.
public bool DebugLogWindow
{
    get
    {
        return _DebugLogWindow;
    }
    set
    {
        _DebugLogWindow = value;
    }
}
The next section of code outputs the log function itself. I know this looks ugly but thats what you get when using one programming language to write the code of another.
if (_DebugLogWindow)
{
    output.WriteLine(@"function log(message) {");
    output.WriteLine(@"if (!log.window_ || log.window_.closed) { ");
    output.WriteLine(@"   var win = window.open("""", null, ""width=400,height=200,"" + ");
    output.WriteLine(@"   ""scrollbars=yes,resizable=yes,status=no,"" + ");
    output.WriteLine(@"   ""location=no,menubar=no,toolbar=no""); ");
    output.WriteLine(@"   if (!win) return; ");
    output.WriteLine(@"        var doc = win.document; ");
    output.WriteLine(@"        doc.write(""<html><head><title>Debug Log</title></head>"" +");
    output.WriteLine(@"        ""<body></body></html>""); ");
    output.WriteLine(@"   doc.close(); ");
    output.WriteLine(@"   log.window_ = win; ");
    output.WriteLine(@"   }");
    output.WriteLine(@"   var logLine = log.window_.document.createElement(""div""); ");
    output.WriteLine(@"   logLine.appendChild(log.window_.document.createTextNode(message)); ");
    output.WriteLine(@"   log.window_.document.body.appendChild(logLine); ");
    output.WriteLine(@"}");
 }
So all we need now is to invoke this function in sections of code where debug output would be useful. For example:
if (_DebugLogWindow)
{
     output.WriteLine("    log(\"We have " + _fieldlist.Length + " fields to hide \" ); ");
}
So let’s rebuild and redeploy these changes and see the effect.
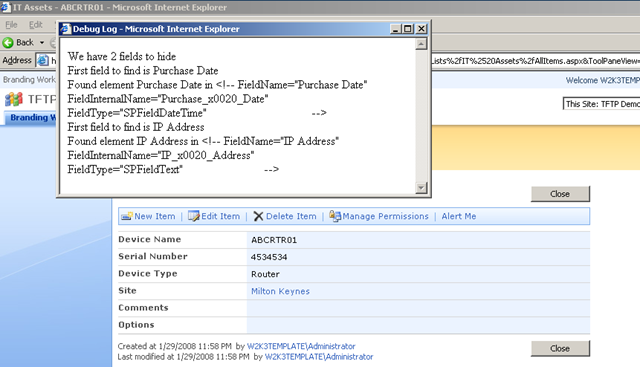
The screen grab below shows the result of enabling this setting. We now have a second browser window spawned that logs to the screen all information passed to the log() function.
Code Enhancement 3 – Hide Control by ID
I cannot take the credit for this enhancement. I originally packaged up an early version of the web part for Jeremy Thake, a former colleague of mine to test on his environment before I published part 5 of this series. He in return sent me back another JavaScript function to hide based on HTML element ID’s.
Way back in Part 1, I described the JavaScript built-in method getElementsByTagName. Jeremy is using the function getElementByID. This function works on the assumption that HTML elements are assigned an optional ID attribute. e.g
<div id="CleverWorkarounds1"
     style="position:absolute; width:500px; height:150px; visibility: visible">
some DIV tag
</div>
If you look in SharePoint HTML source, you will see that this is the case.Take for example this particularly feral HTML element for the CLOSE button.
<input type="button" name="ctl00$m$g_100fd177_99ab_4755_a1d3_f064360d4317$ctl00$toolBarTbltop$RightRptControls$ctl02$ctl00$diidIOGoBack"
   value="Close"
   id="ctl00_m_g_100fd177_99ab_4755_a1d3_f064360d4317_ctl00_toolBarTbltop_RightRptControls_ctl02_ctl00_diidIOGoBack"
   class="ms-ButtonHeightWidth" target="_self"
 />
So this button can be referenced by the following ID.:
document.getElementById('ctl00_m_g_100fd177_99ab_4755_a1d3_f064360d4317_ctl00_toolBarTbltop_RightRptControls_ctl02_ctl00_diidIOGoBack').style.display="none";
Below is a code sample of the property and its use
private string _HideFieldByIdList;

// Create a custom category in the property sheet.
[Category("Custom Properties")]
[Personalizable(PersonalizationScope.Shared)]
[WebDisplayName("List of HTML element IDs to hide on this page")]
[WebDescription("Comma delimited list of HTML element IDs to hide on this page")]
[WebBrowsable(true)]
[XmlElement(ElementName = "HideFieldByIdList")]
public string HideFieldByIdList
{
    get
    {
        return _HideFieldByIdList;
    }
    set
    {
        _HideFieldByIdList = value;
    }
}
Next up, we have the function written by Jeremy (along with some debug log lines added by me)
if (HideFieldByIdList != null || HideFieldByIdList != "")
{
     if (_DebugLogWindow)
    {
        output.WriteLine("    log(\"Calling function hideFieldsById\" ); ");
    }
    output.WriteLine();
    output.WriteLine("function hideFieldsById() { ");
    _fieldlist = HideFieldByIdList.Split(',');
    if (_fieldlist != null)   {
        for (int i = 0; i < _fieldlist.Length; i++)
        {
            if (_fieldlist[i] != "")
            {
                if (_DebugLogWindow)
                {
                     output.WriteLine("    log(\"Looking for ID " + _fieldlist[i] + "\" ); ");
                }
                 output.WriteLine("document.getElementById('" + _fieldlist[i] + "').style.display=\"none\";");
             }
         }
    }
    output.WriteLine(" }");
    output.WriteLine();
}
So let’s test this! Redeploy the project and let’s hide the Close button on DispForm.aspx
Before screen-shot!
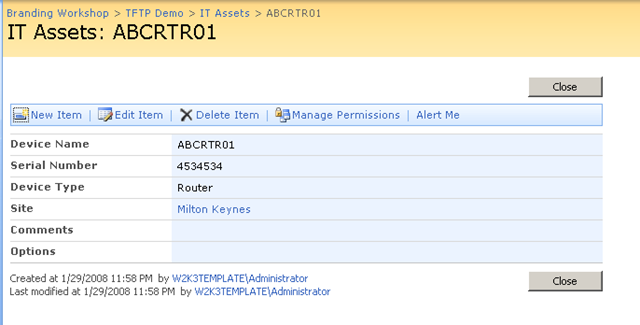 .
.
Add the ID of the “Close” button
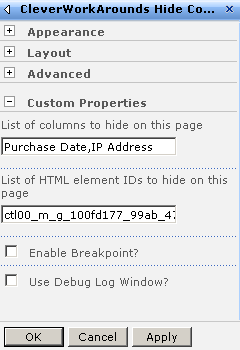
After screen-shot! Wohoo!

Quirks and Issues
We are almost home after 6 posts in this series! No more coding for now as I think we have demonstrated enough of this idea. You can see how this can be used and extended quite easily.
There are a couple of minor points that I think are worth pointing out. One issue I covered back in my first branding series. If you deactivate this feature, the web part will not be removed from the web part library.
“That is by design. Deactivation of features does not remove data that was created when the feature was activated. if you want to “clean up” the data that was created, you need to create a Feature receiver handler and have the FeatureDeactivating() event handler manually remove the file.”
and
“Keep in mind though, data is left in SharePoint BY DESIGN. What would happen if you had deployed a page layout with a Feature and someone removed it while it was in use by thousands of pages? Oops… blamo!”
So now that we know that the web part will not be deleted, let’s see what happens when we modify it. Here is the web part as it was installed by the STSDEV solution.
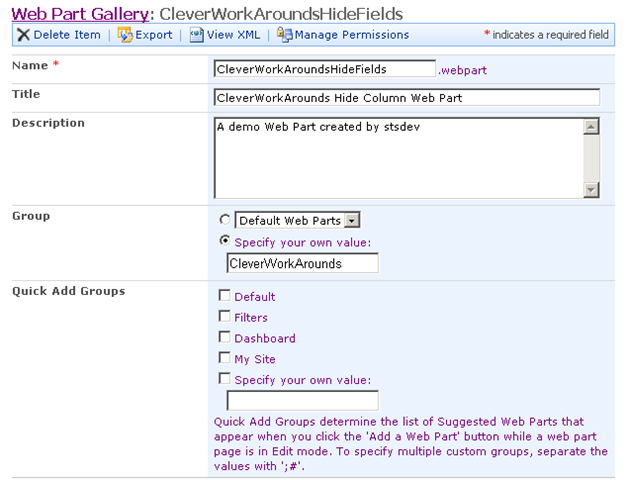
Now let’s do a flashback and modify WebPart.XML in our Visual Studio Project. I have modified the Title property to “CleverWorkArounds Hide Column1 Web Part”
<?xml version="1.0" encoding="utf-8"?>
<!--Created by STSDEV at 7/03/2008 11:34:05 PM-->
<Elements xmlns="http://schemas.microsoft.com/sharepoint/">
  <Module Name="CleverWorkAroundsHideFields" List="113" Url="_catalogs/wp" Path="WebParts" RootWebOnly="True">
    <File Url="CleverWorkAroundsHideFields.webpart" Type="GhostableInLibrary">
      <Property Name="Group" Value="CleverWorkArounds" />
      <Property Name="Description" Value="Web part to selectively hide columns via JavaScript"/>
      <Property Name="Title" Value="CleverWorkArounds Hide Column1 Web Part"/>
    </File>
  </Module>
</Elements>
So let’s redeploy the solution, and even manually deactivate and reactivate the feature as well. When we re-examine the web part in the gallery, the change is not reflected.
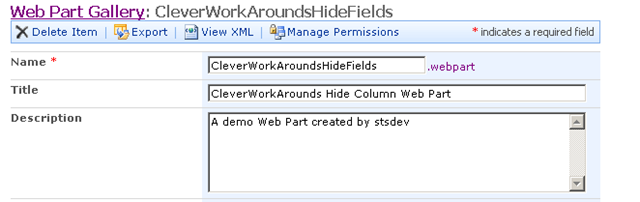
Another inconsistency (although not a major one), is that the “Description” property is ignored completely. If you look at the Webpart.XML screen-shot above, you will notice I have set the Description property to “Property Name=”Description” Value=”Web part to selectively hide columns via JavaScript“.
But look at the web part properties above. The description is “A demo Web Part created by stsdev”.
I assume this is a bug with STSDEV, but in any event, its pretty minor and I can live with it.
Conclusion
Well gawddammit, I am finally done with JavaScript! But to round off this series, let’s summarise what we have achieved.
- No programming skills necessary
- No unghosting of Web Part pages
- Easy debug logging
- Leverage audience based content delivery
- Eliminated the requirement for SharePoint Designer
- Packaged up the functionality into an easy to deploy solution
I am well pleased, and I hope that you found some useful nuggets of information in this post.
I still hate JavaScript, but at least here we are using it in a sustainable customisation manner. 🙂
Bye for now
Paul
This was very helpful. I have been searching for a way to accomplish this without customizing the default pages. The debugging feature was icing on the cake. I will use your technique to create a web part that autofills fields from parameters passed in the querystring.
Thanks.
If you hate JavaScript then take a look at JQuery (a JavaScript framework)
Much easier to play around with (SharePoint) DOM elements.
http://www.e2.nl/sharepoint/?p=11
I have been using the webpart to hide fields (successfully, thanks!) but while researching another issue I did some testing with Firefox and the fields were not hidden.
Have you seen any problems with the webpart in conjunction with Firefox in the past? I am using the new Firefox 3.0.
Thanka
This an IE thing only, Firefix does not recognise the comment “!” as a HTMl element and therefore will not work. Since I do not use this webpart for external facing sites, firefox is not often used.
Sorry
Paul
ISSUE: There is one major problem with adding Web Parts to any SharePoint form using the «&ToolPaneView=2 ».
If the Publishig feature is enabled on the site, you won’t be able to publish your modified form. SharePoint will be caught in a never ending loop. I don’t know if it’s a bug or if this usecase should simply not be!
please see comments in part one of this is you need it to work in firefox.