More SharePoint Branding – Customisation using JavaScript Part 2
Hi again.
JavaScript sucks! There I said it. Despite me hating it as a programming language, I can’t deny that in SharePoint, it does have its uses.
CleverWorkArounds Coffee requirement of this post depends on how much you hate JavaScript.
| Metrosexual web developer | |
| Socially inept technical guy | |
| Luddite IT manager | (sorry … why are you here anyway?) |
[Quick Navigation: Part 1, Part 3, Part 4, Part 5 and Part 6]
To quickly recap the first post of this series, we looked at how we can use JavaScript to deal with the common request of hiding form elements from the user in lists and document libraries. The technique demonstrated can be used for columns, buttons and whatever else you want. The method once debugged, is fairly easy to implement with SharePoint designer with and some cut and paste.
But there are several problems with the method that prevent it from getting a better CleverWorkaround rating than “Meh”. They include:
- One size fits all, fields are hidden for all visitors irrespective of need.
- You need to modify the page in SharePoint designer via cut and paste of JavaScript code
- You need to modify auto-generated pages
- You need to modify a page from its site definition
- Insecure, relying on client side to hide content/controls is not a secure solution
The first problem is obvious. The whole point of hiding fields is to prevent an audience from seeing them, but as an administrator you very likely want an unrestricted view of the world. So it would be nice to have the JavaScript code be selectively applied to a page. Right now everyone is restricted, no matter who they are.
On the second point, SharePoint designer is obviously *the* tool for serious SharePoint customisation. But ideally if we can apply this JavaScript within the SharePoint publishing feature framework, then SharePoint Designer is not required. It can all be performed via the browser, saving us costs such as SharePoint Designer licenses, user training, governance training and the biggest risk of all – people going nuts with unnecessary customisations :-).
On top of that, we are customising auto-generated aspx pages, namely NewForm.apsx, EditForm.aspx and DisForm.aspx – probably not such a good idea. (The fact that the “Edit Page” menu option for these files should be a hint that Microsoft are discouraging modification).
The fourth problem is a tricky one and a large topic in itself. Each time you customise a page, it no longer ‘predictable’ from an upgrade perspective, because by the nature of customisation, you are introducing variation. A future SharePoint upgrade or service pack may well make changes to the site definitions and automagically all pages created from them will upgrade fine. But any customised pages are not guaranteed to work.
So what is the result of this? Increased governance costs. Customisations need to be tracked and managed and upgrades are more complex. Thus my perspective on this is that if you can find an easy way to avoid customising pages from the site definition, then do so. Obviously, In a web content management scenario, significant site definition customisation is a likelihood, but in pure collaboration scenarios, you would be surprised with what you can get away with.
The last problem of security is a major concern. Any validation logic relying on client side JavaScript is prone to manipulation outside of your control. JavaScript can be disabled, or it can be fiddled with by debugging proxies such as fiddler. In fact I can tell you a real world example of this sort of manipulation.
Interlude – JavaScript Security – A True Story
I was assigned to do a security audit for an e-commerce site a few years ago that sold products in an online store. Believe it or, not, the pricing information for stock was in a JavaScript file! It was a separate .js file that was called when the page was loaded. I examined the .js file and could see it was auto-generated by their e-commerce system. Each night they dumped their inventory database to this .js file and then published it to the web server! So using a Paros proxy , I was able to do an on the fly search/replace of the prices in this .js as it was rendered to the browser. From there I was able to submit back to their site, orders for products that were much cheaper than in their database.
Insane? Totally – but sadly a true story.
Anyhow lets get back to the task at hand.
Wait just a dog gone second… is this supported?
Hacking away at the form pages (NewForm.aspx, EditForm.aspx and DispForm.aspx) certainly wasn’t supported in SharePoint 2003 according to Maurice. But with 2007 its harder to work this out. I’ve found nothing official, and Microsoft has a KB article talking about how to modify these pages without breaking stuff. To quote from them:
If you want to customize the controls that appear on the NewForm.aspx page, and if you do not want to show the default List Form Web Part, you can hide the List Form Web Part. To do this, follow these steps:
- Start SharePoint Designer 2007, and then open the NewForm.aspx page for the list.
- Right-click the List Form Web Part, and then click Web Part Properties.
- Expand Layout, click to select the Hidden check box, and then click OK.
Seems like a pretty clear endorsement to me! Anyway, back to business!
Re-examining the code
In the last post, I demonstrated the following JavaScript code used to hide some fields from my TFTP demo site.
<script language="JavaScript" type="text/javascript">

_spBodyOnLoadFunctionNames.push("hideFields");

function findacontrol(FieldName) {
   var arr = document.getElementsByTagName("!");//get all comments
   for (var i=0;i < arr.length; i++ )
   {
      // now match the field name
      if (arr[i].innerHTML.indexOf(FieldName) > 0) {
         return arr[i];
      }
   }
}

function hideFields() {
   var control = findacontrol("Device Name");
   control.parentNode.parentNode.style.display="none";
   control = findacontrol("Comments");
   control.parentNode.parentNode.style.display="none";}
   control = findacontrol("Options");
   control.parentNode.parentNode.style.display="none";}
}
</script>
So, we have established that having to cut and paste this via SharePoint designer is not really the ideal method if you want to promote cleverness and re-use. We also don’t want to customise the pages from the site definition, and we want it to work with multiple audiences. Can we satisfy all of these goals?
Yes indeedie :-).
Step 1. The Web Part
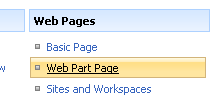
We are going to create a web part containing the above JavaScript code. I’ll do this by creating a new, temporary web part page and dropping a content editor web part onto it. So first up, go to Site Settings and create a new web part page as shown below.
 |
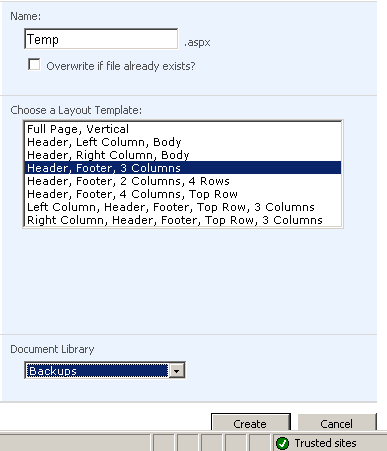 |
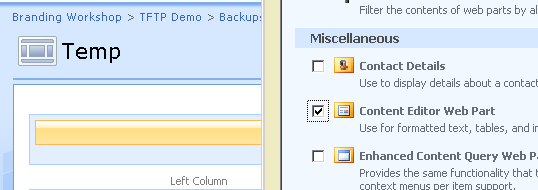
File name and page layout do not matter as we will be deleting this web part page soon. Now edit this newly created page and drag and drop a “Content Editor Web Part” to one of the web part zones on the new page (doesn’t matter which)
Now, as instructed on the newly created web part, open the tool pane to the configuration screen below
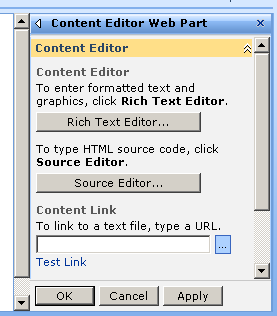
Click on “Source Editor…” (make sure you do not use “Rich Text Editor… as this will escape the JavaScript code thinking it is text information”)
Paste the following JavaScript code into the input window. Note that I have sanitised it somewhat from the code example above. I have commented out the code where we need to fill in blanks later. Note that if you have never used it before, the debugger; command is damn handy, especially with Visual Studio installed.
Also, watch out for issues with quotes when you paste from here. I have seen my double quotes get screwed up breaking the code. If you uncomment the debugger line and it still never fires, you probably have screwed up quotes.
<script language="javascript" type="text/javascript">

_spBodyOnLoadFunctionNames.push("hideFields");

function findacontrol(FieldName) {
   var arr = document.getElementsByTagName("!");//get all comments
   for (var i=0;i < arr.length; i++ )
   {
      // now match the field name
      if (arr[i].innerHTML.indexOf(FieldName) > 0) {
         return arr[i];
      }
   }
}

function hideFields() {
   // uncomment the next line if you are troubleshooting
   // debugger;
   var control;
   // Add the two lines below for each control to be hidden
   //control = findacontrol("<Column Name>");
   //control.parentNode.parentNode.style.display="none";
}
</script>

Click SAVE and then OK on the web part properties screen. We now have a content editor web part with our JavaScript set and ready to go.
Step 2: Export the Web Part
The next step is to create a new web part, based on the customised content editor web part. This is an easy process that I have outlined below.
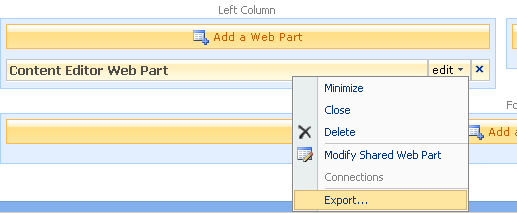
On the customised content editor web part created from step 1, click the edit drop down menu and choose “Export”
Save the web part file with a meaningful file name.
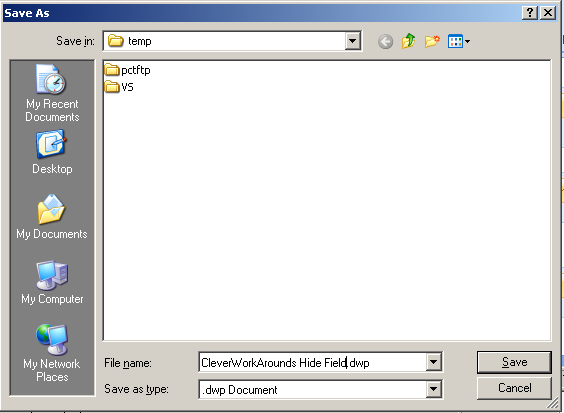
Once you have exported this web part, you can delete the web part page as we are finished with it.
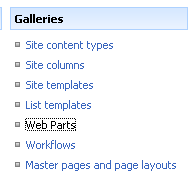
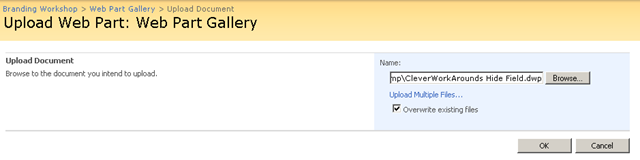
The next step is to upload this exported web part into the site collection web part gallery. This is performed in site settings at the site collection level. Navigate to the web part gallery and upload the file you just saved.

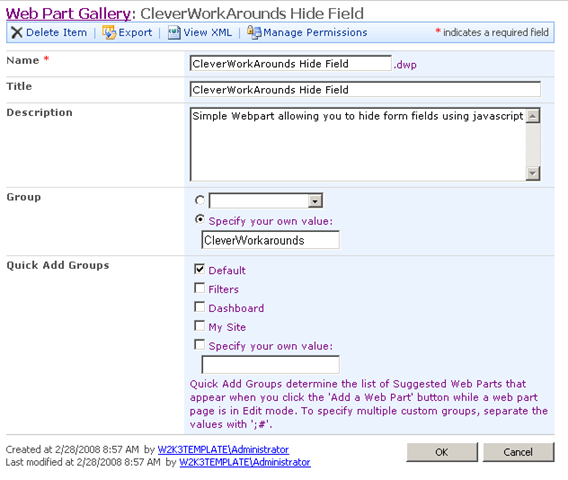
In the next step, we have to set some metadata properties for the new web part. Since the web part gallery is just a document library, it can be assigned columns and content types like any other SharePoint document library. Of particular note here is the Title, Description and Group fields. The Group field is particularly useful, as when this web part is used, it is easy to find.
Conclusion
Sorry for the abrupt stop here readers, but that’s it for part 2, I was going to make one large post on this, but it’s simply gotten too big, so I’ll finish this off in part 3. But fear not, part 3 is 90% written and should be published within a day or two.
Bye for now
Paul


March 12th, 2008 at 11:10 pm |
[…] Part 2 examined some of the issues with the part 1 JavaScript hacks and wrapped it into a web part using the content editor web part. […]
March 14th, 2008 at 1:27 am |
[…] More SharePoint Branding – Customisation using JavaScript Part 2 […]
March 15th, 2008 at 7:32 am |
[…] full series can be found here: Part 1, Part 2, Part 3, Part 4, Part 5 and Part […]
March 21st, 2008 at 8:13 pm |
[…] comme par exemple : More SharePoint Branding – Customisation using Javascript – Part 5, Part 1, Part 2, Part 3, Part […]
June 12th, 2008 at 5:14 am |
You are my new SP hero! 🙂 Do you have an area to post questions, by chance? I am going to use this to web-part-ize a javascript that shows the CSS inheritance for the current page – useful for rebranding via CSS.
My question is this – is there ANY WAY to access the sum of items for each users, in a list that is Grouped By the “created by” field? I have people and hours – and I want to get a sum of all hours by person, for the date range I am selecting.
But I can’t figure out how to get a sum(Hours) value for each grouping vs. the entire nodeset, even after converting to an XLST view. I also have to figure out how to count just the items that display in the filtered view, not the actual view definition.
June 18th, 2008 at 5:34 pm |
Hi, I’m using the way you suggest..but how come i cant hide my column??is there anything that i’m left out? please help.thanks
October 28th, 2008 at 8:53 am |
Just wanted to say thanks for this series of posts, very helpful, and a suggestion that instead of editing the page in SharePoint Designer to add the custom javascript web part, you can just append this to NewForm.aspx page: ‘&PageView=Shared&ToolPaneView=2’ and that will give you the web part tool pane so you can import the web part. Thanks for doing the hard part though!!
October 28th, 2008 at 12:21 pm |
hehe, maybe you should have read part 3 first 😛
November 22nd, 2008 at 10:24 am |
Loved being able to use a web part to hide fields so that didn’t have to modify the page, which broke the attachments; however, the fields are not being hidden in FireFox. Can the code be modified to hide fields in all browsers?
May 7th, 2009 at 12:52 pm |
Fantastic!
December 15th, 2009 at 8:35 pm |
can u suggest it for document library and pls. tell me apart from webpart, can
i implement the suggested changes in sharepoint designer level for editform.aspx
page.
April 27th, 2010 at 4:04 am |
[…] http://www.cleverworkarounds.com/2008/02/28/more-sharepoint-branding-customisation-using-javascript-… […]
September 27th, 2010 at 8:57 am |
javascript rules. it’s sharepoint that sucks, my friend.
October 20th, 2010 at 12:06 am |
Awesome Feature, However there is this Catch :
Consider Two Columns : “Document Status” & “Status” ( With “Document Status” placed higher in Column Ordering).
If you want to hide “Status” column alone and not “Document Status”, you will see the above code does just the opposite. because the indexof function is searching not the exact fieldname, but the occurence of fieldname.
Add the follwoing code above the For Loop.
//To get the exact fieldname as it appears in comments
var exactSearch = “\””+FieldName+”\””;
and the foolwing update inside For loop :
if (arr[i].data.indexOf(exactSearch) > 0)
October 14th, 2011 at 1:17 am |
Great tutorial but this doesn’t work in firefox since the comment tag<!– tags are missing. This code works in both IE and FF.
_spBodyOnLoadFunctionNames.push(“hideFields”);
function searchForRow(fieldName){
var arr = document.getElementsByTagName(‘table’);
for(var i =0;i< arr.length;i++){
var table = arr[i];
if(table.className == "ms-formtable"){
return findRow(table, fieldName);
}
}
return null;
}
function findRow(table, fieldName){
var rows = table.getElementsByTagName('tr');
for(var i=0;i<rows.length;i++){
var row = rows[i];
if(row.innerHTML.indexOf(fieldName) != -1){
return row;
}
}
return null;
}
function hideFields() {
var controlNames = new Array("Status", "Last Signature Date", "Filed With SEC", "NDA On File", "Termination Date", "Termination Reminder", "Notes", "Reject");
for(var i =0; i < controlNames.length; i++){
var name = controlNames[i];
var row = searchForRow(name);
if(row != null){
row.style.display="none";
}
}
}