A Filename Generation Example for PowerApps with Flow
Hiya
A client recently asked to make a PowerApps proof of concept audit app for safety inspections. The gist was that a user would enter an audit number into the App, take a bunch of photos and make some notes. The photos needed to be named using the convention: <Audit Number>-<Date>-<Sequence Number>. Eg
- 114A3-13:04:17-3.jpg is Audit number 114A3, photo taken on 13th of April and it was the 3rd photo taken.
- 114A6-14:04:17-7.jpg is Audit number 114A3, photo taken on 14th of April and it was the 7th photo taken.
As I type these lines, it is still not possible to save pictures directly into SharePoint from PowerApps, so we are going to build on the method that Mikael Svenson documented. But first let’s look at this file name requirement above. While it seems straightforward enough, if you are new to PowerApps this might take a while to figure out. So let’s quickly build a proof of concept app and show how this all can be achieved.
In this post I will build the app and then we will use Microsoft Flow to post the images to a SharePoint document library. I’ll spend a bit of time on the flow side of things because there are a few quirks to be aware of.
First up create a blank app and then add a text box, camera, gallery and two buttons to the form… Rename the text box control to “Auditnumber” and arrange them similar to what I have done below…

First up, let’s disable the submit button until an audit number is entered… Without an audit number we cannot generate a filename. To do this, set the Disabled property of the button labelled “Submit” to AuditNumber.Text=””. This means that while the audit number text box is blank, this formula will return “true” and disable the button.


Now let’s set things up so that when a photo is taken, we save the photo into a Collection. A collection is essentially an in-memory data table and I find that once you get your head around collections, then it opens up various approaches to creating effective apps.
On the camera control (assuming it is named Camera1), set the OnSelect property to “Collect(PictureList,{ Photo: Camera1.Photo, ID: CountRows(PictureList)+1 } )”

Now if you are a non developer, you might think that is a bit ugly, so let’s break it down.
- The collect function creates/populates a collection – and the first parameter is simply the name of the collection. You could call this anything you like, but I chose to call mine PictureList.
- The second parameter is a record to insert into the collection. This consists of a comma delimited set of fields and values inside curly braces. eg: { Photo: Camera1.Photo, ID: CountRows(PictureList)+1 }
Now that whole curly brace thing is a bit ugly so let’s break it down further. First up here is an image straight from Microsoft’s own documentation. You can see a record is a row of fields – pretty standard stuff if you are familiar with databases or SharePoint list items.

In PowerApps formulas, a record can be specified using curly braces. So { Album: “Thriller”, Price: 7.99 } is a record with 2 fields, Album and Price.
Now take a look at the record I used: { Photo: Camera1.Photo, ID: CountRows(PictureList)+1 } . This shows two fields, Photo and ID. The values for the Photo field is Camera1.Photo, which holds the latest photo taken by the camera. The ID field is a unique identifier for the photo. I generated this by calling the CountRows function, passing it the PhotoList collection and then adding 1 to the result.
So here’s what happens when this app starts:
- The PhotoList collection is empty
- A user clicks the camera control. A photo is taken and stored in the Camera1.Photo property.
- I then count the number of records in the PhotoList collection. As it is currently empty, it returns 0. We add 1 to it
- The photo and an ID value of 1 is added to the PhotoList collection
- A user clicks on the camera control again. A photo is taken and stored in the Camera1.Photo property.
- I then count the number of records in the PhotoList collection. As it is currently has 1 record from steps 1-4, it returns 1. We add 1 to it
- The photo and an ID value of 2 is added to the PhotoList collection
… and so on. So let’s test this now…
Press play to test your app and take a couple of photos. It may not look like anything is happening, but don’t worry. Just exit and go to the File Menu and choose “Collections”. If everything has gone to plan, you will now see a collection called PictureList with the Photo and ID columns. Yay!

So next let’s bind this collection to the Gallery so we can see photos taken. This part is easy. On the Gallery you added to the page, set the Items property to PictureList (or whatever you named your collection). Depending on the type of gallery you added, you should see data from the PictureList collection. In my case, I changed the gallery layout to “Image and Title”. The ID field was bound to the title field and now you can see each photo and its corresponding ID.


Now let’s provide the ability to clear the photo gallery. On the button labelled “Clear”, set the OnSelect property to “Clear(PictureList)”. The clear command does exactly what it suggests: clears out all items from a collection. Now that we have the gallery bound, try it out. You can take photos and then clear them to your hearts content.
Now the point of this exercise is to generate a nice filename. One way is by modifying the record definition we were using: eg
From this:
- Collect(PictureList,{ Photo: Camera1.Photo, ID: CountRows(PictureList)+1 })
To this crazy-ass looking formula:
- Collect(PictureList,{ Photo: Camera1.Photo, ID: Concatenate(AuditNumber.Text,”-“,Text(Today(),”[$-en-US]dd:mm:yy”),”-“,Text(CountRows(PictureList)+1),”.jpg”) } )
To explain it, first check out the result in the gallery. Note my unique identifier has been replaced with the file-name I needed to generate.

So this formula basically uses the Concatenate function to build the filename in the format we need. Concatenate takes a list of strings as parameters and munges them together. In this case, it takes:
- The audit number from the textbox – Auditnumber.Text
- A hyphen – “-“
- Todays date in dd:mm:yy format and converts it to text – Text(Today(),”[$-en-US]dd:mm:yy”))
- Another hyphen – “-“
- The row count for PictureList collection, adds 1 to it and converts the result to text – Text(CountRows(PictureList)+1)
- The file type – “.jpg”
The net result is our unique filename for each photo.
Now we have one final step. We are going to send the entire collection of photos and their respective file names to flow to put into a SharePoint Library. The method we will use will take the PictureList collection, and save it as one giant string. We will send the string to Flow, and have Flow then pull out each photo/filename pair. Mikael describes this in detail in his post, so I will just show the code here, which we will add to the onSelect property of the submit button.
UpdateContext( { FinalData: Concat(PictureList, ID & “|” & Photo & “#”) } )

So what is this formula doing? Well working from inside to out, the first thing is the use of the Concat function. This function does something very useful. It works across all the records of a PowerApps collection and returns a single string. So Concat(PictureList, ID & “|” & Photo & “#”) takes the file name we generated (ID), joins it to a pipe symbol “|” and joins that to the photo, and then adding a hash “#”. The UpdateContext function enables us to save the result of the Concat into a variable called FinalData.
If we test the app by taking some photos and clicking the submit button, we can see what the FinalData variable looks like by the Variable menu as shown below. Our table is now one giant text string that looks like:
“filename 1 | encoded image data 1 # filename 2 | encoded image data 2 # filename x | encoded image data x “

Now a quick caveat, avoid using PowerApps desktop client to do this. You should use PowerApps web creator due to an image encoding bug.
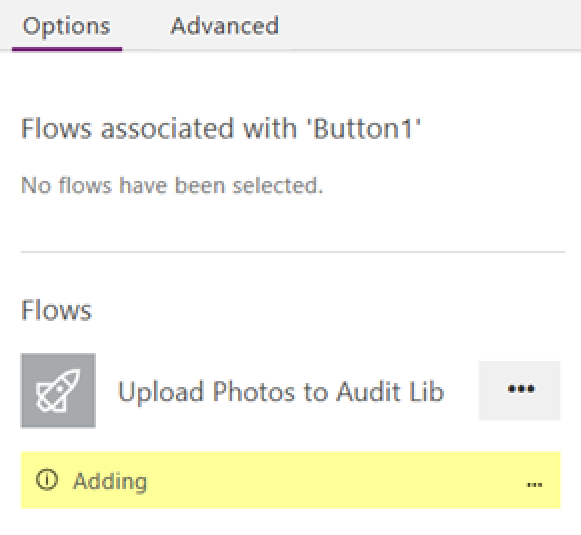
Anyway, let’s now move to Flow to finish this off. To do this, click on the Submit button on your app and choose Flows from the Action menu and on the resulting side panel choose to Create a new flow.


A new browser tab will open and sign you into Microsoft flow, and be nice enough to create a new flow that is designed to be triggered from PowerApps. Rename the flow to something more meaningful like “Upload Photos to Audit Lib” and then click the New Step button, and add a new Action. In the search bar, type in “Data Operations” and in the list of actions, choose the “Compose” action…


Okay so at this point I should a) explain what the hell we are going to do and b) credit Mikael Svenson for first coming up with this method. In relation to the first point, PowerApps is going to send flow a giant string of photos and filenames (remember the FinalData variable – that’s what flow will receive). If you recall with the FinalData, each photo/filename pair is delimited by a hash “#” and the file name is delimited by a pipe “|”. So we need to take what PowerApps sends, and turn it back into rows. Then for each row, we grab the file name, and the file content and upload it to our friendly neighbourhood SharePoint library.
Sounds easy right?
Our first step is to use the compose action we just added to split the data from PowerApps back into photos. This particular workflow action does something really neat. It executes workflow definition language formulas. What are these? Well workflow definition language is actually a part of another Microsoft product called Azure Logic Apps. Flow leverages Azure Logic Apps, which means this language is available to us. Sounds complex? Well yeah, it does at first but when you think about it this is not new. For example, MS Teams, Groups and Planner use SharePoint behind the scenes.
Anyway, the point is that there are several workflow definition language functions we can use, namely:
- Split() – Takes a string, and splits it up into smaller strings based on a delimiter
- Item() – This is used to to return an element of an array. Eg if we use the split command above, item() will refer to each smaller string
- dataUriToBinary() – This takes an image encoded and turns it back into binary form.
Okay enough talk! Let’s fill in this compose action. First up (and this is important), rename the action to something more meaningful, such as “ProcessPhotos”. After renaming, click on the text box for the Compose action and a side panel will open, showing a PowerApps label and a box matching the PowerApps logo called Body. Click the Body button and the compose textbox should have a value called ProcessPhotos_Inputs as shown in the 3 images below…


So what have we just done? Essentially we told the Compose method to ask PowerApps to supply data into a variable called ProcessPhotos_Inputs. In fact, let’s test this before going any further by saving the flow.
Switch back to PowerApps, click the Submit button and select the onSelect method we used earlier. You should still see the function where we created the FinalData variable. Copy the existing function to the clipboard, as you’re about to lose everything you typed in. Now click the Flow once and it should say that it’s adding to PowerApps.
At this point, the function you so painstakingly put together has been replaced by a reference to the Flow. Delete what’s been added and paste the original function back. Add a semicolon to the end of the function (which tells PowerShell that another command is coming) and then press SHIFT+ENTER to insert a newline. Now type in the name of your Flow and it should be found via auto-complete. Click the matching flow with .Run on the end. Add a left bracket to the end of the flow and it will ask for an input parameter. If you have done it right, that parameter will be called ProcessPhotos_Inputs. Note that it matches the parameter from above image. The parameter we are passing is the FinalData variable we constructed earlier.


Okay so basically we have wired up PowerApps to flow and confirmed that Flow is asking PowerApps for the correct parameter. So let’s now get back to Flow and finish the first action. If you closed the Flow tab in your browser, you can start a new flow editing session from within PowerApps. Just click the ellipsis next to your flow and click Edit.

Right! So after that interlude, lets use the first function of interest – split(). In the text box for your compose function, modify it to look like the string below. Be sure to put the whole thing in quotes because Flow is going to try and be smart and in doing so, make things really counter intuitive and hard to use. Don’t be surprised if your ProcessPhotos_Inputs box disappears. Just add it back in again via the “dynamic content” button.

In fact, save and close the flow at this point and then edit it again. You will now see what the real function looks like. Note how the ProcessPhotos_Input has magically changed to {@triggerbody()[‘ProcessPhotos_Inputs’]}.

Unfortunately this sort of magic will not actually work… there are a few too many curly braces and excessive use of “@” symbols. So replace the function with the following (include quotes):
- “@split(triggerBody()[‘ProcessPhotos_Inputs’], ‘#’)”
Like I said… flow is trying to be smart, only its not ![]() . If you have done things right the action looks like the screen below. Double check this because if you do not have the quotes right, it will get messy. In fact if you save the flow and re-open it the quotes will disappear. This is actually a good sign…
. If you have done things right the action looks like the screen below. Double check this because if you do not have the quotes right, it will get messy. In fact if you save the flow and re-open it the quotes will disappear. This is actually a good sign…

After saving the flow, closing an re-opening… look Ma, no quotes!

Now for the record, according to the documentation, the triggerbody() function is a reference function you use to “reference outputs from other actions in the logic app or values passed in when the logic app was created. For example, you can reference the data from one step to use it in another”. This makes sense – as ProcessPhotos_Inputs is being passed from the PowerApps trigger step to this compose function we are building.
In any event, let’s add the next workflow step. The output of the ProcessPhotos step should be an array of photos, so now we need to process each photo and upload it to SharePoint. To do this, click on “New step”, and from the more button, choose “Add an apply to each” action. In the “Select an output from previous steps” action, click “Add dynamic content” and choose the output from the ProcessPhotos step as shown in the sequence of images below.


Next click “Add a condition” and choose the option “Edit in advanced mode”. Replace any existing function with :
- @not(empty(item()))


The item() function is specifically designed for a “repeating action” such as our “apply to each” event. It returns the item that is in the array for this iteration of the action. We are then using the empty() function to check if this item has any data in it and then via the not() function so we can only take action of the item has data. In case you are wondering why I need to test this, the data that comes from PowerApps has an extra blank row and this effectively filters it out.
The resulting screen should look like this:

At this point we should have a file name and file body pair, delimited by a pipe symbol. So let’s add an action to get the file name first. On the “If Yes” condition, click “Add an action” and choose another Compose Action. Rename the action to “Get File Name” and enter the function:
- “@split(item(),’|’)[0]”


The square brackets are designed to return a value from an array with a specific index. Since our split() function will return an array of two values, [0] tells Flow to grab the first value.
Now let’s add an action to get the file body. Click “Add an action” and choose another Compose Action. Rename the action to “Get File Body” and enter the function:
- “@dataUriToBinary(split(item(),’|’)[1])”

Looking at the above function, the split() side of things should be easy to understand. We are now grabbing the second item in the array. Since that item is the image in an encoded format, we are then passing it to the dataUriToBinary() to turn it back into an image again. Neat eh?
Now that we have our file name and file body, let’s add the final action. This time, we will choose the “Create File” action from the SharePoint connector. Rename the action to “Upload to Library” and enter the URL of the destination SharePoint site. If you have permission to that site, you can then specify which library to upload the photo to by browsing the Folder Path.


Now comes the final steps. For the File Name, click the “Add dynamic content” button and add the Output from the Get File Name step (now you know why we renamed it earlier). Do the same for the File Content textbox by choosing the output from the Get File Body step.

Right! We are ready to test. Sorry about screenshot hell in the Flow section, but I am writing this on the assumption you are new to it, so I hope the extra detail helped. To test, use PowerApps on your phone or via the web browser, as the PowerApps desktop tool has a bug at the time of writing that will prevent the photos being sent to Flow in the right format.
Now it is time to test.
So check your document library and see if the photos are there! In the example below I took a photo of my two books for blatant advertising purposes ![]() . The 3rd image is the document library showing the submitted photos!
. The 3rd image is the document library showing the submitted photos!


Finally, here are some tips for troubleshooting along the way…
First up if you are having trouble with your flows, one lame but effective way to debug is to add a “Send an email” action from the Ofifce365 Outlook Connector to your flow. This is particularly handy for encoded images as they can be large and often in the flow management tools, you will see a “value too big to display” error. This method is crude, and there are probably better approaches, but it is effective. In the image below you can see how I have added to action below my ProcessPhotos action prior to splitting it into an array.


Another thing that has happened to me (especially when I rename flow actions) is a disconnect between the trigger connection between Flow and PowerApps. Consider this error…


If your flow fails and you see an error like
“Unable to process template language expressions in action [one of your actions] inputs at line ‘1’ and column ‘1603’: ‘The template language expression ‘json(decodeBase64(triggerOutputs().headers[‘X-MS-APIM-Tokens’]))[‘$connections’][‘shared_office365’][‘connectionId’]’ cannot be evaluated because property ‘shared_office365′ doesn’t exist, available properties are ”. Please see https://aka.ms/logicexpressions for usage details.’
.. the connection between PowerApps and Flow has gotten screwed up.
To resolve this, disconnect your flow from PowerApps and reconnect it. Your flow will be shown as a data source which can easily be removed as shown below.

Once removed I suggest you go back to your submit button and copy your function to the clipboard. This is because adding the flow back will wipe the contents of the button. With your button selected, click the Flows button from the Action menu and then click on the Flow to re-associate it to PowerApps. The third image shows the onSelect property being cleared and replaced with the flow instantiation. This is where you can re-paste your original code (4th image)…


Finally, another issue you may come across is where no pictures come through, and instead you are left with an oddly named file, which (if you look closely) looks like one of your compose actions in Flow. You can see an example of this in the image below.

The root cause of this is similar to what I described earlier in the article where I reminded you to put all of your compose actions in quotes. I don’t have a definitive explanation for why this makes a difference and to be honest, I don’t care. The fix is easy: just make sure all of your compose actions are within quotes, and you should be cooking with gas.
Phew! Another supposedly quick blog post that got big because I decided to explain things for the newbie. Hopefully this was of use to you and I look forward to your feedback.
Paul Culmsee
Thanks a lot for this detailed description! Helps to solve my actual problem!!!!
You are most welcome 🙂
thanks. that was fantastic work
Once this is published, and shared with others, it keeps asking for the API Key. It doesn’t happen when I run it.
How do I stop this happening?
The connection needs to be shared as well as the app…
My companies sharepoint website is in a different format than the accepted format. How do I change it?
http://companysharepoint.company.com.sites/sitename
vs
company.sharepoint.com/sites/sitename
Greetings – I am so close. However, I get an error message under the ‘Apply to Each’ that states: “ExpressionEvauationFaile. The execution of template action ‘Apply_to_each’ failed: the result of the evaluation of ‘foreach’ expression ‘@outputs(“ProcessPhotos’) is a type of ‘string’. The result must be a valid array.
Any thoughts on how to resolve?
Thank you!
Paul – I have resolved the issue I asked about in my earlier post. However, now I keep getting the oddly named file in my sharepoint library “@split(item(),’_’)[0].
I have tried your suggestion of deleting the flow from the PowerApp and reloading it – with no luck.
Any other possible solutions you can recommend? I would greatly appreciate your help in resolving.
Thank you.
lose the quotes in the @split command 🙂
I’m having trouble with the my flow….the when i select “Body” for the compose inputs, it does not change to “ProcessPhotos_Inputs”, it just shows “Body” in the compose text box. I’ve changed the name of the compose action to ProcessPhotos, so i know that’s not the issue. Thanks in advance for the help!
by the way, your website has saved me. You’re my hero!
I get an error message under the ‘Apply to Each’ that states: “ExpressionEvauationFaile. The execution of template action ‘Apply_to_each’ failed: the result of the evaluation of ‘foreach’ expression ‘@outputs(“ProcessPhotos’) is a type of ‘string’. The result must be a valid array.
Someone mentioned they fixed this problem in a previous post can you let me know what you did.
Thanks
Having the same problem as Brad above and once coding in powerapp the ‘ProcessPhotos_inputs’ does not popup. It only shows UploadPhotos.Run()
Please HELP!
Hey
I managed to get the flow run, yeah!
But it come up as a file type in SP instead of an image?
Where have I done wrong?
Thank you
Ho Rowena
First up, how did you get your previous problem fixed as others would benefit from knowing that.
Second, usually when it comes up as a non-image, the function that converts it to binary from base64 encoding has not been done right.
Third and more importantly, I have moved to a different method to what is presented here and suggest watching this video: https://www.youtube.com/watch?v=mp-8B1fLrqs
You are just awsome!! I am working on a similar app for my client. Site Inspection App. I have followed all your steps and done it Successfully!!. Thanks Much.
Only problem I am facing that Client did not exposed his On-Prem SharePoint and even they are reluctant to install Gateway. So only way to upload the files using custom API which they have exposed. Still I am Searching my answer.
This was extremely helpful! Thank you so much! I had similar problems as Rowena. I ended up having to remove the flow from my PowerApps data sources and create a new connection to it. After that it showed up and allowed me to insert parameters in the .run expression. I’m actually using this to save the photos to a onedrive file. I’m struggling to figure out how to stop it from overwriting files if I upload a second group of photos. Any advice on how to adjust the file name expression so that it creates unique files? Thanks so much!
Hi there, simply was mindful of your blog through Yahoo, found that it’s really beneficial. My goal is to be aware of belgium’s capital. I will be thankful for those who move forward the following from now on. Numerous other people will likely be helped from the producing.. marinacenter-eg.com,marina center, Best wishes!
Really much appreciation from a newbie like me, the detailed explanations & screenshots are so incredibly helpful! Thank you so much!
Hi Paul,
Thanks for the great instructions. I am interested in this approach as only one flow run is used for multiple photos.
I am having an issue with the output of “ProcessPhotos”. My input is as you have it @split(triggerBody()[‘ProcessPhotos_Inputs’],”#”)
The error message says the output is a string and needs to be an array. Here is the message
“The execution of template action ‘Apply_to_each’ failed: the result of the evaluation of ‘foreach’ expression ‘@outputs(‘ProcessPhotos’)’ is of type ‘String’. The result must be a valid array.”
I can see in the powerapp that I have a collection with and ID column and Photo column and there are records.
I am not sure where I have gone wrong.
Also the condition no longer seems to have the capability to edit in advanced mode. Very annoying as I am not sure I have this right. I have Current Item is not null.
Thanks
Rosie
great stuff. I am needing to use some weather info. in an app I am making and I am hopeful your post will help.
I was fiddling with the camera feature in Power Apps and noticed that it had limitations displaying on mobile browsers. Does the app you described above work in mobile browsers or do you have to be in Power Apps to use it?