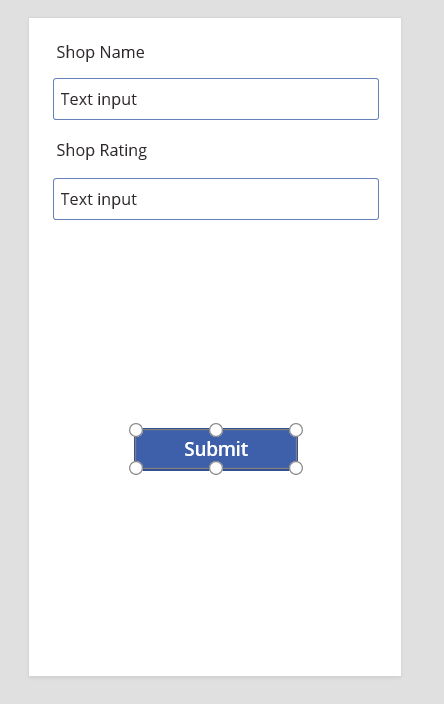
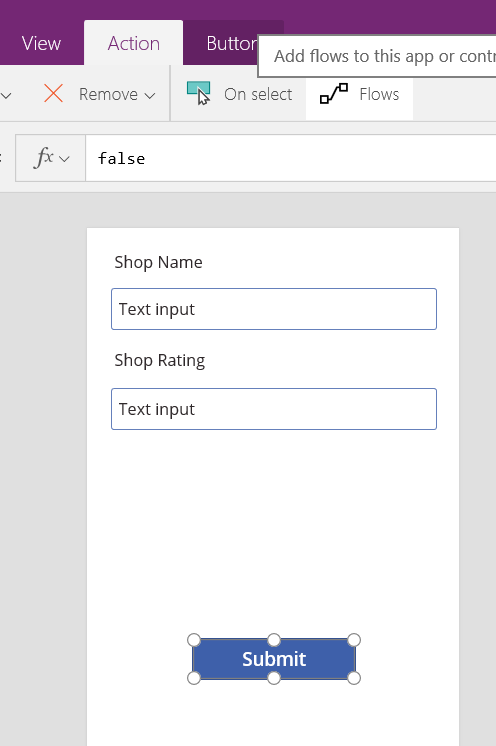
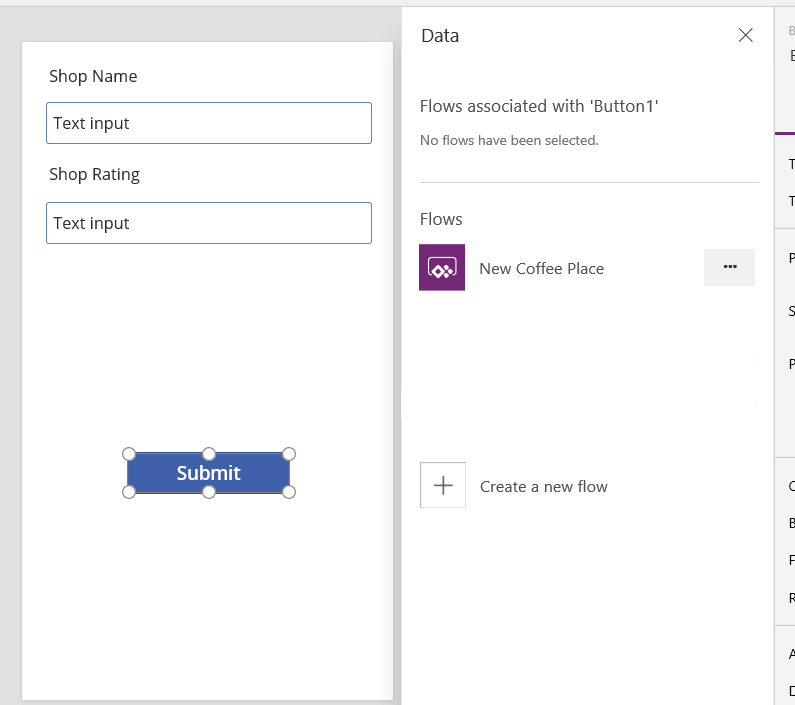
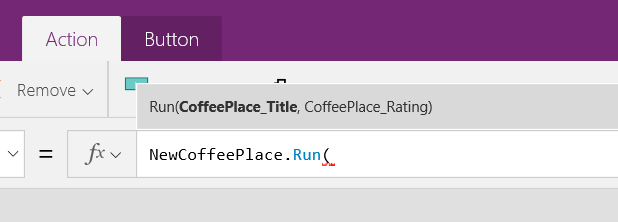
CleverWorkarounds After much frustration, it seems DEFAULT is the way to go…

October 23, 2017

PowerApps, Flow and Managed Metadata fields–part 4

Hi and welcome to the final post in this series of articles that examined how we can work around an unsupported function in PowerApps and Flow. Along the journey we have learnt about app principals, the SharePoint REST API and written some crazy JSON.

In this final post, we will tie up a few loose ends. Currently the flow hard-codes the term ID from managed metadata when in fact, we want it to be sent from PowerApps. I will also also give you some insight into handling more complex situations, like multiple managed metadata fields as opposed to a single one.

But first, the (giant) weak spot…

As I write this I if any of you, as you read the first 3 posts, realised the weakness to this method. A strong hint was given in the last post. Recall that the JSON to update a managed metadata field required a term GUID…

{
   "__metadata": { "type": "SP.Data.Coffee_x0020_Shop_x0020_RatingsListItem" },
   "Bean":
   { "__metadata": {"type":"SP.Taxonomy.TaxonomyFieldValue"},
     "TermGuid":"0937fbc2-0dfe-439e-a24f-ba6d13897abd",
     "WssId":"-1"
   }
}

Now right now in PowerApps, there is no managed metadata control. This means you cannot browse a term store like you can in SharePoint. Among other things, one likely reason for this is that there is no REST API support for managed metadata. This has been a constant source of frustration for many as you can see in the 761 votes (as I type this) in uservoice.

What’s the implication of this limitation? For a start, there is no way we can build a REST call that will return us all of the terms in a term set. We have to either hard-code the term GUID’s in our application (ugh) or find another way to get the list of terms (ugh again). One thing that should be noted is that sometimes, hard coding terms and GUID’s isn’t as bad as it sounds. For example, you might have a term set for your corporate offices in certain countries. Since those terms are unlikely to change quickly, one can embed their GUID’s into PowerApps without too much concern.

For the first part of this article, we will use this approach and hard-code our term set of coffee beans into our Powerapp. Then we will modify our flow to expect this parameter from PowerApps.

Back to PowerApps…

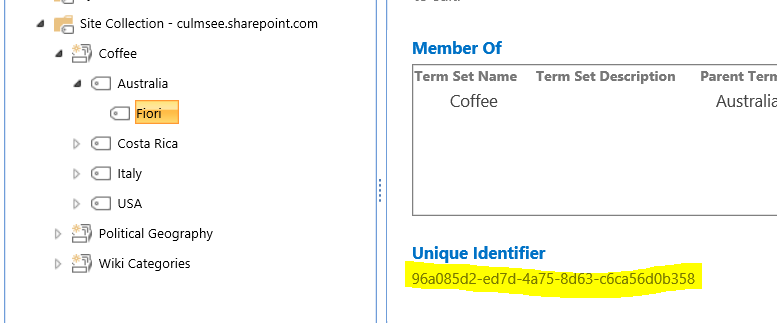
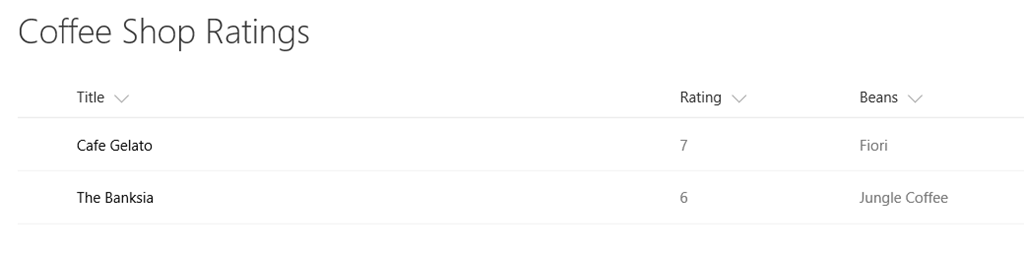
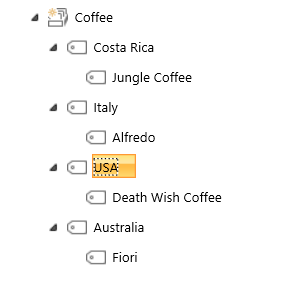
If you go back to the PowerApp we built way back in part 1 and also the term set of coffee beans, they looked like this:
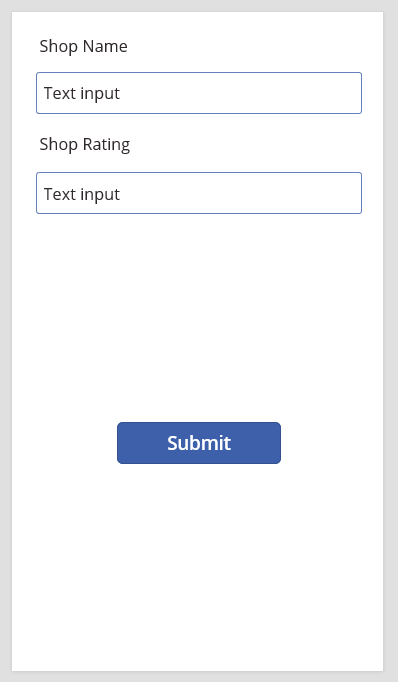
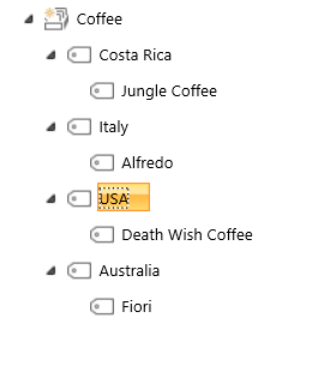
image  image

To hardcode our terms into PowerApps, I am going to use the ClearCollect function to create a collection called BeanDetails. I have grabbed the term label and GUID from managed metadata and constructed this function:

ClearCollect(BeanDetails,
{
   Name:  "Fiori",
   Id:  "96a085d2-ed7d-4a75-8d63-c6ca56d0b358"
},
{
   Name:  "Jungle Coffee",
   Id:  "eb04988d-acc4-4bde-9861-506e90de94c5"
},
{
   Name:  "Alfredo",
   Id:  "38db966f-3b0c-4872-a7d3-982ecd8528dd"
},
{
   Name:  "Death Wish Coffee",
   Id:  "e33c65f9-4202-40d7-89f2-aa1a1016ad9f"
})

Next, I use the OnStart property of the screen and paste the ClearCollect function as shown below.
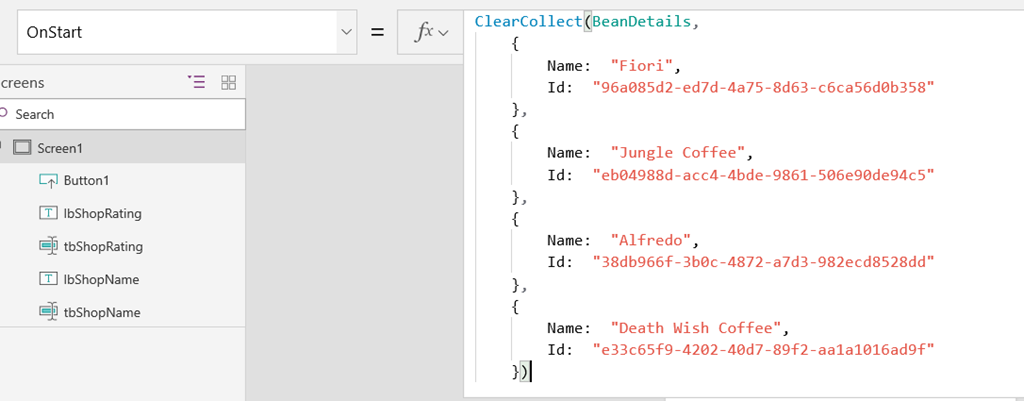
image

Now you will need to save, close and reopen the app for this to take effect. Alternatively add a temporary button and use the above code on the OnSelect property. Either way, you should be able to see your terms and GUID’s when going to Collections from the File menu…
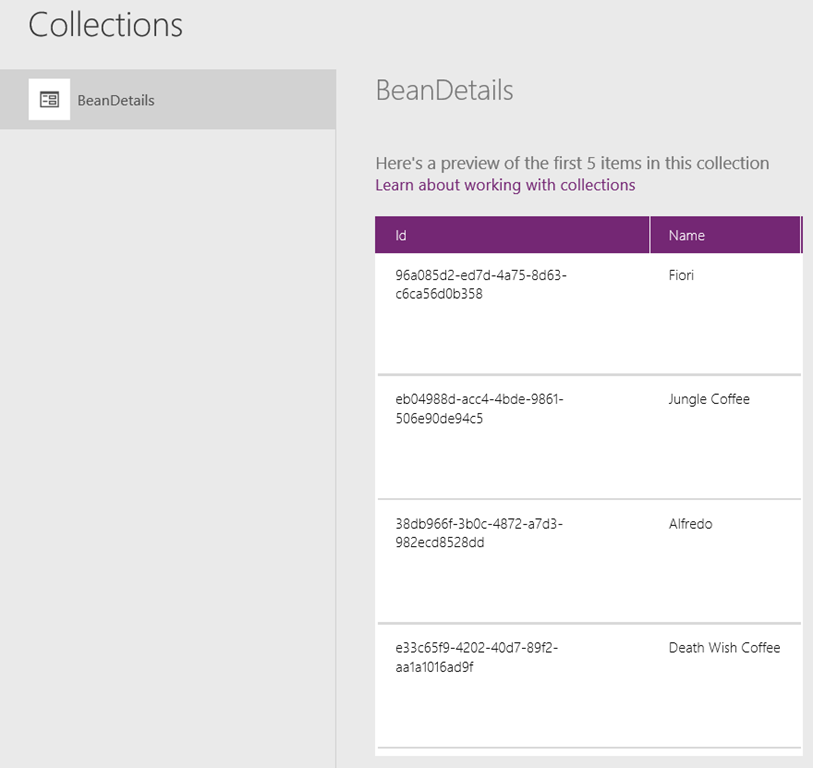
image

Now that we have our term set stored in PowerApps, let’s add a dropdown list to the screen that lists our coffee beans. Choose Insert > Drop Down and set its Items property to BeanDetails.
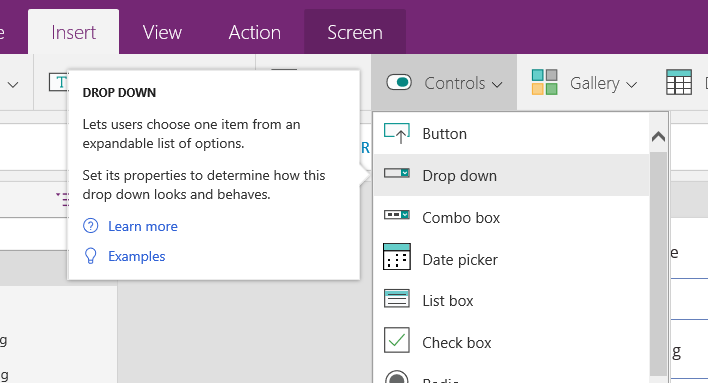

image

image

Now you should be able to see the choice of beans in the dropdown as shown below:
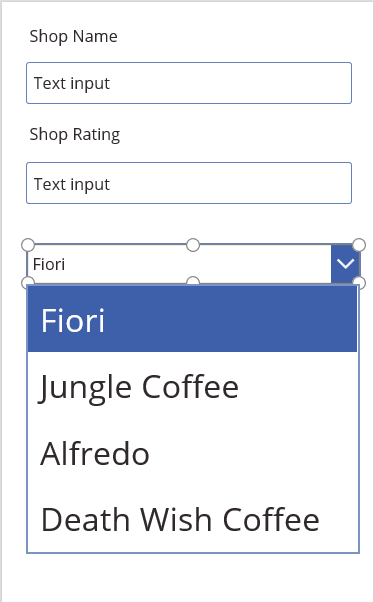
image

Next, we have to go back to Flow and modify it to accept a term GUID as a parameter (if you recall in part 3 the term is currently hard-coded).

Tweaking Flow…

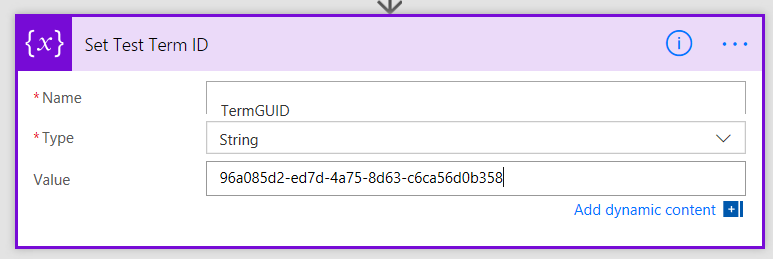
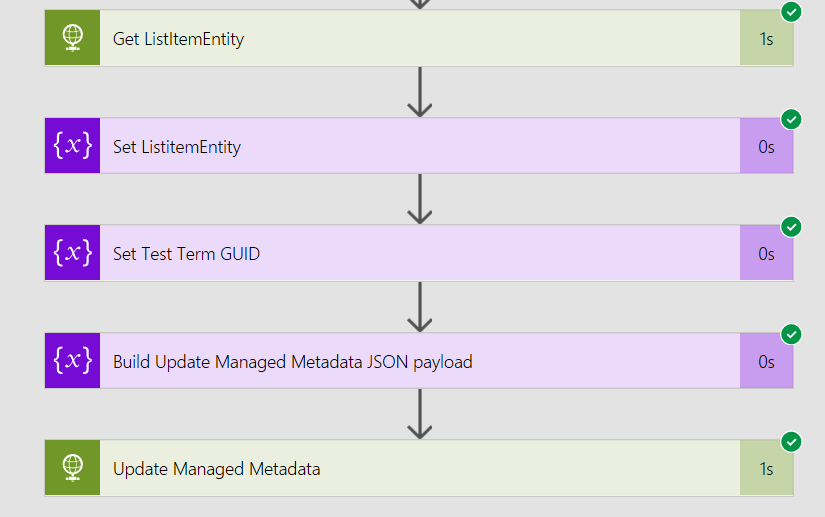
If you have followed our Flow adventure so far, you should have a flow action called Set Test Term GUID that looks something like this:
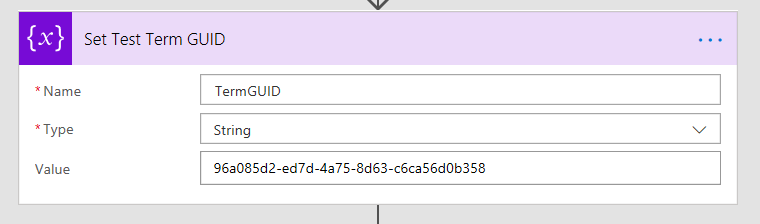
image

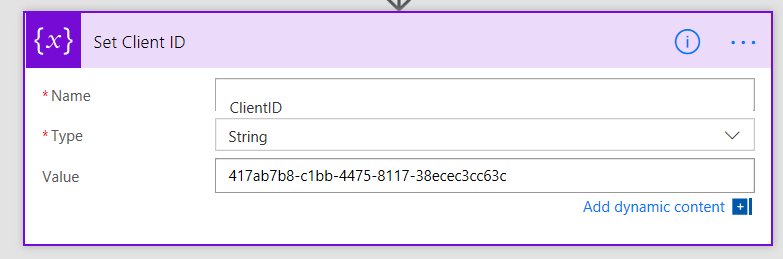
First, rename this flow step to Get Term GUID and then delete the GUID that we previously had in the Value field. From the Dynamic Content pane, choose Ask in PowerApps.
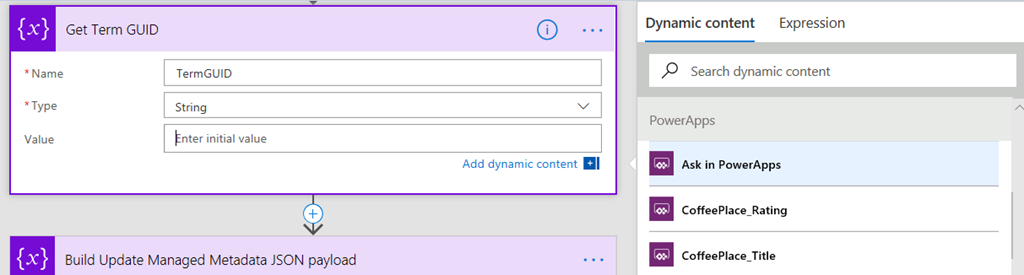
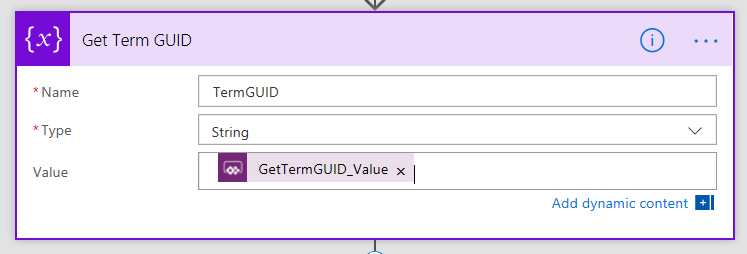
image

image

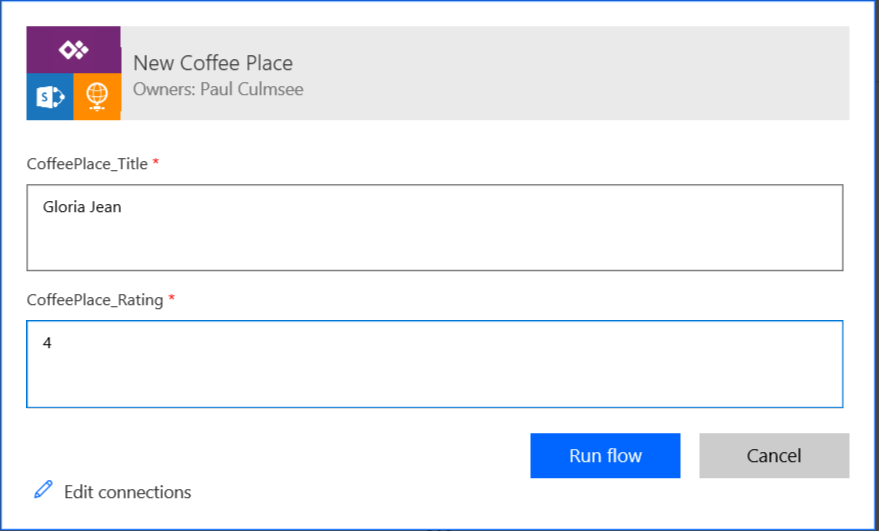
Update your flow and before returning to PowerApps, click the Run Now button. Ensure you are now prompted for three parameters, rather than the original two.

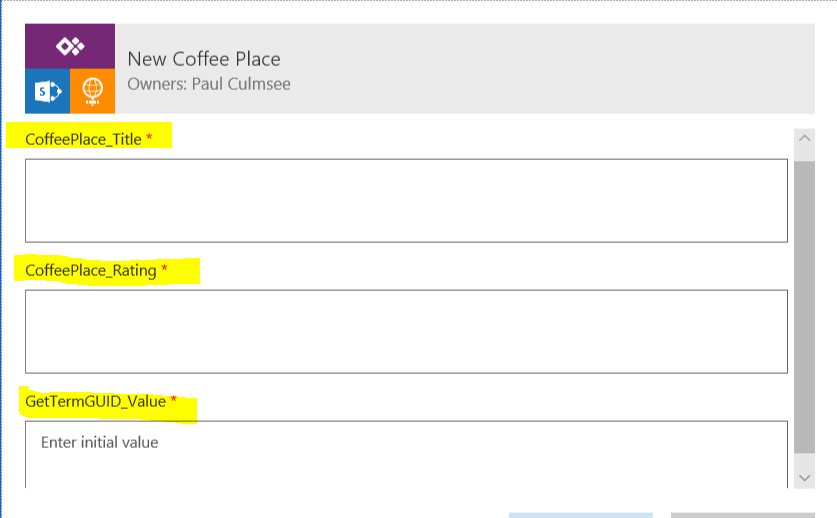
image

image

Back to PowerApps…

Now in PowerApps, we have to delete and flow and re-add it so it finds the new parameter we just added.

Select the Submit button and review the OnSelect property. It should show the function below…
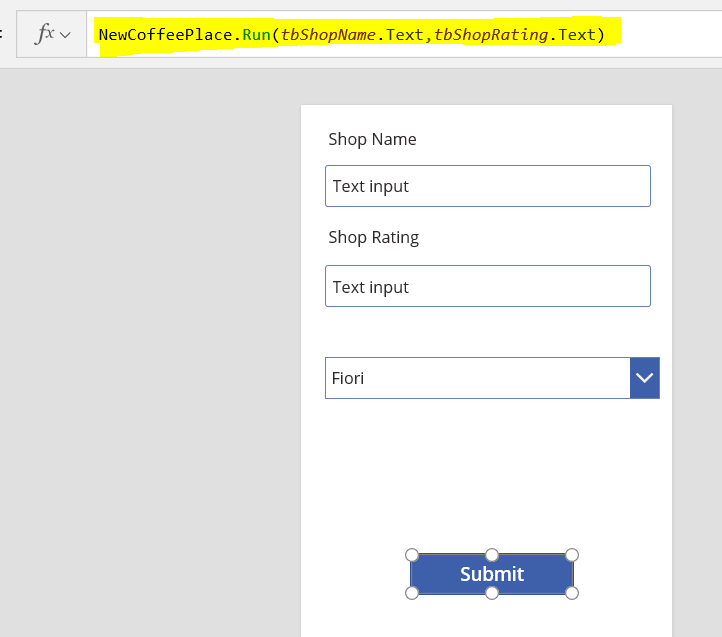
image

Now go to View > Data Sources and remove the NewCoffeePlace data source. You should see an error appear on the Submit button. It will say “Invocation of unknown or unsupported function”. Makes sense right? After all, we just took away its connection to flow.
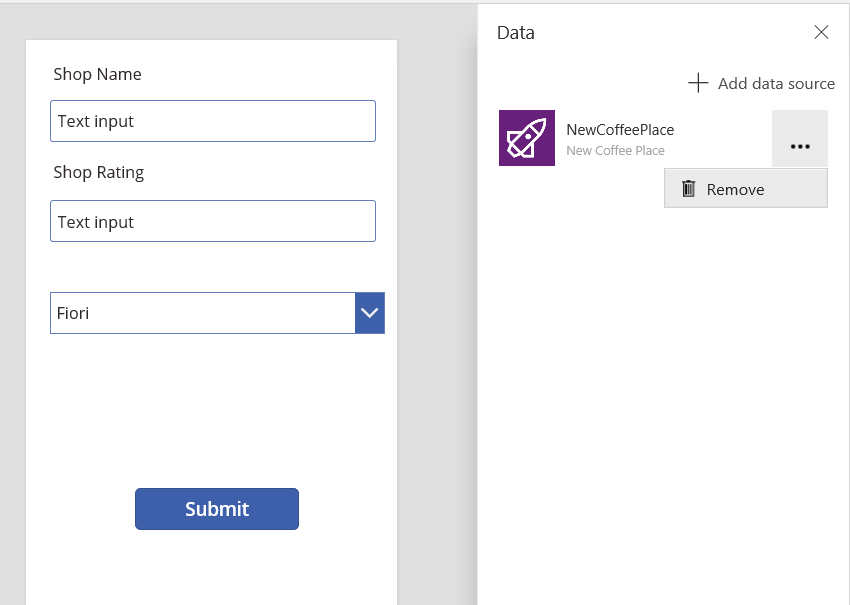
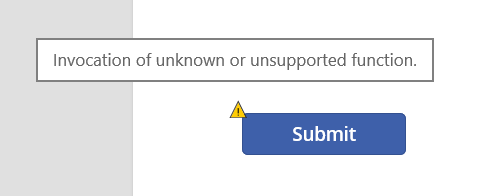
image   image

Once again make sure your Submit button is selected, and select Action > Flows. Choose the flow called New Coffee Place. In a few moments, it will ask you to complete the parameters in the formula bar. If you did this correctly, you should see a prompt for a third parameter – the term GUID.  
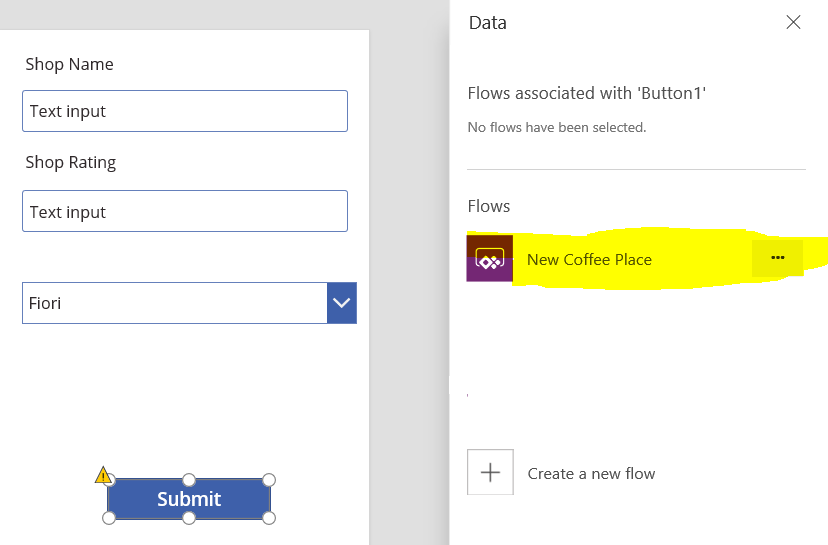
image  image

image

The third parameter will be the GUID that matches the term in the dropdown list. The formula for this is:

image

Now to explain Dropdown1.Selected.Id, remember that we set the Items property of the dropdown to BeanDetails collection, which has two columns, ID and Name. Essentially, by specifying Dropdown1.Selected.Id, whichever bean name is the currently selected one in the dropdown, the GUID will be sent to Flow…
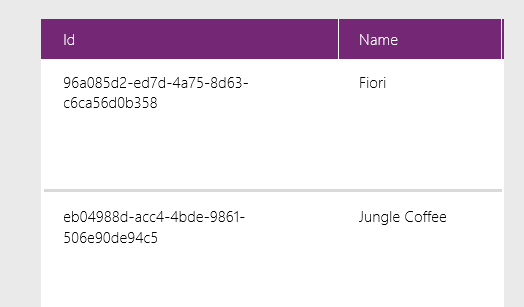
image

Test this by putting the Powerapp into preview and adding a new café. If all things go to plan, you will see your new entry along with the managed metadata term. Yay!!
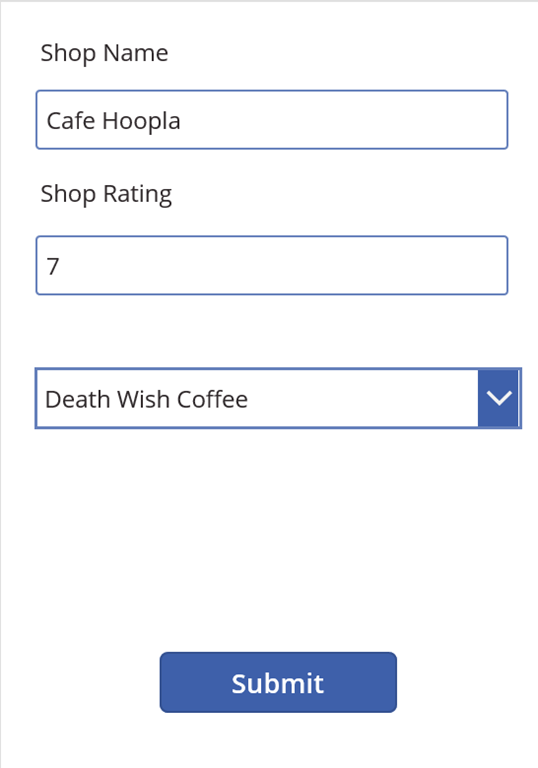
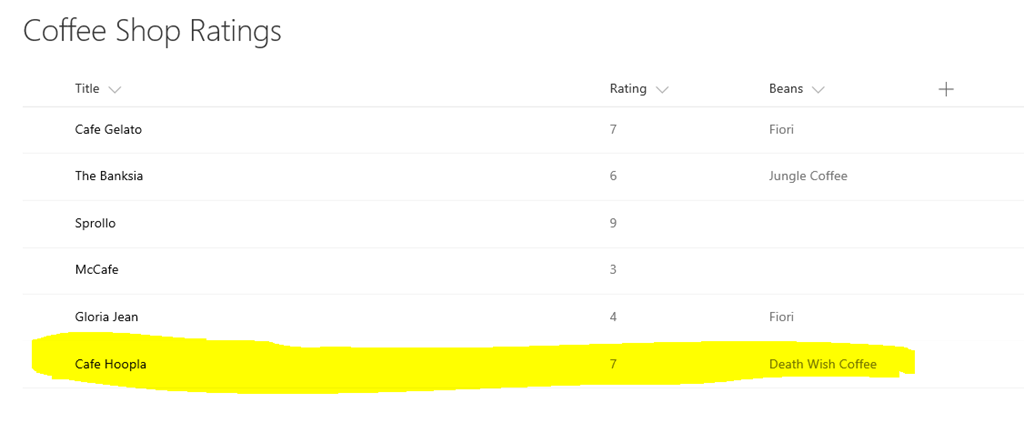
image  image

Hard-coding sucks – surely there a better way?

At this point you might still be hating the fact we had to hard-code the term ID’s into our app. I can sympathise, as it irritates me too. So is there a way to dynamically load the term set into PowerApps? Turns out there is, provided you use an Azure function along with PnP PowerShell.

I won’t cover this in detail here, unless there is sufficient demand, but I will explain the high level overview.

  1. Set up an Azure function using PowerShell
  2. Load PnP PowerShell modules
  3. Write a PowerShell script to connect to your tenant and pull the terms from the term set.
  4. Convert the terms to JSON output
  5. Create a custom connector for PowerApps to consume it.
  6. Add the custom connector to your app, and pull down the latest term set on startup.

Now I wrote another blog post where I went through another example of using Azure functions with PowerApps, and that covers a lot of detail on steps 1, 2, 5 and 6.

In relation to step 3 and 4, here is some PowerShell code sample to do this that you can use as a starting point. Be warned though… you will need to have some understanding of PnP PowerShell to make sense of it!


Import-Module "D:\home\site\wwwroot\modules\2.19.1710.1\SharePointPnPPowerShellOnline.psd1" -Global
$requestBody = Get-Content $req -Raw | ConvertFrom-Json
$name = $requestBody.name
$username = "paul@culmsee.onmicrosoft.com"
$password = $env:PW;
$siteUrl = "https://culmsee.sharepoint.com"
$secpasswd = ConvertTo-SecureString $password -AsPlainText -Force
$creds = New-Object System.Management.Automation.PSCredential ($username, $secpasswd)
Connect-PnPOnline -url $siteUrl -Credentials $creds
$tg = Get-PnPTermGroup -Identity 2830778b-dbfa-4441-bb45-0cbb97b582e7
$ts = Get-PnPTermSet -TermGroup $tg -Identity "Coffee"
$tl = Get-PnPTerm -TermSet $ts -TermGroup $tg -Includes Terms
foreach ($term in $tl) {
   $terms+=$term.terms
}
$output = $terms | Select Name, Id | ConvertTo-Json
Out-File -Encoding Ascii -FilePath $res -inputObject $output

Like I said, if you are interested in knowing more about this, let me know and if there is sufficient demand, I will make a dedicated blog post about it…

Handling multiple managed metadata columns…

I will end this series by showing you how to handle updating multiple managed metadata columns. This is an advanced topic, but is a good test for developing JSON manipulation skills in Flow. Like the previous section I will cover it in a high level only and leave it to you to figure it out for your environment…

So far we have updated a single column, but my real-world project that led to this series actually had 3 columns that were managed metadata. What made this interesting and tricky was that these columns were entirely optional. The complexity is easy to illustrate by looking at what a JSON payload looks like when updating multiple columns. In the example below, I am updating 3 columns called ProjectType, ProjectPhase and ProjectElement respectively…

{
   "__metadata": {
     "type": "SP.Data.ProjectListItem"
     },
   "ProjectType": {
     "__metadata": {
     "type": "SP.Taxonomy.TaxonomyFieldValue"
     },
     "TermGuid": "d4e4494f-34a4-4278-b0ee-7eba372a3f80",
     "WssId": "-1"
   },
   "ProjectPhase": {
     "__metadata": {
     "type": "SP.Taxonomy.TaxonomyFieldValue"
     },
     "TermGuid": "78d647c7-8b92-4ee0-a29d-22346b1af560",
     "WssId": "-1"
   },
   "ProjectElement": {
     "__metadata": {
     "type": "SP.Taxonomy.TaxonomyFieldValue"
   },
     "TermGuid": "6f9f653f-09ec-4771-9063-676d16734b37",
     "WssId": "-1"
   }
}

Contrast the above example with the one below where only one is updated…

{
   "__metadata": {
     "type": "SP.Data.ProjectListItem"
   },
   "ProjectElement": {
     "__metadata": {
     "type": "SP.Taxonomy.TaxonomyFieldValue"
     },
     "TermGuid": "6f9f653f-09ec-4771-9063-676d16734b37",
     "WssId": "-1"
   }
}

So the trick is to build a flexible enough flow that could generate the JSON needed to update 1, 2 or 3 columns. Without knowing whether the column would have a supplied value, meant we have to find a way to handle any combination. The pattern I ended up using was to build the JSON for each of the columns individually before joining them together. Here’s how…

First, I used an Initialize Variable flow action to create the base JSON for each column. The key was to make this conditional, so if the column value was empty, I added an empty string. E.g.
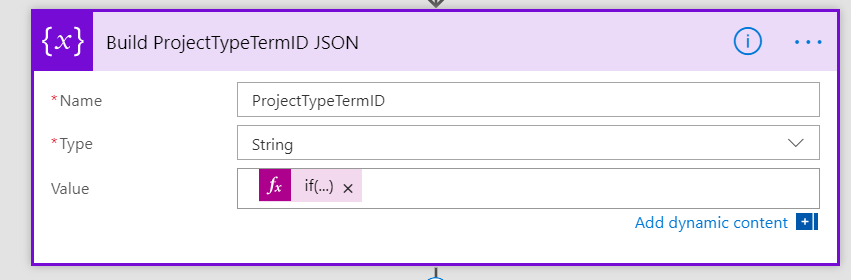
image

The expression used for the value of this variable was this crazy looking Workflow Definition Language Expression:

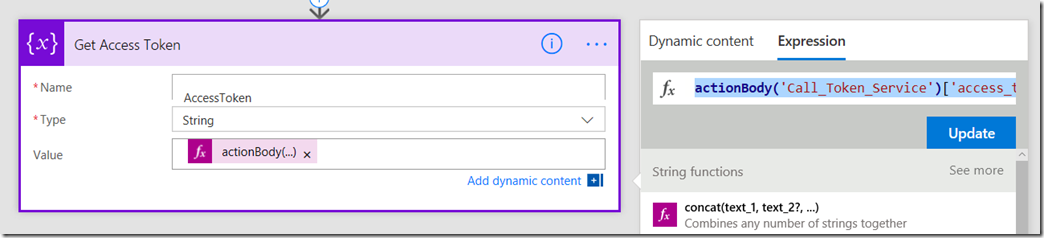
if(not(empty(triggerBody()['GetProjectTypeTermID_Value'])), concat('"ProjectType":{"__metadata":{"type":"SP.Taxonomy.TaxonomyFieldValue"},"TermGuid":"',triggerBody()['GetProjectTypeTermID_Value'],'","WssId":"-1"}'),'')

Basically this grabs the term ID for a column (in the above example the columns is called ProjectType). I test if the column value is supplied – which is what the “if(not(empty” bit does. I then then construct the necessary JSON to update that managed metadata column. (Note if you need a refresher on the JSON in this function, review part 3)

I repeat this action for the other columns, and then perform the following steps in Flow to construct the complete JSON…

First I initialize an array variable that I call JsonPayloadArray.
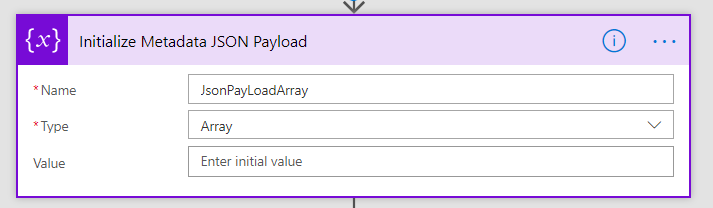
image

Next I add the outer JSON for a managed metadata update to the array using the Variables – Append to array variable workflow task…

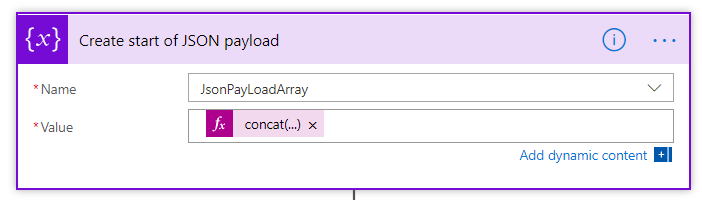
image

image

Here I am using the concat() function because I need to use the ListItemEntity variable. Note, if you have forgotten about ListItemEntryFullName property,  re-read part 3.

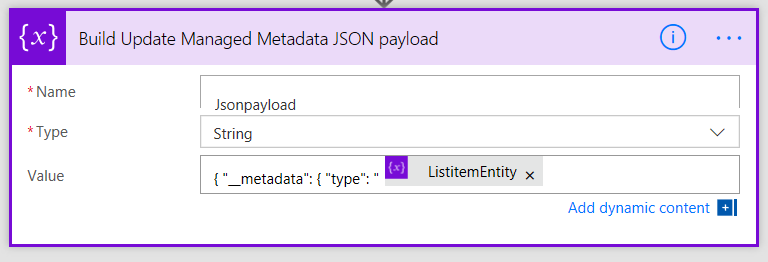
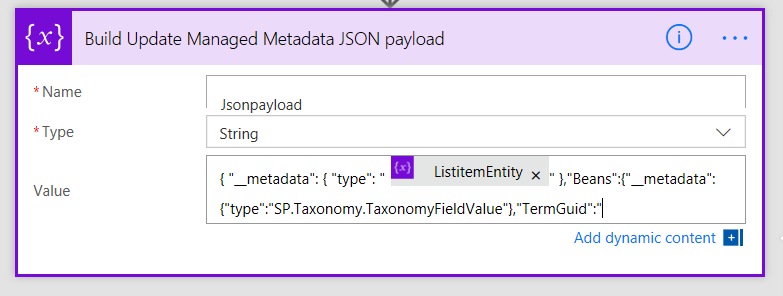
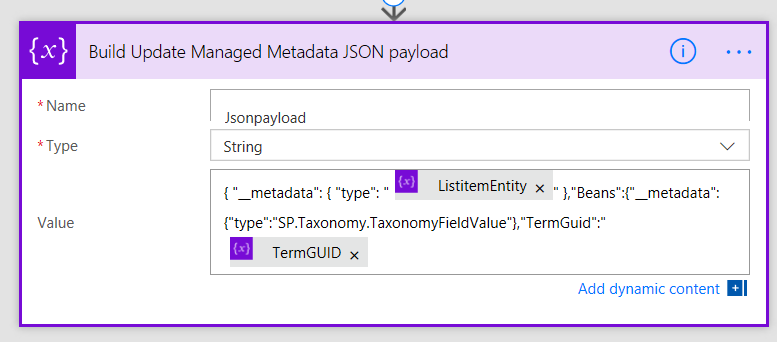
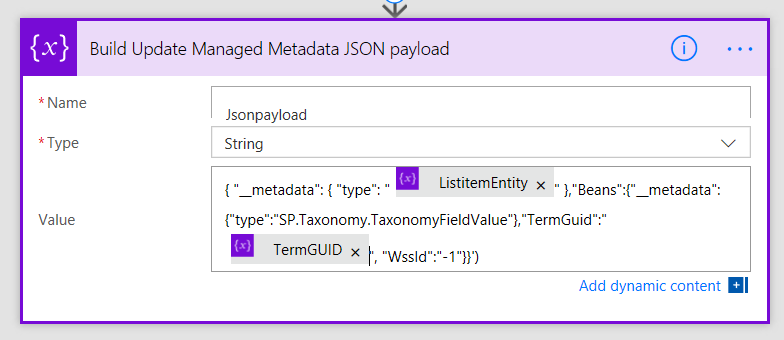
concat('{ "__metadata": { "type": "',variables('ListItemEntity'),'" }')

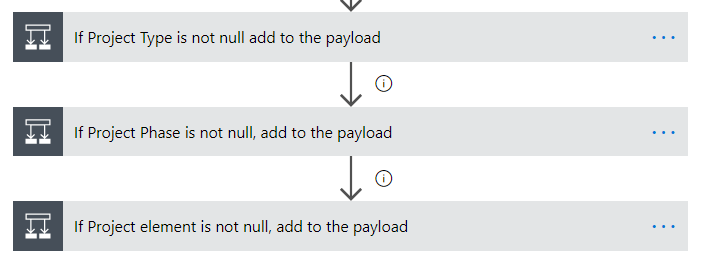
Next, I add the JSON for each column to the array, provided it is not null. I do this by adding a condition for each column.

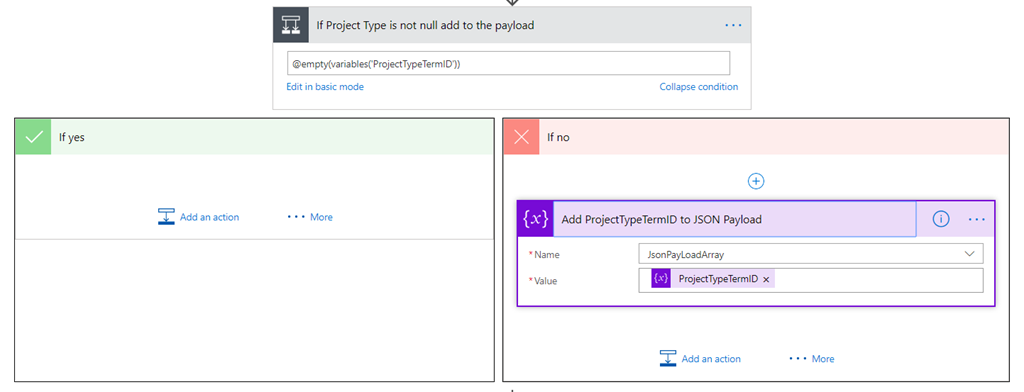
The first image below shows the three conditions and the second image shows an expanded view of one of them. You can see in the example below, if a ProjectType was supplied, I add the variable initialized in the above steps to the JsonPayloadArray variable….
image

image

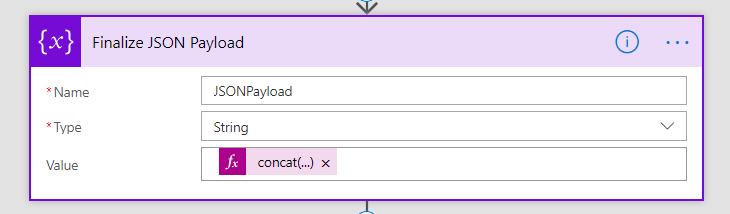
Finally, I use the Join() function to take this array and turn it back into a single string, delimited by commas. This elegantly handles the situation in JSON where the last name/value pair does not have a comma separator.  I do this by initializing a new variable called JsonPayload as a string as follows…
image

concat(join(variables('JsonPayLoadArray'),','),' } ')

Conclusion

This is one of those series that I know only a few people will get some use out of. Hopefully this whole issue of managed metadata will be gone by year-end and these approaches are not necessary. In any event the techniques outlined in these four posts apply to various other scenarios, so learning about JSON manipulation using Flow, or talking to SharePoint via REST/App principals might come in handy for you in other situations.

As for me, this is probably the geekiest series I have written in a long time! I think I better get back to management consulting now!!


Thanks for reading

Paul Culmsee
www.hereticsguidebooks.com

October 20, 2017

October 16, 2017

October 14, 2017

PowerApps, Flow and Managed Metadata fields–part 1

Hi budding PowerApps and Flow users…

One (current) issue affecting both PowerApps and Flow is that neither support Managed Metadata Columns properly. I have a method to get around this issue, but it will take more than one post to explain. Lately I have refrained from writing epic multi-part posts because things change quickly. In fact this issue will likely go away by the end of 2017. <update> Native support for Managed metadata is now available. Be careful when you use this content</update>.

Due to this pace of change, this is very likely the last multi-part blog series I will do. So consider this a last hurrah from a bygone era of Cleverworkarounds Smile

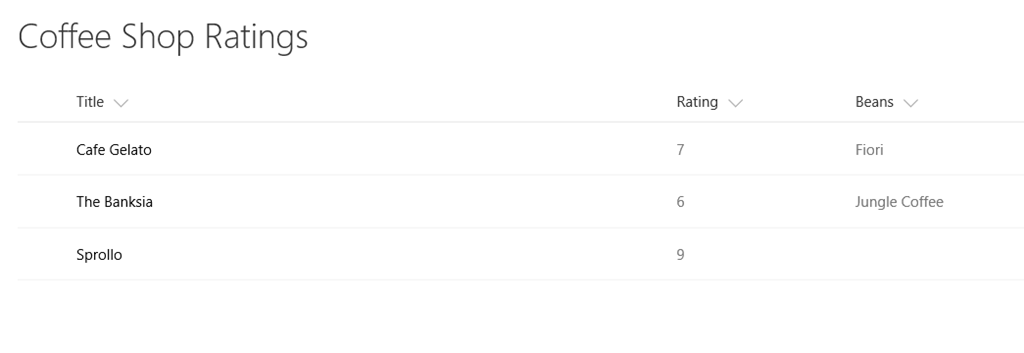
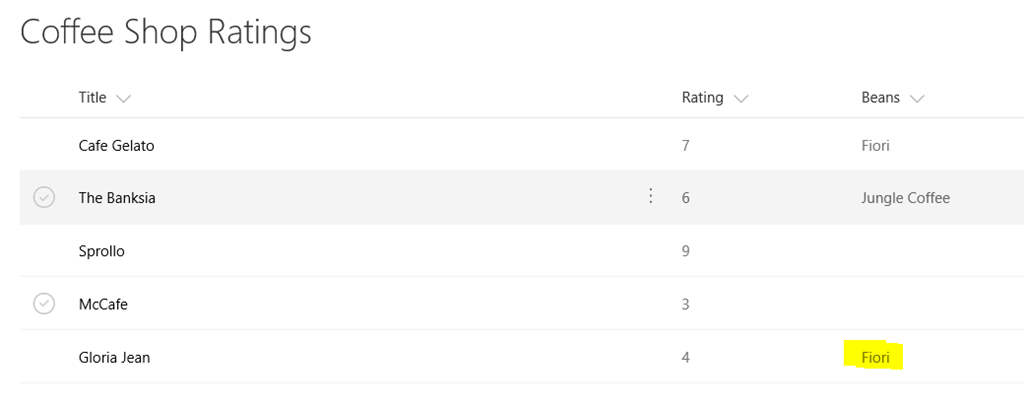
Now let’s get to work. To illustrate the managed metadata issue we currently have to contend with, consider the list below that tracks the most business critical task ever – where the best coffee is near the office…

image

The beans column is actually a managed metadata column, linked to the following term set which has a list of locations and coffee beans from that location. As you can see above, each café sells a certain type of coffee bean…

image

Now that we all understand the vital importance of the data contained in this list, it is obvious that we need an app for it so that our workforce can have locations of the best coffee at their fingertips. So let’s quickly examine the degree to which PowerApps is able to handle this list. I created a blank app and connected it to the above list. I then tested with a gallery, data table, display form and edit form. Here are the results below…

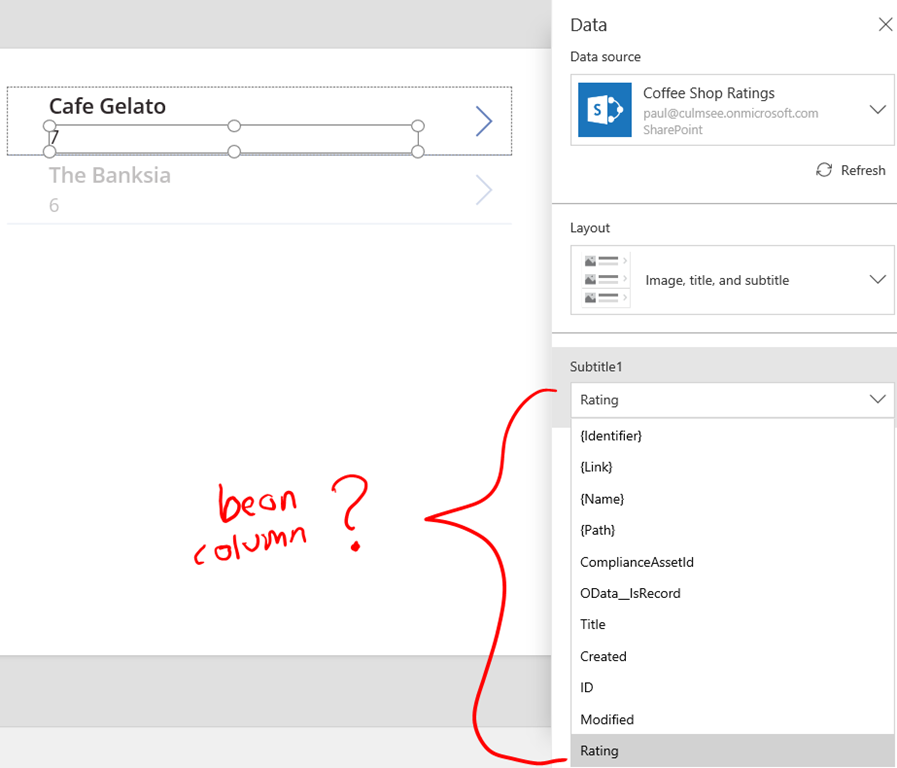
Gallery: Fail

As you can see in the image below, the gallery is bound to the Coffee Shop Ratings list, but in the dropdown highlighted below, the managed metadata “Beans” column is not listed.

image

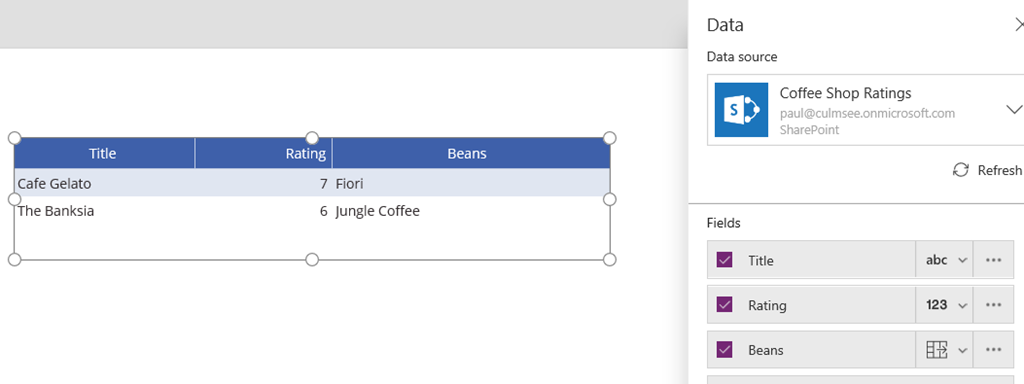
Data table: Pass

The data table does work. You can see below that the Beans column is visible….

image

Display Form: Pass

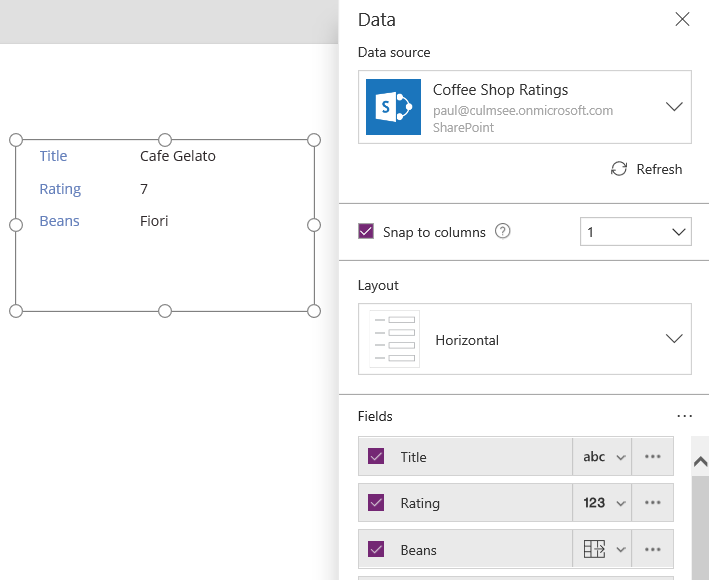
Like the data table, a display form also will display the managed metadata value…

image

Edit Form: Fail

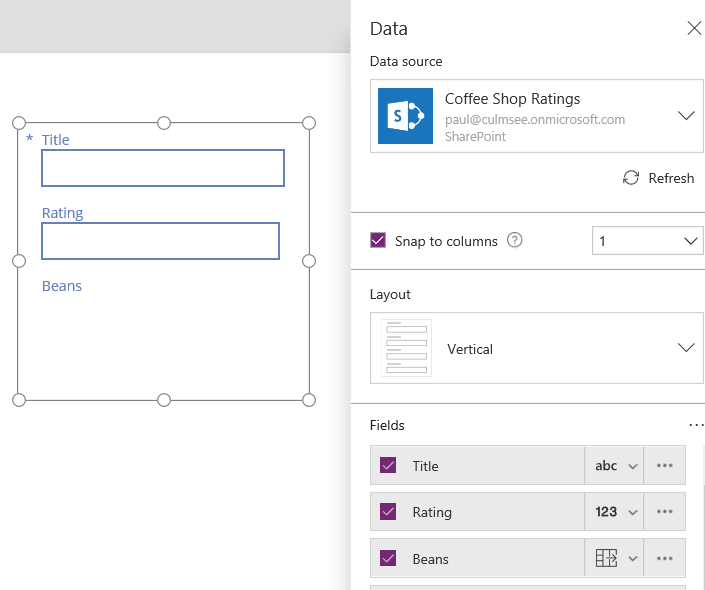
As you can see below, the edit form sees the Beans column, but will not render it as editable in PowerApps… bummer. Not a great solution if you want your users to add new coffee places to the list via the app.

image

Flow to the rescue?

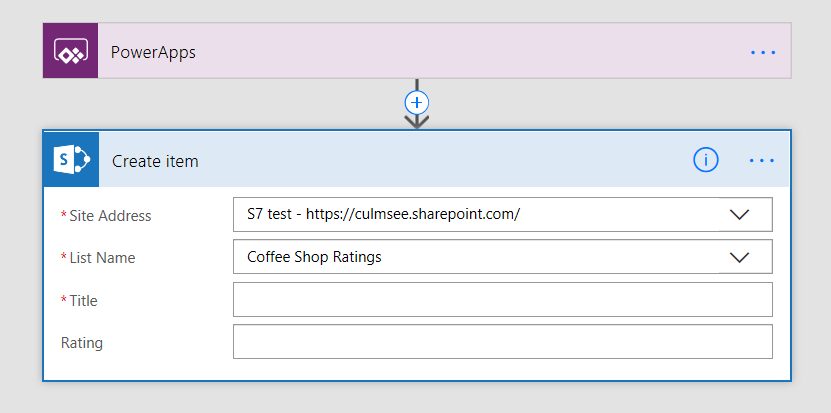
If you have read some of my recent posts, I have found Flow to be very useful to work around various obstacles. For example, I use flow to handle photo uploads from PowerApps to SharePoint. So how does Flow fare with Managed Metadata? Unfortunately this is also a bust at present. The built-in “SharePoint – Create Item” action will not show the managed metadata columns. Notice the Beans column is missing from the image below…

image

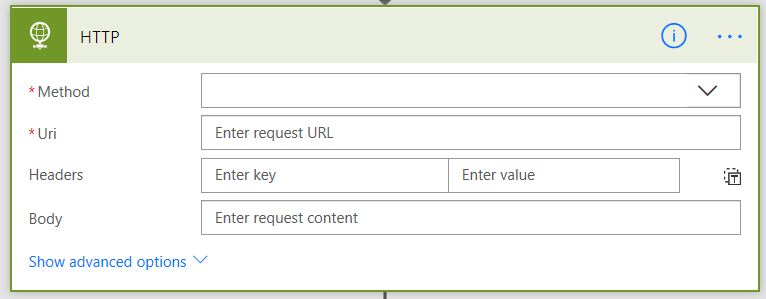
Now all is not lost. Just because the built-in Flow actions do not work, does not mean we cannot achieve our goal. One can also talk to SharePoint via it’s API’s. Flow makes this possible because one of its built-in actions called the HTTP action. This is a super powerful action because you can use it to pretty much make any form of web request you want.

image

So let’s do an experiment and find out how easy it is to support managed metadata via Flow, by talking to SharePoint via API.

But there is one issue we have to contend with first. The SharePoint actions in flow take care of authentication for us, whereas the HTTP action is generic by definition. So how are we going to make an authenticated connection to SharePoint using the HTTP action?

The answer is we are going to use oAuth to request an access token. For the non-developers reading this who’s eyes start to glaze over when terms like oAuth start getting bandied about, let me use an analogy…

An oAuth primer using beer…

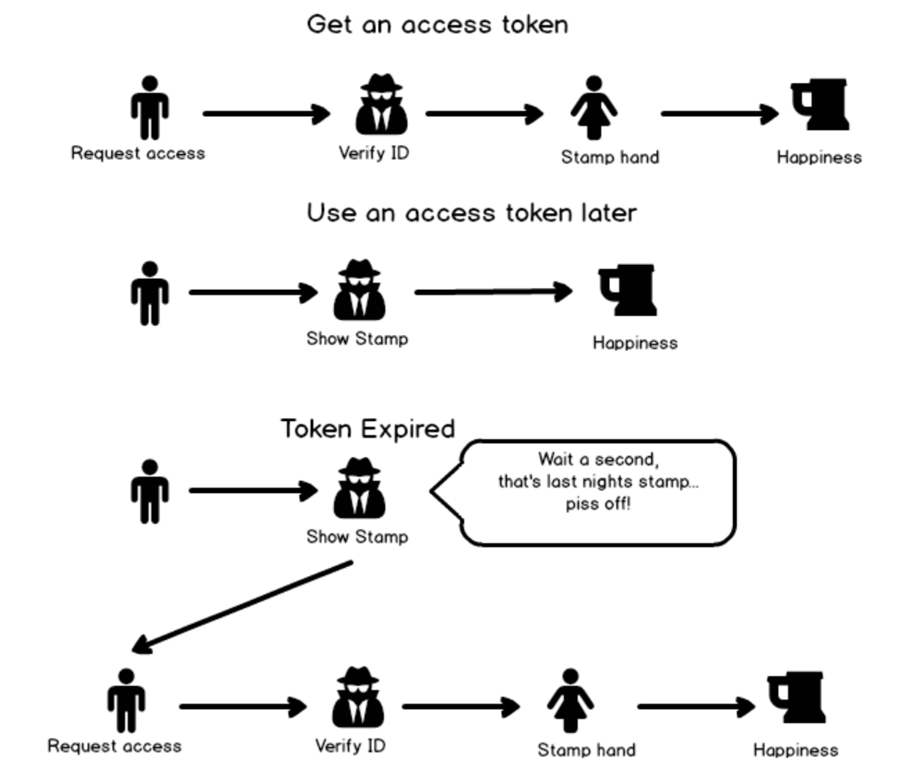
Let’s say that you are going to a nightclub or a bar, and you have to prove that a) you are over the legal age and b) you are wearing suitable attire for the venue. You present your drivers license or other form of ID. The doorman checks your ID, decides if you are good looking enough and permits you to enter. You then walk into the club, pay your entrance fee, and an ink stamp is used to mark your arm. This tells staff that are are legally allowed to be in the club and can enjoy a frothy beer or two. Think of that stamp as your access token. If you walk out of the club for a break, you can skip the line to get back in, because you have already been stamped. You just show them your hand…

So the basic pattern is to get an access token is:

image

Once you have access, no one has to check your ID, instead they just make sure the stamp on your arm is the same as the one they issued you earlier. Eg:

image

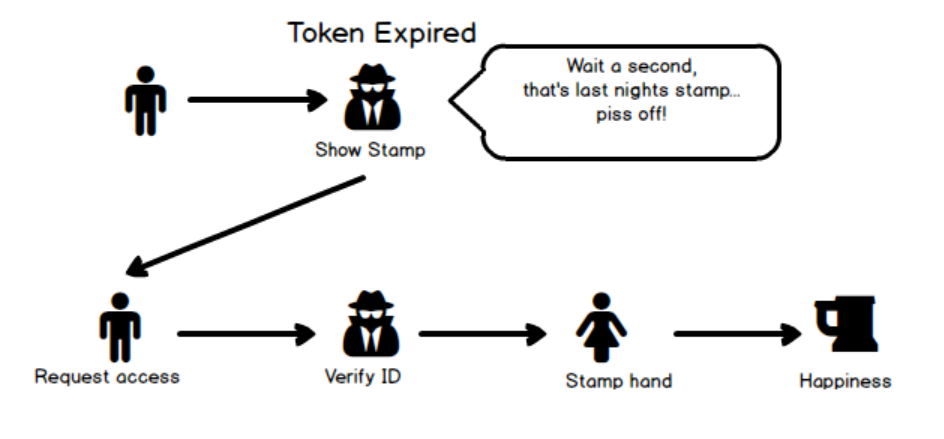
Now access tokens don’t last forever. If you turn up the next day, try and skip the line and present your stamp, the doorman will turn you away because today they used the blue stamp and last night they used the green stamp. So you will have no choice but to go to the other line, get your ID checked, and pay up before getting a new blue stamp issued…

image

So let’s now turn our attention to SharePoint and how this works in real life. What I just described above is roughly equivalent to something in oAuth called the Client credentials grant. In short, before we do anything related to managed metadata, we need to get into the club. So we will need to get some identification so we can get our hand stamped. So who issues the ID in the first place?

Enter the app principal

In our analogy above, there was an implicit trust going on. You showed your identification to the doorman, and they trusted that the ID you flashed before him was genuine. In the context of SharePoint, we need to have SharePoint itself issue your ID for it to be deemed trustworthy. After all, even bouncers have problems with fake IDs.

So our flow is going to need to use an app principal (a genuine ID) before it can be issued a “stamp” (or access token). Fortunately for us, the plumbing to do this in SharePoint has been in place since the oft-derided app/app-in model was brought in. I am not going to get too caught up in the details here, because all-round guru Wictor has detailed the process in a few posts. In particular, have a read of this one, and in particular the “Create the App Principal” page…

Here are the basic steps to create an app principal to use in flow:

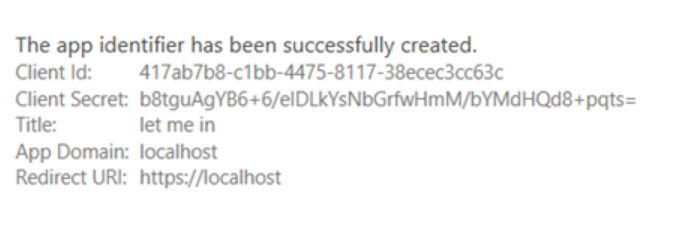
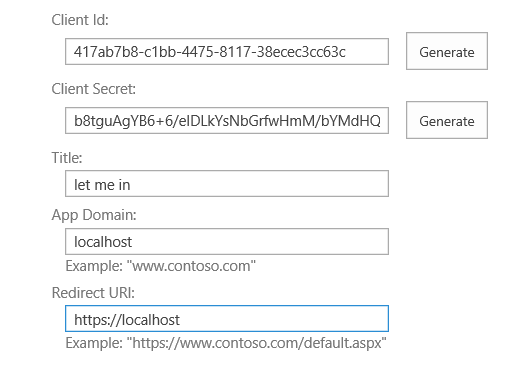
1. Navigate to your site collection and append /_layouts/15/AppRegNew.aspx

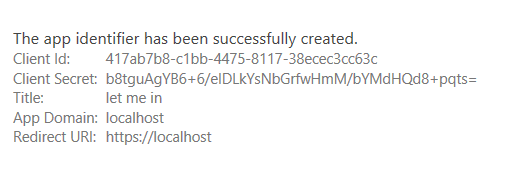
2. Generate an App ID, App secret and enter some other identifying info

image  image

3. Copy the client id and secret to clipboard.

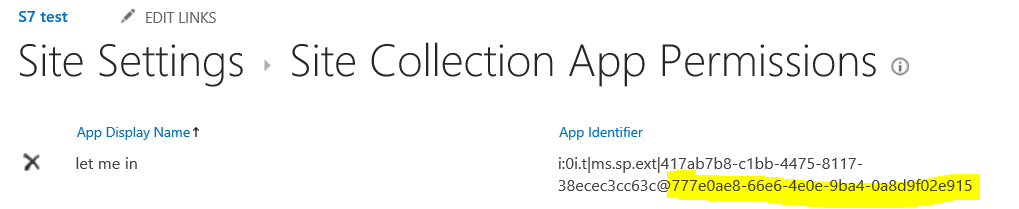
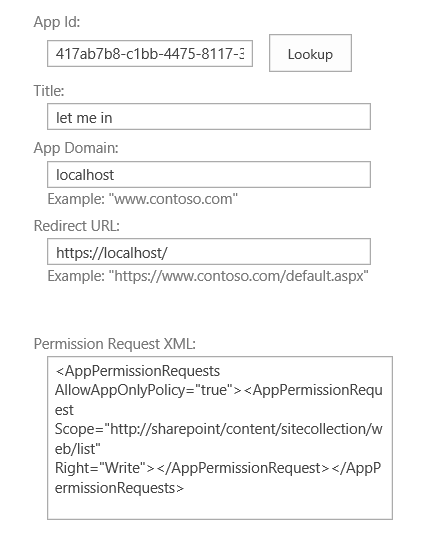
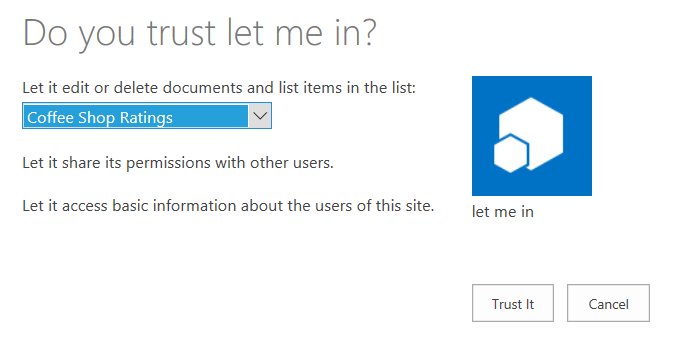
4. Append /_layouts/15/AppInv.aspx to your site collection and grant the permissions needed by this app principal.

image

In our example, we are updating a managed metadata field in a single list, so this app principal is going to be given the ability to write to SharePoint lists. The XML is below, and the schema for other scenarios is here:

<AppPermissionRequests AllowAppOnlyPolicy=”true”>

    <AppPermissionRequest Scope=”http://sharepoint/content/sitecollection/web/list” Right=”Write”>

    </AppPermissionRequest>

</AppPermissionRequests>

6. Choose the list that the app principal will be working with. In my case it is the coffee shop rating list with the managed metadata column.

image

Although I said I would not get into too much detail, here are some handy notes around this process:

  • The permission XML is very fussy. It will not tolerate spaces between elements
  • This app principal is registered/stored in azure active directory. You need privileged access in Azure AD to do this (site collection admin is not enough)
  • You can also do all of this in PowerShell
  • The app principal is valid for 1 year. So just like your drivers license expires periodically, the same happens here. If you want something longer, do this in PowerShell. (in our case native support for Managed Metadata in PowerApps/Flow is a few months off, so a year is fine
  • The oAuth method we are using doesn’t actually use the App Domain nor the request URL. But other methods do, hence why we have to enter something anyway
  • Microsoft are now steering people to the Graph API, which is a unified API that allows access to all of Office365 services. This will become the approach to take, but Wictor Wilen told me on Twitter that currently you cannot scope an access token down to a particular site collection.

Back to Flow…

Now that we have an app principal with permission to our site collection, it is time to start work on our Flow.

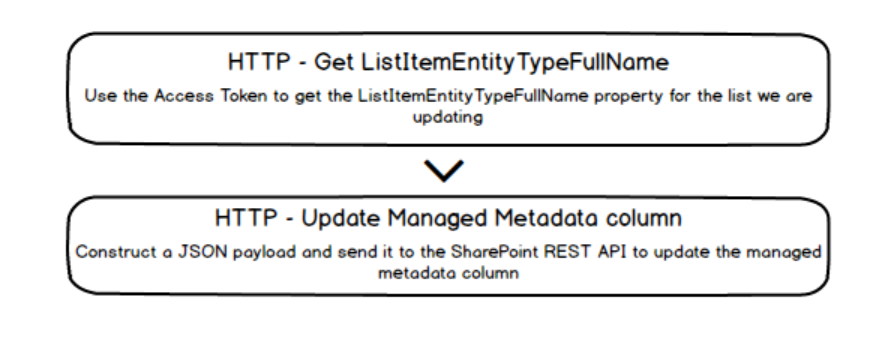
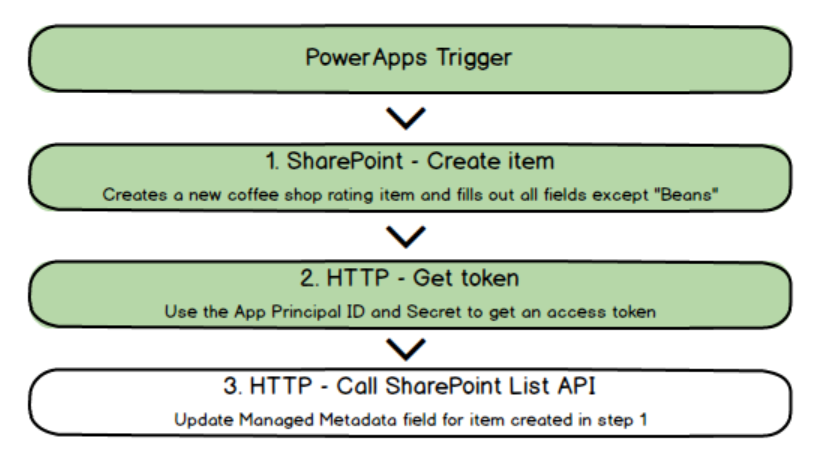
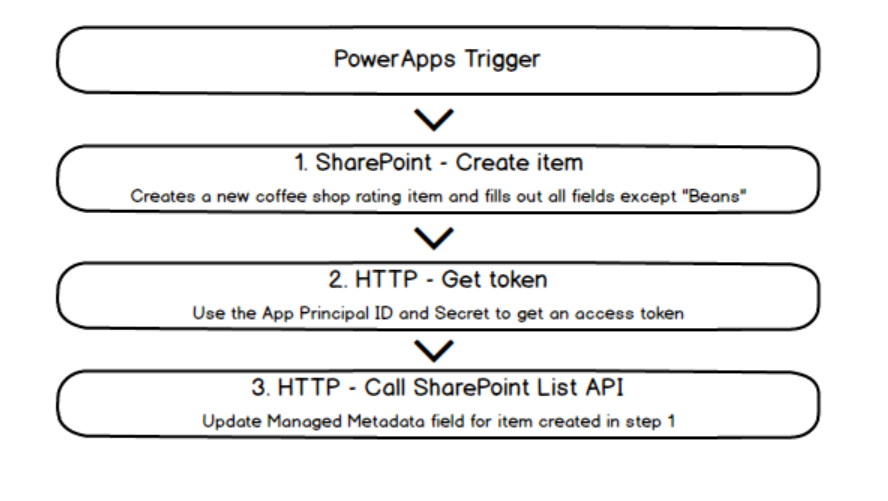
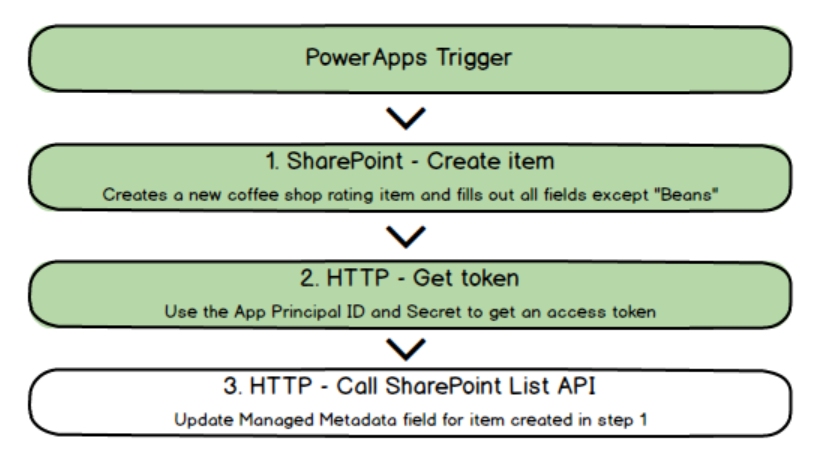
The basic operation for the flow is follows… First, the flow will be triggered by PowerApps, which will send Coffee shop name, rating and Bean. We will create a new entry in the list using the standard SharePoint flow action, before using the HTTP action to get an access token, and then update the newly created item with the coffee bean used by the shop.

image

Now the actual flow is going to look different to what I have outlined above. There are multiple actions involved for each of the steps, and some architectural and security considerations too. So we will adjust our flow as we go…

So let’s end this post by dealing with the trigger and step 1 above, as they are easiest. Part 2 will deal with the access token and part 3 will deal with the updating of the managed metadata column.

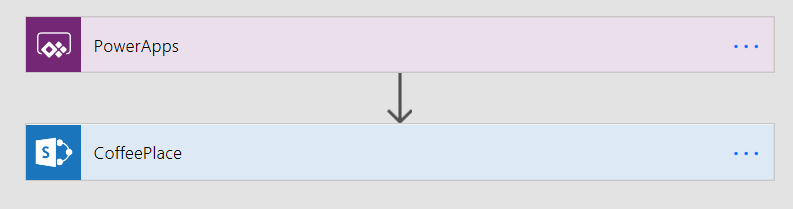
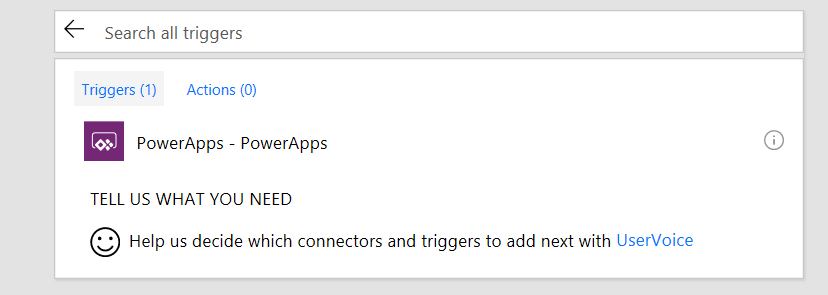
1. Create a new flow and choose the PowerApps trigger…

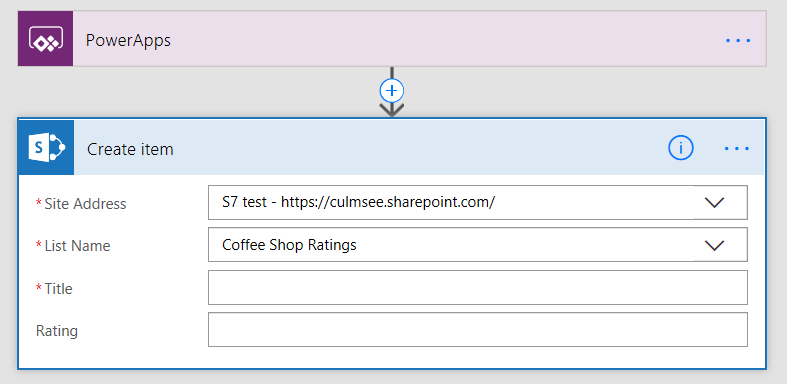
image

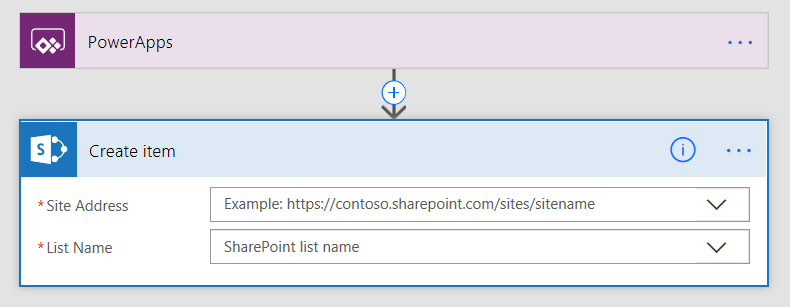
2. Add a SharePoint – Create Item action.

image

3. Specify the site collection where your list is stored and then the Coffee ratings list. Flow will read the list and display the fields it has found (excusing Beans)

image

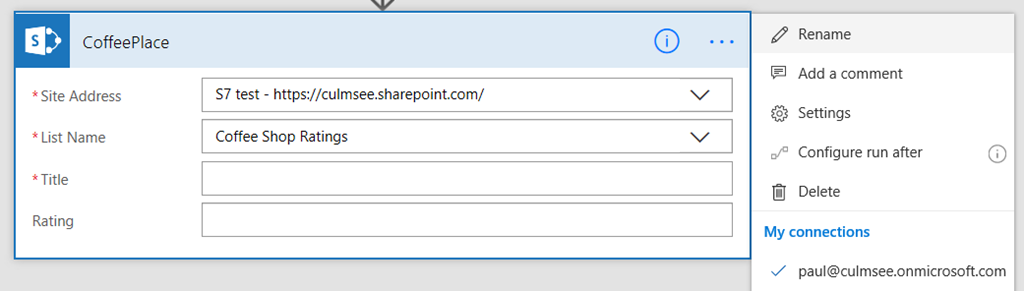
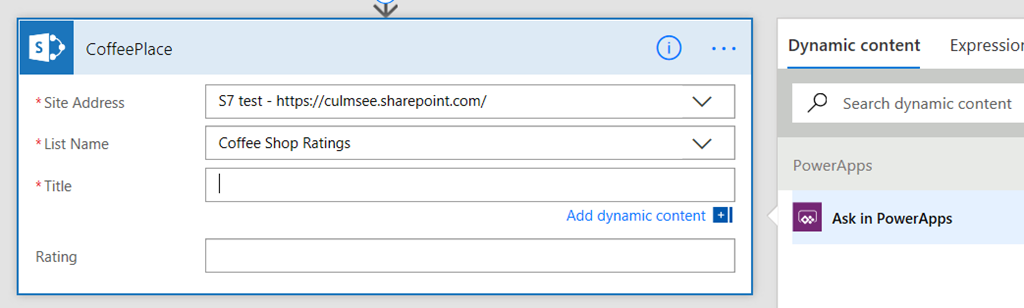
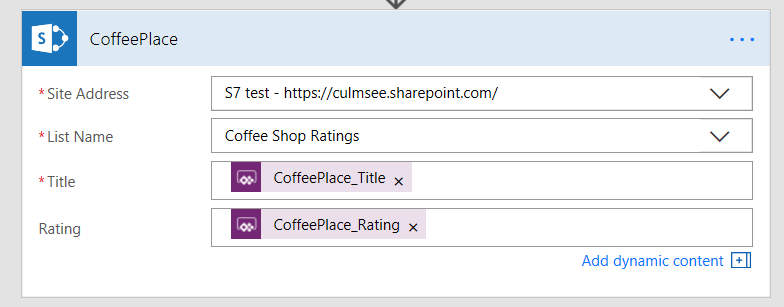
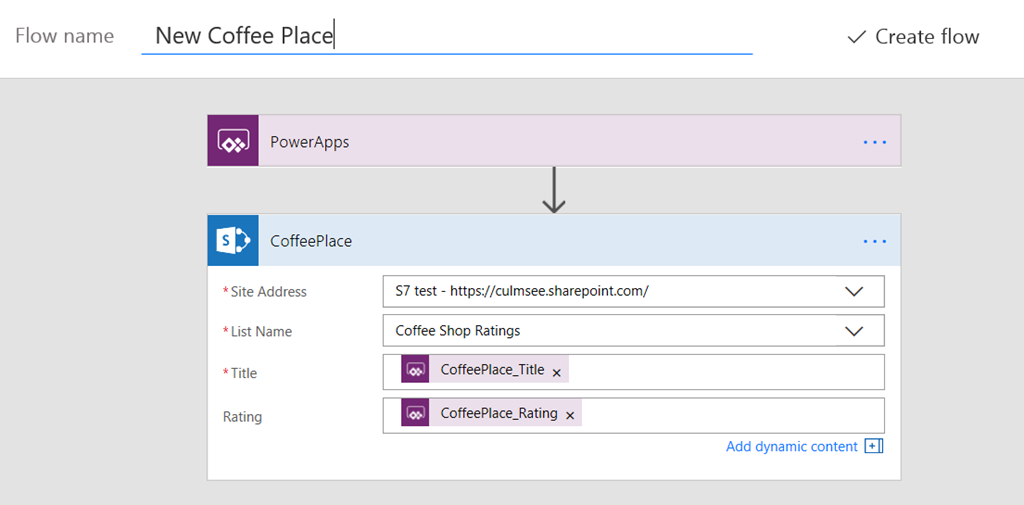
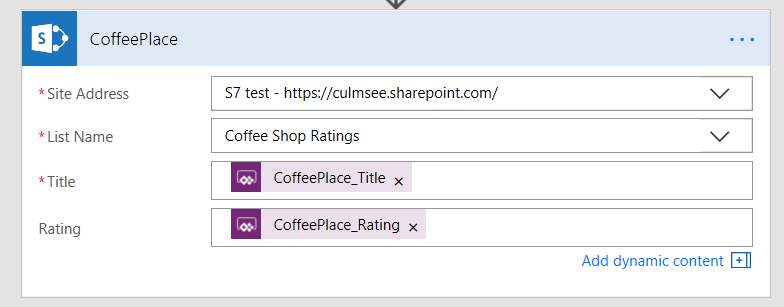
4. Rename the flow to CoffeePlace and for the Title and Rating columns, set it to ask PowerApps for the data

image

image

image

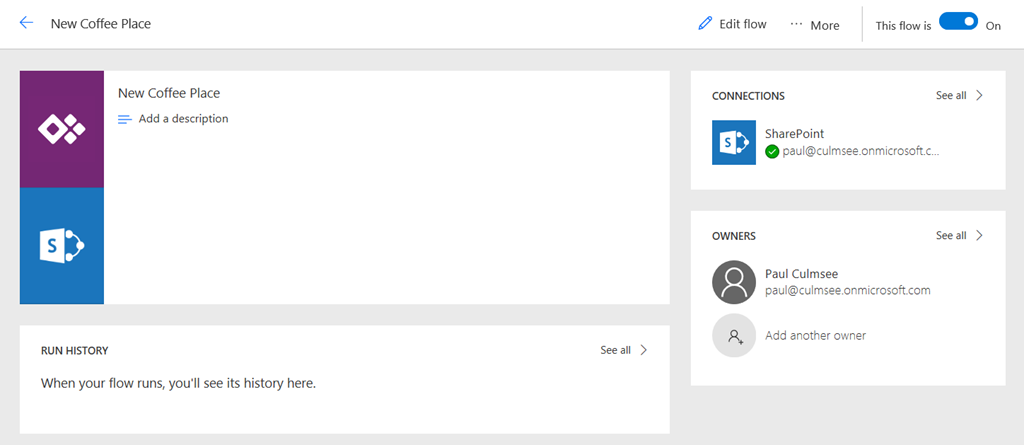
5. Save the flow and give it an appropriate name…

image

image

Build a PowerApp…

Now let’s go to PowerApps and build a basic app to add a new coffee place.

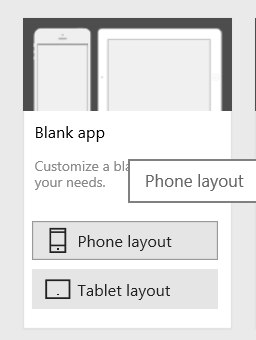
1. In PowerApps create a new blank app using the phone layout

image
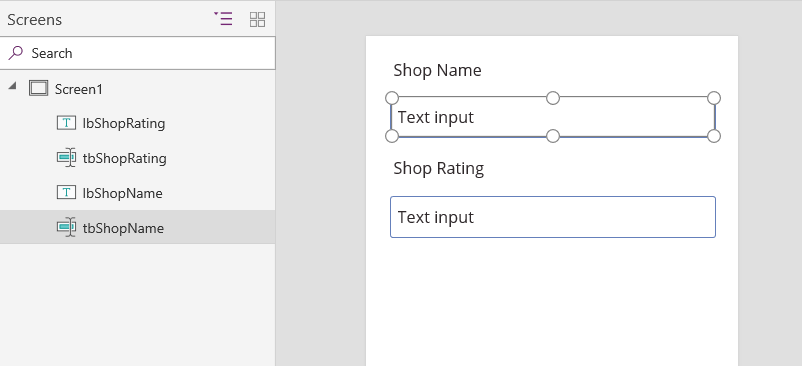
2. Insert 2 text boxes and 2 labels as shown below… note that I have named my controls to be more meaningful. I suggest you do the same…

image

3. Add a button to the bottom the app and label it “Submit”

image
4. Select the button, and from the actions menu, choose “Flows”

image

5. A panel will open to the right of your app screen, and you should see the flow we made earlier. Basically PowerApps will show any flows that you have access to, that use a PowerApps trigger

image

6. Choose your Flow, and PowerApps will add a submit action to the button that calls the flow. Any “Ask in PowerApps” parameters will be displayed in the function as shown below. Now hopefully you can see why I made you rename your Create Item action when building the flow! The image on the right is the flow action where we told it to ask PowerApps. Note the names in both images…

image  image

7. Fill in the parameters by choosing the text boxes we added in step 2. Now you will see why I recommend naming them…

image

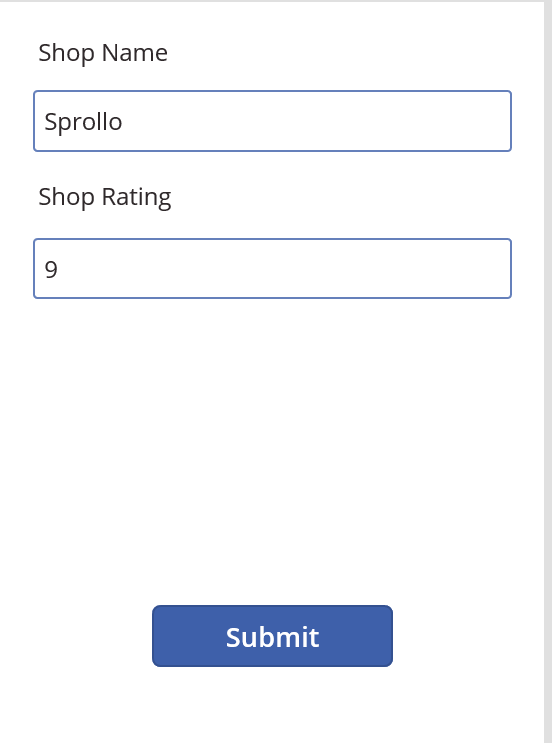
8. Save your flow and then preview it… Enter a shop name, rating and click the button. Check your SharePoint list and you should see the new entry…

image  image

Conclusion…

Awesome! If you have gotten this far, we have all of our raw ingredients set up. We have an app principal, a PowerApp and a flow. In the next post, we will focus on getting our access token, so we can update the managed metadata field.

Thanks for reading…

Paul Culmsee
October 11, 2017

The (new current) best way to update SharePoint document metadata using Flow

Filed under: Flow — admin @ 7:47 pm

Hi

Some time back I documented an approach to updating document library metadata using Flow. To recap, the issue was that the “SharePoint : Create File” action provided no way to update library metadata when uploading a file, nor did it return the item ID of the newly created file. Since I wrote that post, Microsoft has updated things. First, the create file action now does return an ID, and some new Flow actions have been released, including one called “SharePoint – Update File Properties”.

This now makes the whole metadata situation much less sucky…

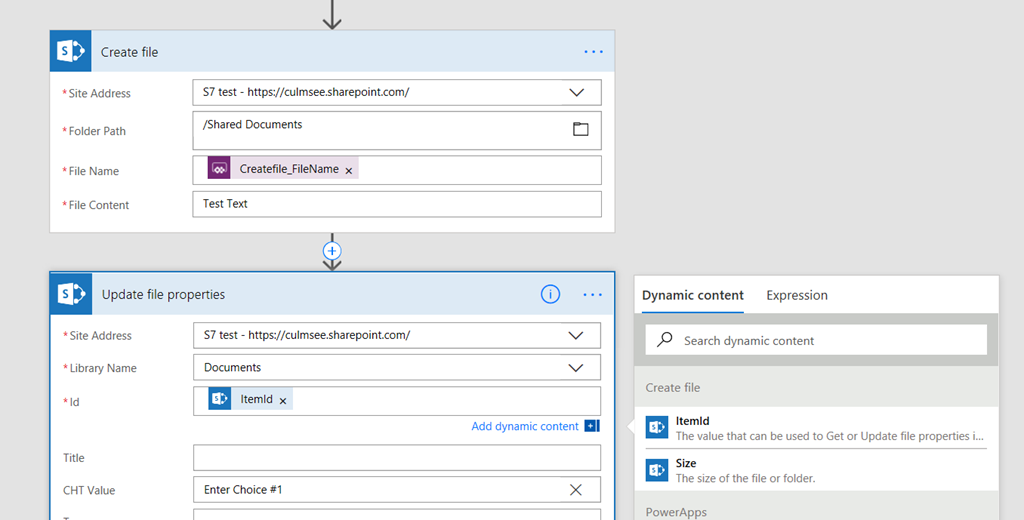
Check out the image below. In it, I have used a PowerApps trigger, and added a Create File action, and followed it up with an Update File Properties action. Notice that when I click the ID textbox in the Update File Properties action, I now have ItemID available from the Create File action. Much simpler than before!

image

Hope this helps someone…

Paul Culmsee
Powered by WordPress