SharePoint for Cisco Fanboys (and developers) -Part 3
As I write this series, it is getting less and less about Cisco and more and more about SharePoint. This article is definitely developer centric, but since Cisco guys tend to be interested in the guts of the detail, I decided to keep going :-).
If you read my articles I tend to take the piss out of IT role stereotypes just to make it more entertaining reading. Sales guys and IT Managers tend to cop it the most, but I also like to have a dig at the expense of the nerds too. Cisco nerds on the whole are a great bunch, but I have to say, the scariest nerd I have ever met drank Cisco kool-aid in jumbo size!
If you have gotten to this article after reading the first two and you are scoffing at my audacity to suggest you TFTP your configs into SharePoint, chances are most people think you’re scary! If you are hitting this series of articles for the first time, go back and read part 1 and part 2 before being scary!
Seriously now, I thought that this would be a 2 part set of articles, but I got all bogged down in the methods of getting files into SharePoint. The WEBDAV based methods described in the previous article is easy to do, but ultimately is not the recommended method. So now, we will look at the ‘proper’ ways to do it and see if they are worth the effort. They work okay, but are more complex and I’m not convinced that the governance issues are necessarily worth it for many readers.
Degree of difficulty for this article is varied.
CleverWorkArounds Coffee requirement rating (for an application developer): ![]()
CleverWorkArounds Coffee requirement rating (for a non developer): ![]()
![]()
![]()
![]()
How can we we *not* use WEBDAV?
If we are using methods other than WEBDAV, then how are our existing applications supposed to work? I mean, all they know is the windows networking API. So, unless the other methods are implemented as a redirector (as described in more detail in the “WEBDAV Interlude” section of my first article), how can they use any other API?
The answer is, they can’t! So we are leaving the world of freeware and cheap TFTP servers and writing our own one!
“What? I’m no coder”, you say? That’s okay, nor am I… but stick with me anyway.
Okay, how about we modify someone else’s open source TFTP Server to work with SharePoint via non WEBDAV methods?
Fortunately for us, such a TFTP server does exist. In addition to being conveniently modifiable (got to love open source), it is multithreaded, very well written and easy to understand and extend. Kudos to the author. If you write a few scripts here and there, it should be enough for this article.
So let’s take a closer look. If you already know visual studio you can skip the next section and move to the section entitled “Examining the Code”. Otherwise let’s keep going getting this TFTP Server compiled!
Getting TFTPUTIL compiled
Head on over to http://sourceforge.net/projects/tftputil and download the latest release. Crank out Visual Studio 2005 and take a look at it.
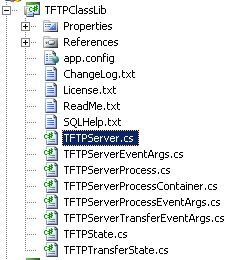
This server is implemented as a class, so you have to write your own little program to make use of this class by creating a TFTP server object. You do by adding a new project to your Visual Studio workspace. But before we do that, how about we deal with a pre-requisite component.
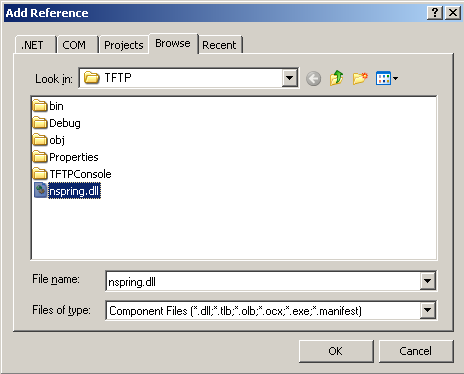
The TFTPUtil class makes use of a library of useful functions called NSpring. You will want to download this. Grab the nspring.dll, and then tell Visual Studio how to find it by choose “Add Reference” from the “Project” menu, . At the resulting dialog box, go to the “Browse” tab and navigate to where you downloaded nspring.dll. (Best to put into C:\WINDOWS\SYSTEM32 or use the same folder where the TFTPutil code lives).
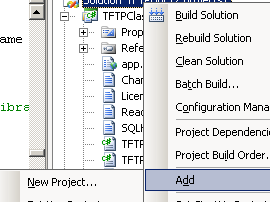
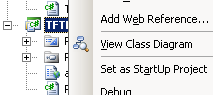
Right, we are all set! You could compile and build TFTPUtil.DLL right now, but it would not do you a lot of good because it’s a class and does not run on its own. It needs to be *invoked*. This means we need to create a little application that creates an *instance* of the TFTPUtil class. Right click on the project and choose “Add New project” as shown below.
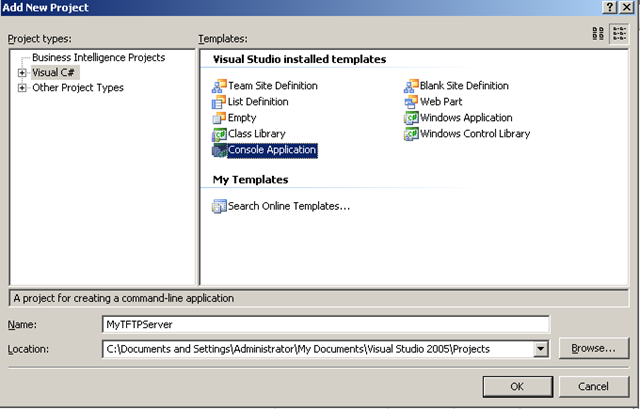
For our purposes, we create a new “Console Application” project and call it myTFTPServer or something meaningful to you. This will be a small EXE file that uses the TFTPUtil class to create a TFTP server.
Now, right click on the newly created project and choose “Set up Startup Project”
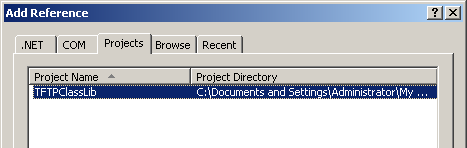
Next step, we need to tell this new console application project how to find the TFTPUtil class. From the Project menu, choose “Add Reference”. At the resulting dialog box, go to the “Project” tab and you will see the open TFTPUtil project.
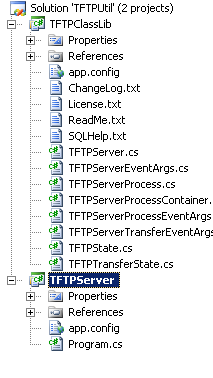
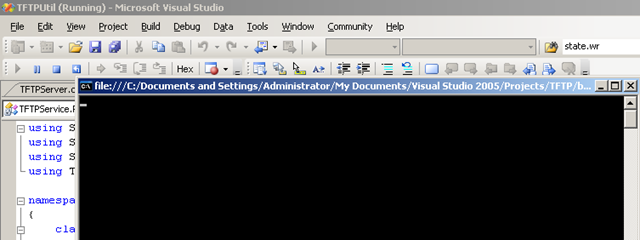
Right, that should be it! Your Visual studio should look something similar to this
Creating a basic TFTP server
This is a well written TFTP server. Everything is very nicely modular and easy to understand without getting into too much complexity.
So first up, here is the 5 lines of code of your console application to get the TFTP server working. Add this to the code section of the static void Main(string[] args) method.
using TFTPUtil;

TFTPServer myTFTP = new TFTPServer();
myTFTP.Path= "C:\TEMP";
myTFTP.AllowWRQ = true;
myTFTP.AllowWRQOverwrite = true;
myTFTP.StartListener();
Those 5 lines create a new TFTP server object, set the destination folder, allow it to receive files, overwrite received files and start the TFTP server. If you now compile and build this solution you will end up with the files TFTPutil.DLL and myTFTPServer.EXE.
You should be able to test it now. (By default, files will be uploaded to the folder the EXE is run from unless you specify a path).
Examining the code
Now let’s look at the area of the TFTP server where we need to add some code. It is in TFTPServerProcess.css in a method called “ProcessDataGram”
If you examine this method, you will see the following code (just search for it):
AddMsg(Level.Info, "Successfully received file " + State.Filename + " (" + State.Filesize.ToString() + " bytes) from " + State.RemoteIPAddress + " in " + TotalTime.ToString() + " seconds (" + (Rate).ToString() + " bytes/sec).");
//This is the last block so go ahead and setup to delete state
State.Close();
We will make some fairly basic modifications to the server in this section, so that the file is uploaded to SharePoint.
There are several methods that can be used to get files into SharePoint. We will do this first by using the most obvious way: The SharePoint SDK.
Modification example #1 – The SharePoint SDK
The SharePoint SDK is definitely the easiest way to upload a file, but there are several caveats:
- The TFTP server MUST run on a server that is a member of the SharePoint farm
- The TFTP service account MUST have administrative privileges on the server and SQL access
That second requirement in particular just plain sucks. After going to the trouble in part 1 to set up low privileged account “tftp service” with “contribute” access to a document library, we now find that we need to grant the account significantly more privileges than before. My security nazi Cisco readers will read that and say “no way will I do that”, and I would concur. But fortunately for my readers (and unfortunately for me) I only discovered that caveat AFTER I had gotten it working. So I will show you the code changes anyway.
So, first up I will tell you what we will do. The aforementioned ProcessDataGram uses a class called State that is used to write the file to the file system. Then later the method Close() closes the file that has been uploaded.
So what we will do, is upload the file to SharePoint just after State.Close(). This means the file is still downloaded to the local file system and then copied to SharePoint. Therefore, the local file system is now simply a temporary place for the file to be stored, prior to it be uploaded to SharePoint.
To do this, we will change how TFTPUTIL handles the PATH property. Recall in my basic TFTP console application example code I could set the path via:
myTFTP.Path = "C:\TEMP";
So let’s change this behaviour so that if Path contains the string “http://”, we assume it is a SharePoint path, rather than a file system path. Therefore we set the internal file path to %TEMP% so we can still capture the file, but then we will upload it to the http:// specified SharePoint site.
Path is a property of the TFTPUtil class that is defined in TFTPServer.cs. We will make a minor change to the Path property, because it performs a check that will always fail when a SharePoint URL is supplied.
public string Path
{
    get
    {
        return FullPath;
    }
    set
    {
        if (value.Contains("http://")) {
            FullPath = value;
        } else
        {
        if (System.IO.Directory.Exists(value))
            FullPath = value;
        }
    }
}
Now we turn our attention to the TFTPServerProcess.cs file where we have to modify the TFTPServerProcess class. We will add two more properties to the TFTPServerProcess class. Find the declaration for FullPath and then add the two lines in bold below it.
private string FullPath = System.IO.Directory.GetCurrentDirectory();
private string TempPath = System.IO.Directory.GetCurrentDirectory();
private bool IsSharePoint = false; // If this is a sharepoint site
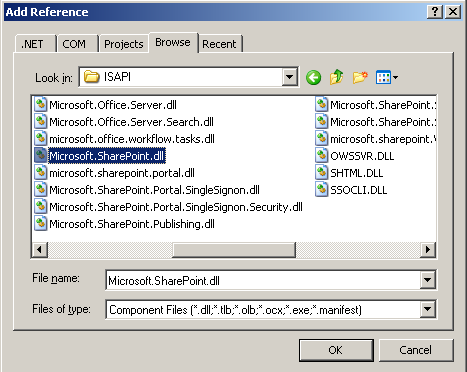
Also while we are here, add a reference to the SharePoint dll.
using Microsoft.SharePoint;
You will find the Microsoft.SharePoint.DLL in C:\Program Files\Common Files\Microsoft Shared\web server extensions on most installations.
Next, we need to add some basic logic to the code where the TFTPServerProcess class is initialised. It is an overloaded class so it is declared twice. To keep it simple, I have added the code to each declaration. If this is a Sharepoint path, it copies the supplied path to a variable called TempPath, and then puts the path of %TEMP% into the FullPath. This is deliberately done so that minimal code changes elsewhere are required (ie the rest of the class expects a variable called FullPath to point to a filesystem, not SharePoint).
Thus, it looks like this (bold):
Declaration 1:
public TFTPServerProcess()

if (FullPath.Contains("http://"))
{
    IsSharePoint = true;
    TempPath = FullPath;
    FullPath = Path.GetTempPath();
}
Declaration 2:
public TFTPServerProcess(string FilePath,
    Level LoggingLevel,
    Level DisplayLevel,
    bool AllowRRQ,
    bool AllowWRQ,
    bool AllowWRQOverwrite,
    bool AllowTFTPOptions,
    bool CheckReadWriteState,
    int ResendInterval,
    int TimeoutInterval,
    Logger logger,
    IPAddress srvaddr)
{

    if (FilePath.Contains("http://"))
    {
        IsSharePoint = true;
        TempPath = FilePath;
        FullPath = Path.GetTempPath();
    }
    else
    {
        FullPath = FilePath;
    }
Finally, we add some code just after the State.Close() method as shown earlier. This takes the downloaded file from %TEMP%, uploads it to SharePoint and then deletes the file from %TEMP%.
State.Close();
if (IsSharePoint)
{
    // Now we add this newly downloaded file to the document library
    try
    {
        SPSite DestSite = new SPSite(TempPath);
        SPWeb DestWeb = DestSite.OpenWeb();
        DestWeb.AllowUnsafeUpdates = true;
        SPFileCollection files = DestWeb.Files;
        FileStream destFile = File.OpenRead(FullPath + @"/" + State.Filename);
        string destFileURL = TempPath + "/" + State.Filename;
        Hashtable MetaDataTable = new Hashtable();
        SPFile destSPFile = files.Add(destFileURL, destFile, MetaDataTable, true);
        destFile.Close();
        // clean up temp file
        File.Delete(FullPath + @"/" + State.Filename);
    }
    catch (Exception ex)
    {
        AddMsg(Level.Verbose, "Problem opening SharePoint site" + TempPath);
        AddMsg(Level.Debug, "Exception: " + ex.Message + "\n" + ex.StackTrace);
    }
}
//This is the last block so go ahead and setup to delete state
StopListener();
Note the HashTable MetaDataTable line. Even though we are not setting any metadata values, I have left in HashTable code because it illustrates how this method allows you to code in the setting of metadata columns in a document library. For example, imagine that the SharePoint document library has a column called “DeviceType”. Your code could say, write the string “Cisco” or “Linksys” to the DeviceType column when the file is uploaded.
So let’s try it out shall we?
Modify your console application to fix the path variable to a SharePoint doc library and then build the solution.
TFTPServer myTFTP = new TFTPServer();
myTFTP.AllowWRQ = true;
myTFTP.AllowWRQOverwrite = true;
myTFTP.Path = "http://tidemo/tftp/backups";
myTFTP.StartListener();
Test the solution and you get a fairly unexciting console window.
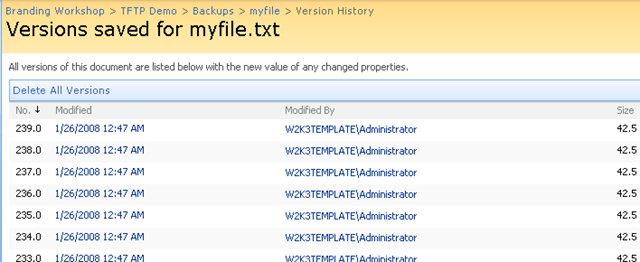
Now we attempt an upload.
C:\>TFTP 192.168.134.129 put c:\myfile.txt
Transfer successful: 43552 bytes in 1 second, 43552 bytes/s
[snip it all working swimmingly]
C:\>TFTP 192.168.134.129 put c:\myfile.txt
Transfer successful: 43552 bytes in 1 second, 43552 bytes/s
Also, this time around, none of the locking/access errors seen with the WEBDAV based methods – WOHOO!. Running this as a service also works fine, using the same freeware utility I used in the last post (ServiceInstaller ). Just compile the solution and then use ServiceInstaller as I described for TFTPD32 in the previous post.
Remember what I said before though, the “tftp service” account MUST have the following privileges on the server:
- The user is a server farm administrator.
- The user has Read and Write permissions on the content database.
- The user is a site collection administrator.
- The user has permissions to access the Windows SharePoint Services site or the SharePoint Server 2007 site through which the code iterates.
Read more at KB Article 935751, but the fundamental issue is that we are not running this code as the IIS process, but rather a separate user account. “If code is executed from a custom Windows-based application or from a custom console application, the code path does not use the Web context that is hosted by the Microsoft Internet Information Services (IIS) application pool. Therefore, specific user permissions are required in SharePoint Server 2007 and in the back-end data source”
Conclusion
The requirement for administrator level privileges sucks. It is not a showstopper, but it sucks nonetheless. So the next post, we will turn our attention to the Webservices methods of uploading data and see if they are any better. Then (finally!) we will get onto more interesting topics like making use of workflow and integrating it with other useful information.
If you are wondering whether you can download my changes and test for yourself, not yet :-). I’m going to contact the author of the TFTPUtil project first, and I have to perform more debugging :-). So right now you will have to do it yourself.
Thanks for reading.
Paul


January 26th, 2008 at 10:10 am |
[…] SharePoint for Cisco Fanboys – Part 1SharePoint for Cisco Fanboys (and developers) -Part 3 […]
January 26th, 2008 at 9:38 pm |
[…] SharePoint for Cisco Fanboys (and developers) -Part 3 […]
January 31st, 2008 at 1:32 am |
[…] Part 3 then looked at a wonderful open source TFTP server written in C# called TFTPUtil. We modified the source code of this TFTP server to use the SharePoint SDK and upload files to a SharePoint document library. […]
February 2nd, 2008 at 7:31 am |
[…] SharePoint for Cisco Fanboys (and developers) -Part 3 […]
February 19th, 2008 at 11:31 pm |
[…] Part 3 then looked at a wonderful open source TFTP server written in C# called TFTPUtil. We modified the source code of this TFTP server to use the SharePoint SDK and upload files to a SharePoint document library. […]
July 4th, 2008 at 3:30 pm |
IJZMe6 mftjrgwhbafc, [url=http://fwzwpdgnjidq.com/]fwzwpdgnjidq[/url], [link=http://aqdoohcifbqa.com/]aqdoohcifbqa[/link], http://tagswtubcbje.com/
October 15th, 2008 at 10:25 pm |
Very cool – thanks for sharing!