PowerApps, Flow and Managed Metadata fields–part 4
Hi and welcome to the final post in this series of articles that examined how we can work around an unsupported function in PowerApps and Flow. Along the journey we have learnt about app principals, the SharePoint REST API and written some crazy JSON.
In this final post, we will tie up a few loose ends. Currently the flow hard-codes the term ID from managed metadata when in fact, we want it to be sent from PowerApps. I will also also give you some insight into handling more complex situations, like multiple managed metadata fields as opposed to a single one.
But first, the (giant) weak spot…
As I write this I if any of you, as you read the first 3 posts, realised the weakness to this method. A strong hint was given in the last post. Recall that the JSON to update a managed metadata field required a term GUID…
{

   "__metadata": { "type": "SP.Data.Coffee_x0020_Shop_x0020_RatingsListItem" },

   "Bean":

   { "__metadata": {"type":"SP.Taxonomy.TaxonomyFieldValue"},

     "TermGuid":"0937fbc2-0dfe-439e-a24f-ba6d13897abd",

     "WssId":"-1"

   }

}
Now right now in PowerApps, there is no managed metadata control. This means you cannot browse a term store like you can in SharePoint. Among other things, one likely reason for this is that there is no REST API support for managed metadata. This has been a constant source of frustration for many as you can see in the 761 votes (as I type this) in uservoice.
What’s the implication of this limitation? For a start, there is no way we can build a REST call that will return us all of the terms in a term set. We have to either hard-code the term GUID’s in our application (ugh) or find another way to get the list of terms (ugh again). One thing that should be noted is that sometimes, hard coding terms and GUID’s isn’t as bad as it sounds. For example, you might have a term set for your corporate offices in certain countries. Since those terms are unlikely to change quickly, one can embed their GUID’s into PowerApps without too much concern.
For the first part of this article, we will use this approach and hard-code our term set of coffee beans into our Powerapp. Then we will modify our flow to expect this parameter from PowerApps.
Back to PowerApps…
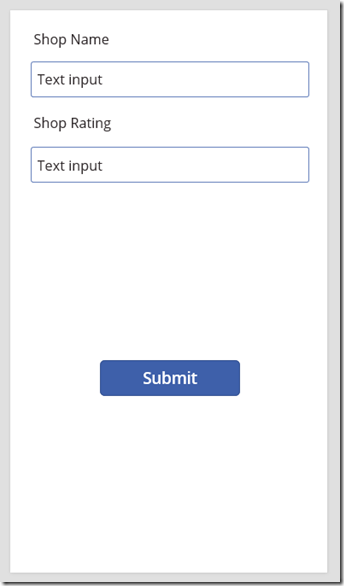
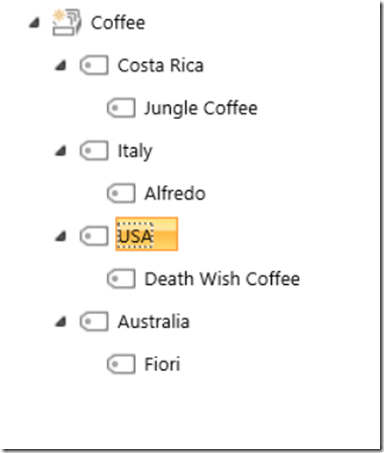
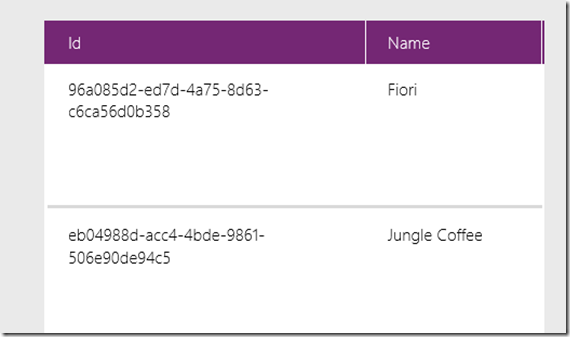
If you go back to the PowerApp we built way back in part 1 and also the term set of coffee beans, they looked like this:
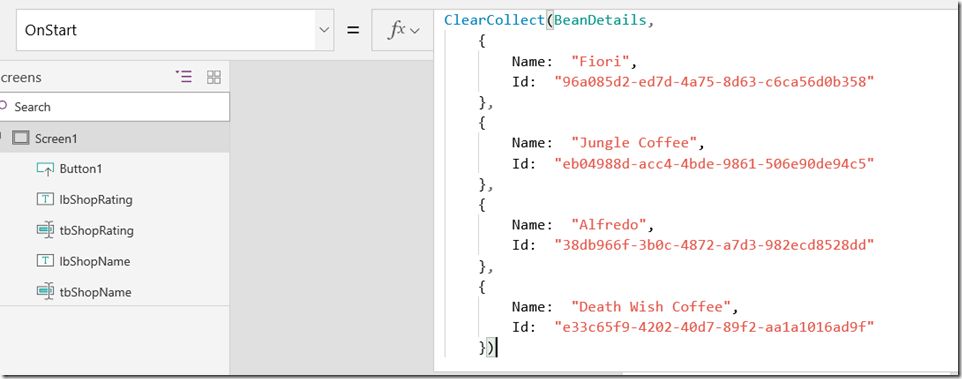
To hardcode our terms into PowerApps, I am going to use the ClearCollect function to create a collection called BeanDetails. I have grabbed the term label and GUID from managed metadata and constructed this function:
ClearCollect(BeanDetails,

{

   Name:  "Fiori",

   Id:  "96a085d2-ed7d-4a75-8d63-c6ca56d0b358"

},

{

   Name:  "Jungle Coffee",

   Id:  "eb04988d-acc4-4bde-9861-506e90de94c5"

},

{

   Name:  "Alfredo",

   Id:  "38db966f-3b0c-4872-a7d3-982ecd8528dd"

},

{

   Name:  "Death Wish Coffee",

   Id:  "e33c65f9-4202-40d7-89f2-aa1a1016ad9f"

})
Next, I use the OnStart property of the screen and paste the ClearCollect function as shown below.
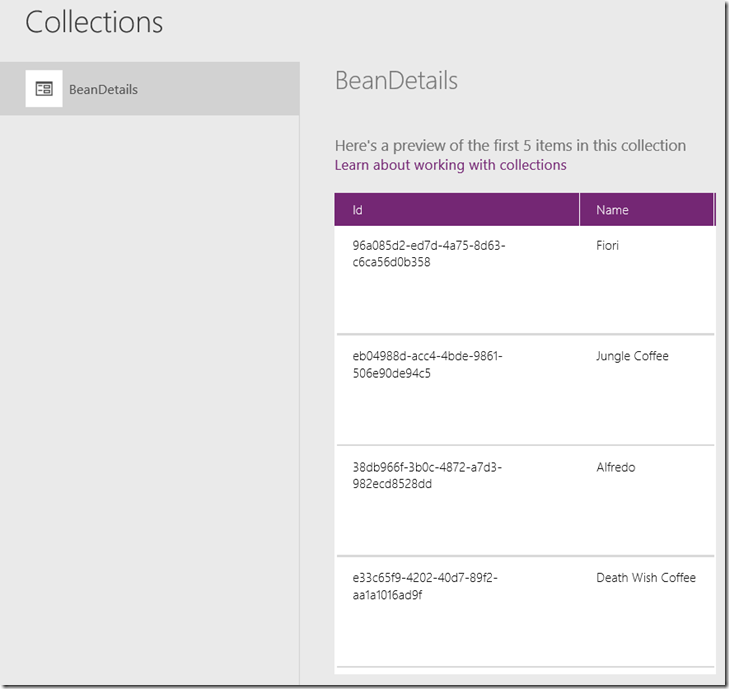
Now you will need to save, close and reopen the app for this to take effect. Alternatively add a temporary button and use the above code on the OnSelect property. Either way, you should be able to see your terms and GUID’s when going to Collections from the File menu…
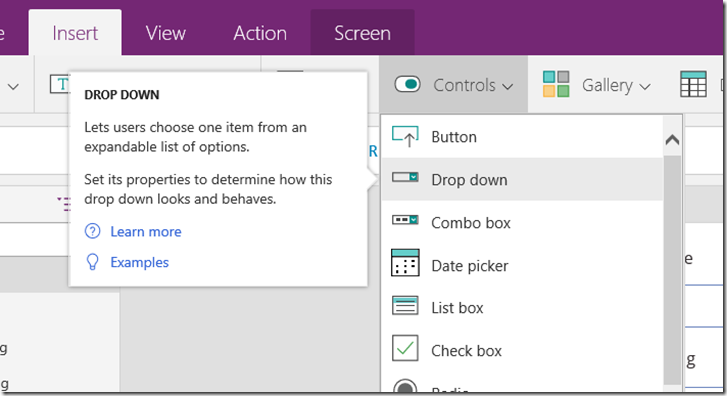
Now that we have our term set stored in PowerApps, let’s add a dropdown list to the screen that lists our coffee beans. Choose Insert > Drop Down and set its Items property to BeanDetails.
Now you should be able to see the choice of beans in the dropdown as shown below:
Next, we have to go back to Flow and modify it to accept a term GUID as a parameter (if you recall in part 3 the term is currently hard-coded).
Tweaking Flow…
If you have followed our Flow adventure so far, you should have a flow action called Set Test Term GUID that looks something like this:
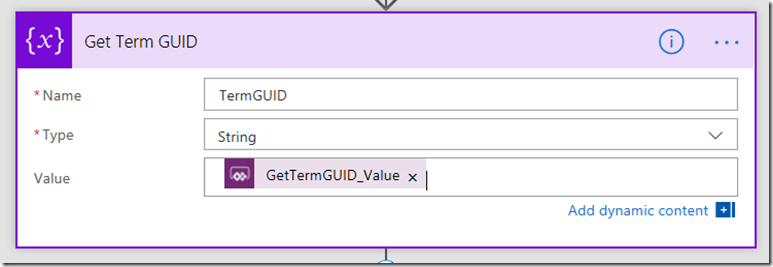
First, rename this flow step to Get Term GUID and then delete the GUID that we previously had in the Value field. From the Dynamic Content pane, choose Ask in PowerApps.
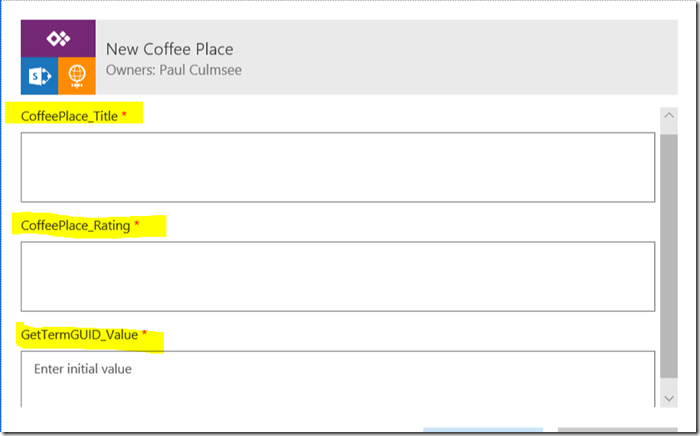
Update your flow and before returning to PowerApps, click the Run Now button. Ensure you are now prompted for three parameters, rather than the original two.
Back to PowerApps…
Now in PowerApps, we have to delete and flow and re-add it so it finds the new parameter we just added.
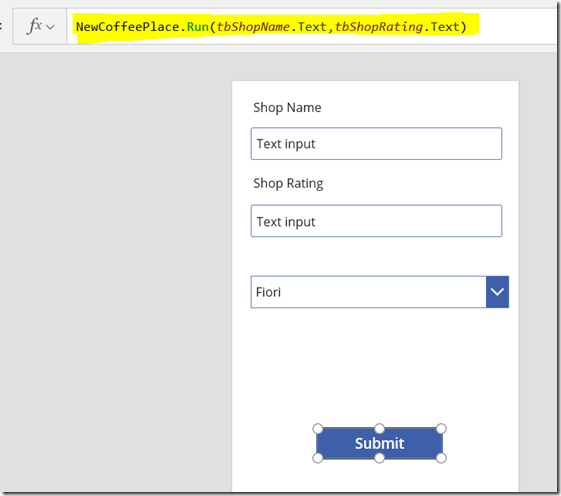
Select the Submit button and review the OnSelect property. It should show the function below…
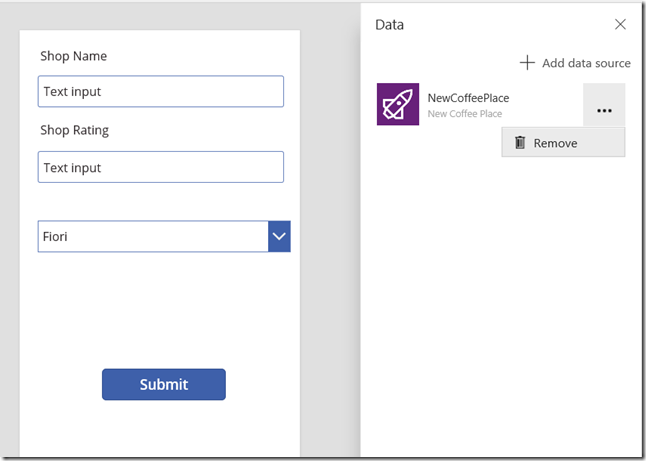
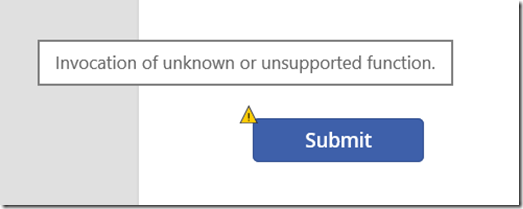
Now go to View > Data Sources and remove the NewCoffeePlace data source. You should see an error appear on the Submit button. It will say “Invocation of unknown or unsupported function”. Makes sense right? After all, we just took away its connection to flow.
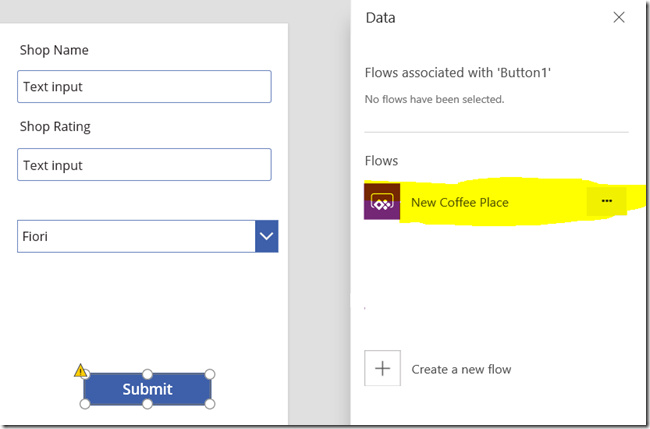
Once again make sure your Submit button is selected, and select Action > Flows. Choose the flow called New Coffee Place. In a few moments, it will ask you to complete the parameters in the formula bar. If you did this correctly, you should see a prompt for a third parameter – the term GUID.
The third parameter will be the GUID that matches the term in the dropdown list. The formula for this is:
Now to explain Dropdown1.Selected.Id, remember that we set the Items property of the dropdown to BeanDetails collection, which has two columns, ID and Name. Essentially, by specifying Dropdown1.Selected.Id, whichever bean name is the currently selected one in the dropdown, the GUID will be sent to Flow…
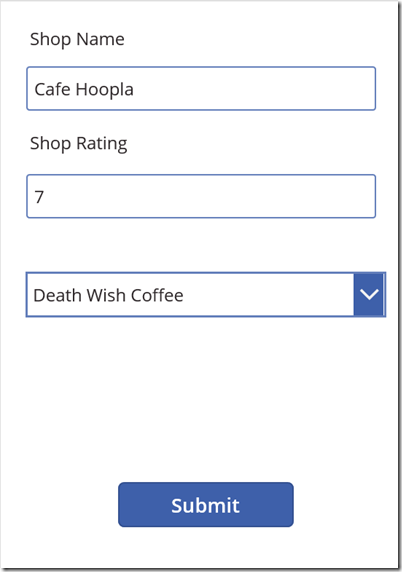
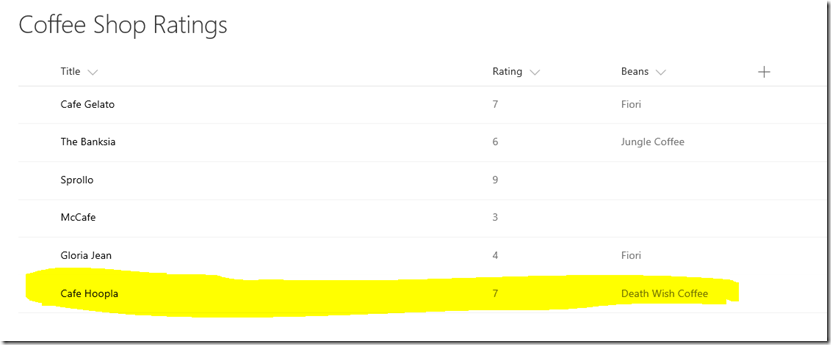
Test this by putting the Powerapp into preview and adding a new café. If all things go to plan, you will see your new entry along with the managed metadata term. Yay!!
Hard-coding sucks – surely there a better way?
At this point you might still be hating the fact we had to hard-code the term ID’s into our app. I can sympathise, as it irritates me too. So is there a way to dynamically load the term set into PowerApps? Turns out there is, provided you use an Azure function along with PnP PowerShell.
I won’t cover this in detail here, unless there is sufficient demand, but I will explain the high level overview.
- Set up an Azure function using PowerShell
- Load PnP PowerShell modules
- Write a PowerShell script to connect to your tenant and pull the terms from the term set.
- Convert the terms to JSON output
- Create a custom connector for PowerApps to consume it.
- Add the custom connector to your app, and pull down the latest term set on startup.
Now I wrote another blog post where I went through another example of using Azure functions with PowerApps, and that covers a lot of detail on steps 1, 2, 5 and 6.
In relation to step 3 and 4, here is some PowerShell code sample to do this that you can use as a starting point. Be warned though… you will need to have some understanding of PnP PowerShell to make sense of it!
Import-Module "D:\home\site\wwwroot\modules\2.19.1710.1\SharePointPnPPowerShellOnline.psd1" -Global

$requestBody = Get-Content $req -Raw | ConvertFrom-Json

$name = $requestBody.name

$username = "paul@culmsee.onmicrosoft.com"

$password = $env:PW;

$siteUrl = "https://culmsee.sharepoint.com"

$secpasswd = ConvertTo-SecureString $password -AsPlainText -Force

$creds = New-Object System.Management.Automation.PSCredential ($username, $secpasswd)

Connect-PnPOnline -url $siteUrl -Credentials $creds

$tg = Get-PnPTermGroup -Identity 2830778b-dbfa-4441-bb45-0cbb97b582e7

$ts = Get-PnPTermSet -TermGroup $tg -Identity "Coffee"

$tl = Get-PnPTerm -TermSet $ts -TermGroup $tg -Includes Terms

foreach ($term in $tl) {

   $terms+=$term.terms

}

$output = $terms | Select Name, Id | ConvertTo-Json

Out-File -Encoding Ascii -FilePath $res -inputObject $output
Like I said, if you are interested in knowing more about this, let me know and if there is sufficient demand, I will make a dedicated blog post about it…
Handling multiple managed metadata columns…
I will end this series by showing you how to handle updating multiple managed metadata columns. This is an advanced topic, but is a good test for developing JSON manipulation skills in Flow. Like the previous section I will cover it in a high level only and leave it to you to figure it out for your environment…
So far we have updated a single column, but my real-world project that led to this series actually had 3 columns that were managed metadata. What made this interesting and tricky was that these columns were entirely optional. The complexity is easy to illustrate by looking at what a JSON payload looks like when updating multiple columns. In the example below, I am updating 3 columns called ProjectType, ProjectPhase and ProjectElement respectively…
{

   "__metadata": {

     "type": "SP.Data.ProjectListItem"

     },

   "ProjectType": {

     "__metadata": {

     "type": "SP.Taxonomy.TaxonomyFieldValue"

     },

     "TermGuid": "d4e4494f-34a4-4278-b0ee-7eba372a3f80",

     "WssId": "-1"

   },

   "ProjectPhase": {

     "__metadata": {

     "type": "SP.Taxonomy.TaxonomyFieldValue"

     },

     "TermGuid": "78d647c7-8b92-4ee0-a29d-22346b1af560",

     "WssId": "-1"

   },

   "ProjectElement": {

     "__metadata": {

     "type": "SP.Taxonomy.TaxonomyFieldValue"

   },

     "TermGuid": "6f9f653f-09ec-4771-9063-676d16734b37",

     "WssId": "-1"

   }

}
Contrast the above example with the one below where only one is updated…
{

   "__metadata": {

     "type": "SP.Data.ProjectListItem"

   },

   "ProjectElement": {

     "__metadata": {

     "type": "SP.Taxonomy.TaxonomyFieldValue"

     },

     "TermGuid": "6f9f653f-09ec-4771-9063-676d16734b37",

     "WssId": "-1"

   }

}
So the trick is to build a flexible enough flow that could generate the JSON needed to update 1, 2 or 3 columns. Without knowing whether the column would have a supplied value, meant we have to find a way to handle any combination. The pattern I ended up using was to build the JSON for each of the columns individually before joining them together. Here’s how…
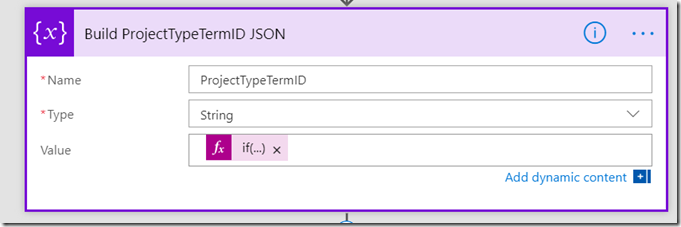
First, I used an Initialize Variable flow action to create the base JSON for each column. The key was to make this conditional, so if the column value was empty, I added an empty string. E.g.
The expression used for the value of this variable was this crazy looking Workflow Definition Language Expression:
if(not(empty(triggerBody()['GetProjectTypeTermID_Value'])), concat('"ProjectType":{"__metadata":{"type":"SP.Taxonomy.TaxonomyFieldValue"},"TermGuid":"',triggerBody()['GetProjectTypeTermID_Value'],'","WssId":"-1"}'),'')
Basically this grabs the term ID for a column (in the above example the columns is called ProjectType). I test if the column value is supplied – which is what the “if(not(empty” bit does. I then then construct the necessary JSON to update that managed metadata column. (Note if you need a refresher on the JSON in this function, review part 3)
I repeat this action for the other columns, and then perform the following steps in Flow to construct the complete JSON…
First I initialize an array variable that I call JsonPayloadArray.
Next I add the outer JSON for a managed metadata update to the array using the Variables – Append to array variable workflow task…
Here I am using the concat() function because I need to use the ListItemEntity variable. Note, if you have forgotten about ListItemEntryFullName property, re-read part 3.
concat('{ "__metadata": { "type": "',variables('ListItemEntity'),'" }')
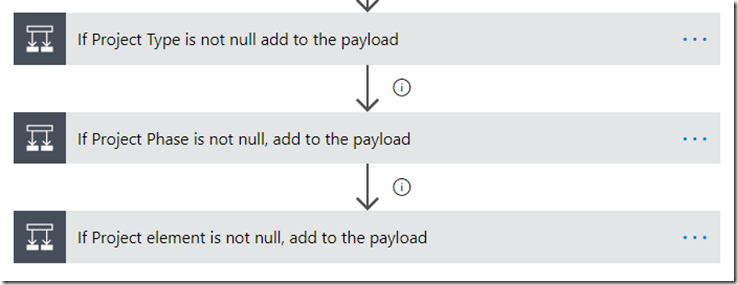
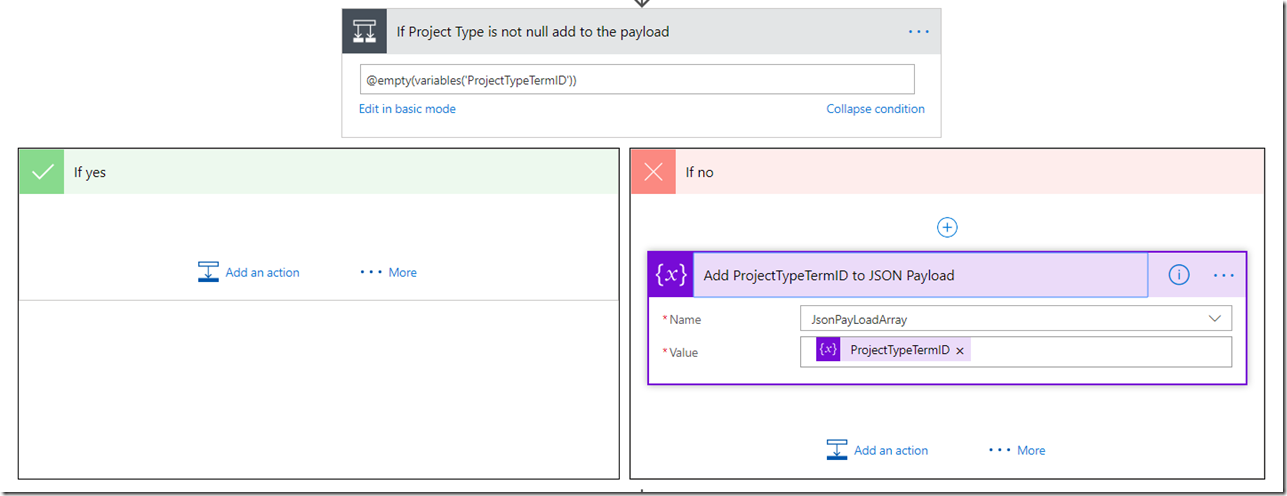
Next, I add the JSON for each column to the array, provided it is not null. I do this by adding a condition for each column.
The first image below shows the three conditions and the second image shows an expanded view of one of them. You can see in the example below, if a ProjectType was supplied, I add the variable initialized in the above steps to the JsonPayloadArray variable….
Finally, I use the Join() function to take this array and turn it back into a single string, delimited by commas. This elegantly handles the situation in JSON where the last name/value pair does not have a comma separator. I do this by initializing a new variable called JsonPayload as a string as follows…
concat(join(variables('JsonPayLoadArray'),','),' } ')
Conclusion
This is one of those series that I know only a few people will get some use out of. Hopefully this whole issue of managed metadata will be gone by year-end and these approaches are not necessary. In any event the techniques outlined in these four posts apply to various other scenarios, so learning about JSON manipulation using Flow, or talking to SharePoint via REST/App principals might come in handy for you in other situations.
As for me, this is probably the geekiest series I have written in a long time! I think I better get back to management consulting now!!
Thanks for reading
Paul Culmsee








Leave a Reply