A Sample OpenAPI/Swagger file for PowerApps
Ever since I posted a video on how to use Flow to upload photos to SharePoint from PowerApps, I get a lot of requests for help with the most mysterious bit – the swagger/openAPI file…
To save you all much pain and suffering, here is a sample file that you can use to get started.
In this post I am going to assume you have watched the video and understand the intent. Here I will simply annotate the file with some notes that will help you customise and extend it for your own purposes.
Note 1: This only works for a HTTP request trigger in Flow
Flow is capable of being called like any other web service. To do so, you have to use the following trigger.

Note that the trigger states clearly “URL will be generated after save”, so the first thing to do is generate that URL…

Once you have done so, it will look like this:

If we break the URL it down, you will see:
- A domain something like <location>.logic.azure.com.
- A URL path of “/workflows/<instance ID>/triggers/manual/paths/invoke” which that identifies your specific workflow ID. Take note of this as you will need it.
- A parameter called api-version with a (at the time of writing) value of “2016-06-01” – eg api-version=2016-06-01
- A parameter called sp with an encoded value of “/triggers/manual/run” = eg sp=%2Ftriggers%2Fmanual%2Frun
- A parameter called sv with a value of 1.0 – eg &sv=1.0
- A parameter called sig with a random string value. eg sig=PeZc-ljtjmJhsz00SD78YrwEohTqlUxpQuc95BQQuwU
In combination, the URL looks as follows with the important bits in bold…
https://<location>.westus.logic.azure.com:443/workflows/<workflow instance ID>/triggers/manual/paths/invoke?api-version=2016-06-01&sp=%2Ftriggers%2Fmanual%2Frun&sv=1.0&sig=<signature>
The bits in bold you will need to know, because they need to be added to the OpenAPI file. Why? because this file is what PowerApps uses to construct a HTTP call to your flow.
So let’s look at the Swagger File…
Note 2: Host, basePath and Path
Open the Swagger file and look for the section called “host”… Replace the section labelled [enter Flow URL here] with the URL from the flow Trigger I mentioned above. eg:
prod-23.westus.logic.azure.com or prod-01.australiasoutheast.logic.azure.com
Note: The image below shows the port number shown (443), this no longer works so omit it altogether as shown in my 2 examples above.
From this…

To this…

Now find the section labelled [enterid here]. This is where the workflow ID goes… so from this:

To this..

Note 3: Double check the sv, api-version and sp parameter sections.
All of the parameters expected by the Flow are specified in the OpenAPI file. You will see it in the “parameters” subsection of the “post” section…eg

Now for reference, each parameter section has:
- name: The name of the parameter as it appears on the URL
- in: specifies whether this parameter is in the query string, header or body. All of the default flow parameters are in the query string.
- default: This is the value to check!! If Flow is updated in future it is very likely this parameter will reflect it. Please do not come to me for support if you have not checked this!
- required: States that this parameter MUST be passed. PowerApps will not allow you to call this Flow without specifying this parameter
- x-ms-visibility: this basically says “use the default value and don’t show the user”. So in effect, the above “required” condition is met, but PowerApps will not ask the user to enter it.
- type: is self-explanatory. It tells PowerApps that the parameter is a string.
Note: For more detail on these parameters go and read the OpenAPI 2.0 standard and Microsoft’s documentation.
Note 4: Update the sig parameter…
The sig parameter is like an API key or a password. You need to paste it as the default value in your file like so…


Note: It is possible to set this up in PowerApps so that it has to be entered when a user adds a datasource. However I am not covering that here.
Note 5: Add (and remove) your own parameters…
This swagger file makes the assumption that PowerApps is going to send a file name for the photo, as well as a description, latitude and longitude. Note that all fields are set to required, but none have default values and the x-ms-visibility parameter is not specified, meaning that PowerApps will prompt the user to enter them.
Using the examples as a guide, add or remove parameters as you see fit.

Note 6: Set your function call names appropriately…
Going back to the top of of the file, update the description to suit the task you are performing. Pay special attention to “Title” and “operationId”, as PowerApps uses these. For example, based on the image below, you will be calling a function called PhotoHandler.UploadPhoto() from PowerApps.

At this point you should be able to save your file and register it as a custom connection and call it from PowerApps.
Note 7: Do not use the word “SharePoint” in your custom connector name
Believe it or not, if you name your custom connector with the word “SharePoint” it will confuse PowerApps completely. For example, consider this custom connector:
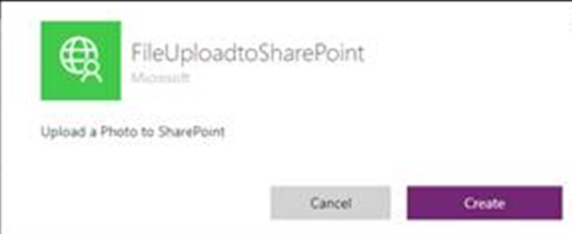
Now look what happens when you try to use it… you get the message “The data did not load correctly. please try again”, with a sub message of “Resource not found”…
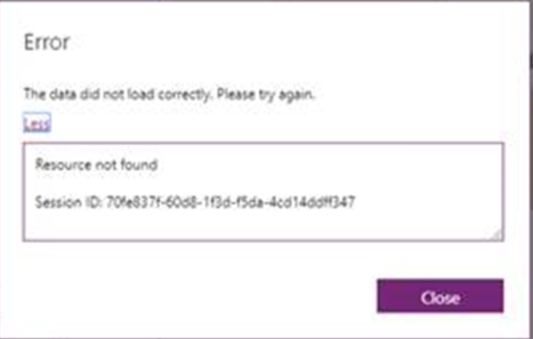
The solution? Name your connector anything, so long as the word SharePoint is not there 🙂
Parting notes…
If you intend to send data back to Flow, you will also have the define the schema for what is returned to Flow in the responses section. I have not added any custom schema in the sample swagger file and discussing it is outside the scope of this article. But in case you are interested, to get you started, below is an example of calling Microsoft’s QNAmaker chatbot service REST API and sending the results back to PowerApps.
"responses": {
  "200": {
    "description": "OK",
    "schema": {
       "type": "object",
       "properties": {
          "answers": {
          "type": "array",
          "uniqueItems": true,
          "minItems": 1,
          "items": {
             "required": [
                "answer",
                "score"
             ],
             "type": "object",
             "properties": {
                "answer": {
                   "type": "string",
                   "minLength": 1
                },
                "questions": {
                   "type": "array",
                   "items": {
                      "type": "string"
                   }
                 },
                 "score": {
                   "type": "number"
                 }
              }
           }
        }
      },
       "required": [
         "answers"
       ]
    }
 }
Thanks for reading
Paul Culmsee


November 19th, 2017 at 4:34 am |
If I could figure this out, I would finally be able to accomplish what I need for my PowerApp. I just want to simply upload a picture to a Sharepoint library, and be able to not only include the picture\’s filename, but also to include the \”job number\” , and \”description\” of the picture so I can sort the Sharepoint columns easily. However, i\’m not having any luck making this happen. I can upload the picture to the library, but when I try to add the other properties of the picture, i\’m not having any luck. Is there anyway that you could help me!?
November 22nd, 2017 at 1:55 pm |
Hi Paul
Thanks for the info. I managed to upload picture successfully,I have one question, the file that was created in the shared point is somehow always pointing to me as the creator (created by in the file property) , regardless who ever is using the apps to upload the file. I understand we dont pass any parameter in the JSON file to define this, as i assume it should be created automatically by Flow using the user profile. Do you know how we can rectify this? this is asmall issuebut im very eager to eliminate it
November 22nd, 2017 at 8:48 pm |
Hi Diana
It’s trickier than it seems. a Custom connector runs in the context of the person who created it. To change this, one has to use some trickery 🙁 Let me know if you want some more detail, but I can confirm its not overly simple…
December 4th, 2017 at 11:35 pm |
Hi Paul,
Great Tutorial, Very appreciative of you taking the time to explain this. I got everything to work as you have described but can’t seem to get the custom connector added to PowerApp’s I get a DLP violation. which is very odd. So i figured I’ll move this over to Azure Function App seemed simple enough. used the Swagger file and OpenAPI to generate a new function on Azure. Do i need to grant
December 27th, 2017 at 2:20 pm |
Hi Paul
Please share on how I could rectify the similar issue as mentioned by Diana. Would love to see the Modified by column showing the user name instead of mine. Also, I could not preview the photos uploaded in SP for unknown reason. Thank you.
December 28th, 2017 at 10:04 am |
The inability to preview is likely that you did not convert the images from base64 back to binary. There is a flow WDL function available for that. As for the updating modified by, that requires to set the AllowUnsafeUpdates property which I assume can be done via REST API. I have not done this so will look into it… eg https://threewill.com/update-sharepoint-online-system-fields-via-csom/
December 29th, 2017 at 10:52 pm |
Thanks Paul – unfortunately I’m getting authentication errors when I try to run the Flow via PowerApps. I’m the only user on my dev tenant so PowerApps is running under the same ID/context as was used to create the Connector.
Could this be related to the Sig? Can this just be any text of any length? I haven’t yet found information on the relevance of Sig.
December 30th, 2017 at 9:16 am |
The sig is *super* important. It is in affect an access token. It is generated as part of the HTTP trigger on your flow. That’s where you get it from…
January 3rd, 2018 at 5:30 am |
Paul, your video on this was excellent and even a Sharepoint/365 noob like me has got it *almost* working!
I’m down to an authentication error when I click “New” and start filling out the form. I saw elsewhere that I need to make sure the parameters are correct. They all have default values that were pulled from the URL and set to required and appropriate ones set to Internal (all but filename, right?)
The error persists but I have no other context. Do you have any other suggestions on what might be causing this error? Thanks!
January 3rd, 2018 at 8:45 am |
remove :443 from the host section of the swagger file. That seems to be a recent change…
January 4th, 2018 at 3:09 am |
Paul, thank you for your response. I’ve removed that but still have the same authentication error.
Do I need to rebuild the connector from scratch after I remove the :443 from the file, or can I just edit the connector and remove it from the Host field and update?
Maybe there’s another issue.
January 4th, 2018 at 6:46 am |
send me your file or contact me via linkedin and I’ll send you a working file to compare…
January 8th, 2018 at 10:43 am |
Hi Paul,
This is great. I watched your youtube video on submitting a photo through powerapps, which then triggered FLOW to save the record into Sharepoint.
I do have a question though in regards to error handling. In the event that FLOW stops/is not turned on, is there a way for powerapps/custom connector using the Open API file you shared above, that we can use to inform a user of the error message received (if there is one)? Do you know a way that we can reference the JSON body response from the connector in PowerApps for this?
January 9th, 2018 at 8:05 am |
Hi,
The link to your swagger file is broken. Do you mind updating it?
January 9th, 2018 at 8:08 am |
Hi Anthony
I just tested it and it works fine. It is possible your company is blocking onedrive?
Paul
January 11th, 2018 at 4:54 pm |
Hi Paul, great video thank you very much. However I am stuck creating a custom connector I get this error
The request failed with error: ‘{“Code”:”ValidationError”,”Message”:”One or more fields contain incorrect values:”,”Target”:null,”Details”:[{“Message”:”One or more fields contain incorrect values:”},{“Code”:”ValidationError”},{“ErrorEntity”:{“ExtendedCode”:”Entity field:apiDefinitionUrl”,”InnerErrors”:[{“Parameters”:[“value[0].responses[0].representations[0].contentType”,”apiDefinitionUrl”],”Code”:”ValidationError”,”Message”:”‘contentType’ should not be empty”}],”Code”:”ValidationError”,”Message”:”One or more fields contain incorrect values}}],”Innererror”:null}. The tracking Id is ‘634a9933-5d77-41ca-9e23-b56a5bfc9bfe’.
Andy ideas please?
January 16th, 2018 at 11:20 pm |
Hi Paul,
I get the same Error Message as James when I try to make a custom connector. Any help would be appreciated!
January 18th, 2018 at 8:24 am |
It is telling you the API definition URL is empty. You need to edit my OpenAPI file and update the URL before you load it. Double (triple) check you have the URL right 🙂
January 18th, 2018 at 8:25 am |
Oh, we just found out that adding :443 to the end of the URL for host might be the culprit. Try removing “:443”
January 22nd, 2018 at 11:06 pm |
Hi Paul, I have followed your instructions and despite a sucessful result, I am getting the following error even though the photo uploads to SharePoint and all the correct metadata gets added!
PhotoHandler.UploadPhoto failed: Exception message: ‘Unknown error.’ Exception call stack: Error at d (https://paplayercdn-int.azureedge.net/appresources/08ma4a1cra84f/js/Core.js:1:15269) at f (https://paplayercdn-int.azureedge.net/appresources/08ma4a1cra84f/js/Core.js:1:15377) at Object.n [as checkNonEmpty] (https://paplayercdn-int.azureedge.net/appresources/08ma4a1cra84f/js/Core.js:1:14697) at Function.n.createFromArrayBuffer (https://paplayercdn-int.azureedge.net/appresources/
Any ideas?
January 23rd, 2018 at 7:14 pm |
Hi @chris, I really need to see your custom connector and try it on this end… Never seen that error before.
February 2nd, 2018 at 6:05 pm |
Hi Paul,
if followed your instructions. But by creating a custom connector i got this message.
Fehler bei der Anforderung: {“Code”:”ValidationError”,”Message”:”One or more fields contain incorrect values:”,”Target”:null,”Details”:[{“Message”:”One or more fields contain incorrect values:”},{“Code”:”ValidationError”},{“ErrorEntity”:{“ExtendedCode”:”Entity field: apiDefinitionUrl”,”InnerErrors”:[{“Parameters”:[“contract”,”apiDefinitionUrl”],”Code”:”ValidationError”,”Message”:”Parsing error(s): Invalid type. Expected String but got Null. Path ‘paths./{connectionId}/090dc30a6e25408daf458a9a03084e85/triggers/manual/paths/invoke.post.produces[0]’, line 31, position 14.”}],”Code”:”ValidationError”,”Message”:”One or more fields contain incorrect values:”}}],”Innererror”:null}. Die Nachverfolgungs-ID lautet “52ab2
– Tried removing “:443
– Double (triple) checked the URL
Can you give me a hint?
Thanks bevorehand
February 2nd, 2018 at 10:02 pm |
Hi, I’m having the same problem. Same error. Tried the fixes mentioned but nothing works.
February 3rd, 2018 at 2:10 am |
new to this so any help with the procedure / steps to have the other parameters (lat, long, desc) populated in the library would be most helpful. other than that it works great.
February 3rd, 2018 at 2:19 am |
Hi – Is there any way to use this with other file types? Word, PDF, etc.
Thanks!
February 3rd, 2018 at 5:22 am |
got it using the update file properties. linked from your other post http://www.cleverworkarounds.com/2017/10/11/the-new-current-best-way-to-update-sharepoint-document-metadata-using-flow/
February 5th, 2018 at 6:34 pm |
Thanks for the great explanation in the video and the swagger file. In my case, the SharePoint site where the user wants to upload the file is not fixed and is decided in the PowerApp form by the user himself, in which case I cannot use the SP connector in Flow to create file in the Library 🙁 Guess I’ll have to go down the Azure function route !!
February 6th, 2018 at 9:21 pm |
Hey Alex and Andri,
I ran into the same problem and didn’t understand why the error refers to the “apiDefinitionURL” since this didn’t seem to be the problem. It’s a null-value he doesn’t like.
Solution:
Find…
“produces”:[
null
]
…in your code and delete the “null” to make it look like this:
“produces”:[ ]
Hope this helps – it did for me 🙂
February 7th, 2018 at 5:55 pm |
Thank you Christoph,
Im a step forward, but now accures another error.
{„error“:{„code“:“AuthorizationFailed“,“message“:“you do not have the permissions to provide this action \“run“ for the section \“/triggers/manual/paths/\“. …
any body an idea?
Thanks
February 7th, 2018 at 6:17 pm |
That worked, I’ve got my connector. But the photos don’t save to my sharepoint now. They did when I tested with Postman, but the app doesn’t send the photos. Argh, so close!
February 7th, 2018 at 6:37 pm |
I can see now that when adding the ForAll(PhotoList,PhototoSP.PostPhoto(filename,content-type,file) line in onSelect, PowerApps prompts me for an additional variable, content-type.
February 7th, 2018 at 7:05 pm |
Deleted content-type from Header in the custom connector to solve this.
Now getting “Authorization failed” on PostPhotoToSP.PostPhoto, “the authentication credentials are not valid”
February 7th, 2018 at 9:04 pm |
I have the same problem.
February 7th, 2018 at 11:20 pm |
Could be this problem coused by the licence type?
Because my license doesn’t support the use of gateways. To use this feature, start a trial.
February 8th, 2018 at 11:25 pm |
RIght Now i get it Working. Removing “Null” and Content-type.
Thanks a lot for the Video and this Comments here.
Very Good Job!!
February 13th, 2018 at 3:46 pm |
Hello Andri and Alex,
Concerning the authentication error:
Do you have the right path? (the string from your Flow-URL in the paths-object?)
“paths”:{
“/XXXXXXXXXXXXXXXXXXXXXXXXX/triggers/manual/paths/invoke”
…..
}
Is the first thing that comes to my mind.
February 22nd, 2018 at 6:33 pm |
You are just Awesome man!! Just followed your path and got Success!!
March 11th, 2018 at 9:36 am |
Hi Paul.I followed the steps in your Youtube video and got the flow to work. As we are now able to save photos into SharePoint with its title, how could i retrieve the saved images and view it back in PowerApps now ? Thank you.
March 11th, 2018 at 9:40 am |
here is the quick answer as I am working to a project deadline at present. I have an example of how to do this in my activity feed series of videos. But basically at present you also need to write to a list with the URL of the image. Make sure in SharePoint it is a HTML column type formatted as picture…
http://www.cleverworkarounds.com/2018/01/04/how-to-make-a-powerapps-activity-feed-via-sharepoint-search-part-3/
March 11th, 2018 at 11:30 pm |
I tried to work around using a new action “Update File Properties” after “Create File” in Flow but the maximum allowable size to update is only 2mb while the image base64 data exceeds the limit 🙁
March 12th, 2018 at 8:09 am |
Hmm that makes no sense. That action is not designed to update the file at all – you pass it the ID of the file. It is designed to update metadata like Title and any other columns you might have added to the file in SharePoint…
March 12th, 2018 at 7:37 pm |
My attempt was to first create file by passing the filename and file content (through your step by step guide) to SharePoint, then I will update another column of this created item with base64 metadata of all my images. My intention was to filter the ID and call these base64 metadata in PowerApps to view the saved images and this approach only worked for images smaller than 2mb.
March 13th, 2018 at 4:59 pm |
Put the images where they belong and instead of base64, hyperlink them in your list. PowerApps can handle that natively…
April 10th, 2018 at 3:01 pm |
Paul,
I have followed your step by step approach to save a image from PowerApps to SP. It worked perfectly on web version and iOS. However its failing to save image on Latest Android OS version 7.1 onward.
Error Message :
Contract failure: Construction of a PABinary should always result in a valid instance.
Please advise me on how to resolve this issue.
April 13th, 2018 at 3:29 am |
Paul,
I have another question, how can we save image url into Sharepoint Picture column from Powerapps. At this moment i am able to save image url into Sharepoint Hyperlink column only.
Please advice workaround .
Thanks,
April 14th, 2018 at 10:27 pm |
@Rajamani – this is a bug in the latest PowerApps version released on April 7 onwards on Android as well as on IOS. So don’t upgrade or downgrade on your phone. It works manually or by using the browser, so it must be the powerapp itself.I’m also searching for a solution…mentioned that to Microsoft and some said they look into….but who knows…
April 14th, 2018 at 10:44 pm |
@Rajamani – pls post/check there, the Microosft guy said he’s looking into it…
https://stackoverflow.com/questions/49803583/powerapps-failure-starting-on-april-7th-after-upgrade-of-app-on-ios-android
April 14th, 2018 at 10:52 pm |
Thanks Paul for your quick response.
April 16th, 2018 at 8:03 pm |
Hello Paul,
wonderful article there,
now i want to achieve the same but with a small twist ….i want to read text from business cards , populate the name phone number and email then create a Lead record in Dynamics 365
At least i know my way around power apps but the OCRText function is really beating me down on how to it set up
Kindly help
April 27th, 2018 at 7:41 pm |
Notifier