Back to Cleverworkarounds mainpage
 

Optimising SSP User Profile Import – Part 2

In the previous post, we modified the Shared Services Provider to include the Active Directory attribute “country” (code C) in the SharePoint User Profile settings. Now we need to configure a full import from Active Directory and create a test audience to see that it is working.

Task 2: Configuring User Profile Import

Now we need to configure a full import (and the schedule for continual import)

In SharePoint central admin, navigate to Shared Services Administration: User Profile and Properties > Configure Profile Import

  • Import profile data from: Current Domain
  • Default Access Account: <choose an account with Read access to AD>
  • Full Import Schedule: 3:00AM Saturday
  • Incremental Import Schedule: 12:00am every day
  • Now click on “Start Full Import”
  • Click Refresh to review status and then click “Start Full Import”


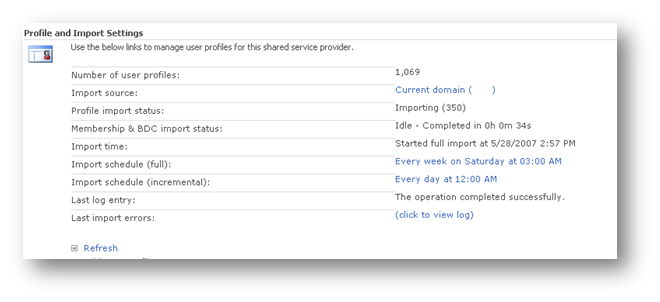
  • When the import has completed, it will show a status of idle.


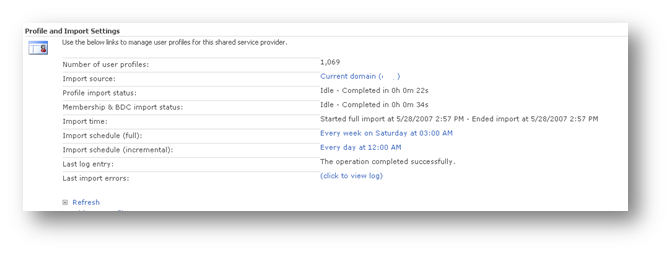
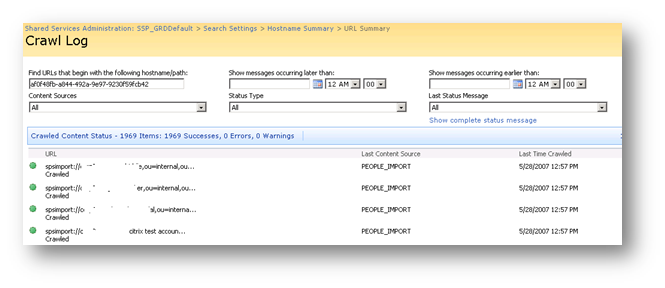
  • Optionally click the “View Log” to examine how the import performed..


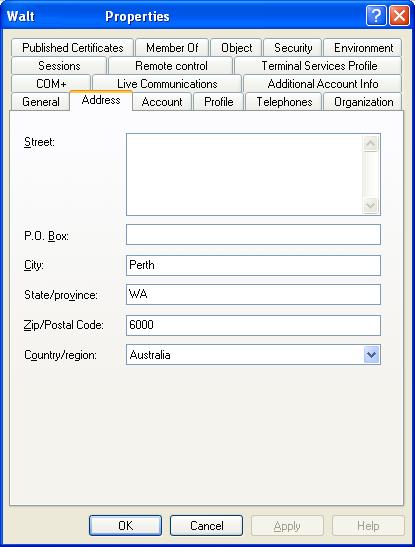
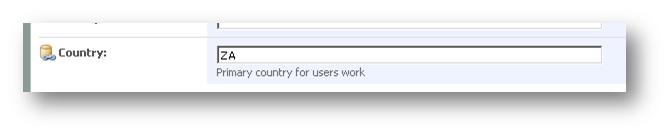
  • Now click “View User Profiles” and choose a user that you know has the country code set in Active Directory.


Now we have confirmed that we can import country information into SharePoint profiles. We now create audiences based on this attribute.

Task 3: Create the Audience

This section assumes that the user profile import has been successfully been configured and imported.

Shared Services Administration: Manage Audiences

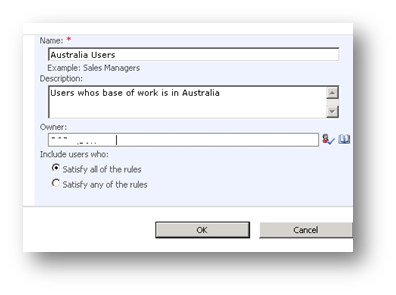
  • Click “Create Audience”
  • Name: “Australia Users”
  • Description: Users who’s base of work is in Australia
  • Owner: <choose an account to be the administrative owner of this audience>
  • Include users who: Satisfy all of the rules


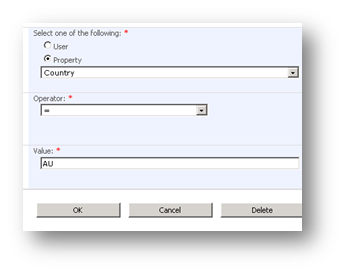
Now we add our rule to be satisfied:

  • Operand/property: Country
  • Operator: =
  • Value: AU


Once the rule has been added, we can we see the audience summary:


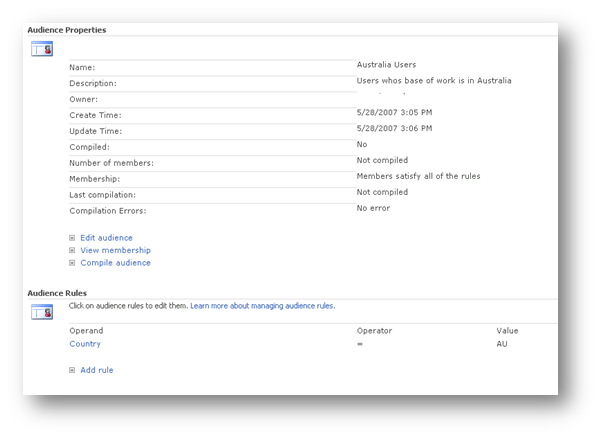
  • Click “Compile Audience”. This will attempt to now filter the imported profiles for Country that equals “AU”. In the example below, 87 users matched this criteria


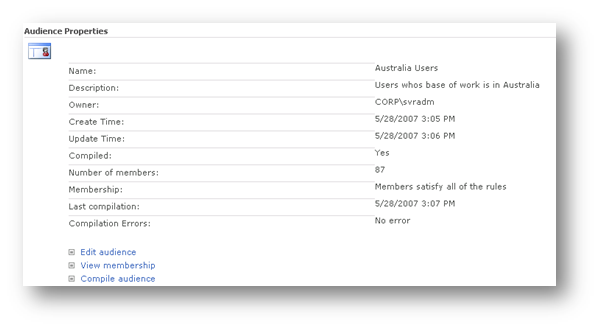
  • Click View membership to confirm country matches


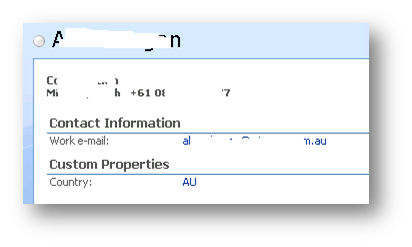
  • Note the custom properties showing the country code as “AU”.
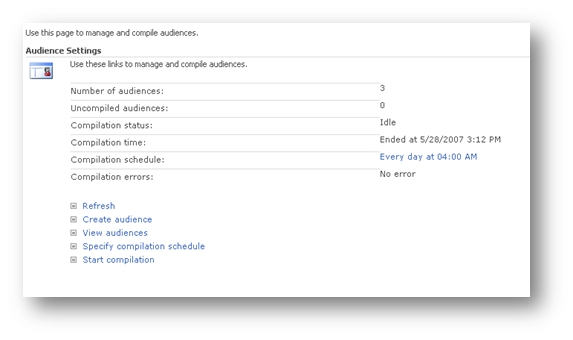
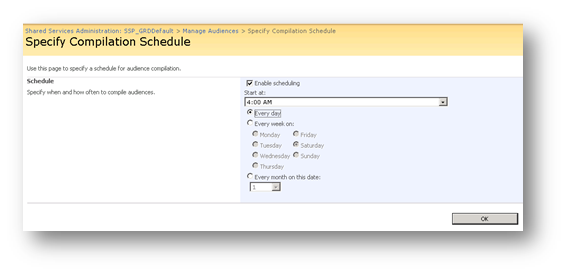
  • Finally, click on “Specify Compilation Schedule”. Set schedule to 4:00am every day (ensures that it takes place after the user profile import)


  • Review the summary. In this example, I also added an audience for another country, and there is always the default audience of all users, so there is a total of 3.


Optimising SSP User Profile Import – Part 1

This post discusses SharePoint User Profiles. In SharePoint 2007, each user has their own profile stored about them and includes properties such as a user’s title, e-mail, distribution list membership, and contact details. It is by default (and required to) import this information from Active Directory, but it can also import from other sources, as well as be manually created directly inside SharePoint. User profiles can be customized in SharePoint to include additional details, such as country of work. User profiles are used throughout SharePoint Server 2007 to disseminate or target information to users, help users locate colleagues with similar interests, and return search results on people.

In this post, I will demonstrate how to import a user’s country in Active Directory into SharePoint as by default, SharePoint does not import this from AD. I am assuming that you have some Active Directory familiarity.

A users country of work is stored and tracked in Active Directory as shown below

ad.JPG

Note the “Country/region” field above.

A component of each Shared Service provider (that I will cover another time) is “User profile import’. By default this is not enabled and if enabled, many Active Directory fields are imported into SharePoint. As previously mentioned however, the user’s country is not a field that is imported by default.

Thus we have three tasks to perform.

  1. Configure the ‘country’ to be imported from Active Directory into SharePoint.
  2. Configure the scheduled import of Active Directory into SharePoint profiles
  3. Create two audiences based on country

Task 1: Add Country to be imported from Active Directory

The first thing we had to do is examine Active directory and find out the distinguished name (DN) of the ‘Country’ property attached to a user. This was performed on a domain controller using the LDP utility.

Click ‘Connection’ Menu and choose connect. Connect to a domain controller.

ldp1.JPG

Click ‘Connection’ menu and choose ‘bind’. Enter domain credentials to bind to Active Directory so its content can be queried.

ldp2.JPG

Click the ‘View’ menu and choose ‘Tree’. Choose your domain in DN format

(eg “DC=co,DC=group,DC=net” for co.group.net)

ldp3.JPG

Now you should be able to browse Active Directory via LDAP view as shown below (image edited to protect the innocent).

ldp4.JPG

Now navigate to the OU that your user accounts reside.

Click on the user account and examine the right pane of LDP. All of the properties associated with that user will be listed. For example here is the left pane showing the user account in an OU called “Internal”

ldp5.JPG

Note to readers: No there is no “Alan Boon” you have witnessed my 3l1t3 mspaint skillz :-)

Expanding base ‘CN=Alan Boon,OU=Internal,OU=Accounts,OU=za,DC=co,DC=group,DC=net’…

Result <0>: (null)Matched DNs: Getting 1 entries:>>

Dn: CN=Alan Boon,OU=Internal,OU=Accounts,OU=za,DC=co,DC=group,DC=net

4> objectClass: top; person; organizationalPerson; user;

1> cn: Alan Boon;

1> sn: Boon;

1> c: ZA;

[snip]

1> mail: alan.boon@somewhere.else

If we examine the output above we can see that line C:ZA.  I have it marked in bold. It shows that the country is South Africa (ZA). Thus, the name of the country property is simply “C”.

So now we need to add the country property to the SharePoint user profile In Central Administration, navigate to Shared Services Administration: SSP_Default > User Profile and Properties

Click “Add profile property” and here are the parameters I entered.

  • Property Settings/Name: Country
  • Property Settings/Display Name: Country
  • Property Settings/Type: String
  • Property Settings/length: 25
  • Property Settings/Allow multiple values: unchecked
  • Property Settings/Allow Choice list: unchecked
  • User Description/Description: Primary country for users work
  • Policy Settings/Policy Setting: Optional
  • Policy Settings/Default Privacy Setting: Everyone
  • Edit Settings: Do not allow users to edit values for this property
  • Display Settings/ Show in the profile properties section of the user’s profile page: checked
  • Display Settings/Show on the edit details page: Checked
  • Display Settings/Show changes in the colleague Tracker Web Part: Checked
  • Search Settings/Alias: unchecked
  • SearchSettings/Indexed: checked
  • Property Import Mapping/Source Data Connection: Master Connection
  • Property Import Mapping/Data source field to map: c

Note the last parameter matches the field name we discovered from Active Directory.

Now we click OK and we can now examine a user profile and see ‘Country’ listed under ‘Custom properties’.

ldp8.JPG

Great! Thats it for now. In part 2 I will cover the user profile import and audience creation based on country. (thats the easy part)


Poor windows explorer view performance in SharePoint?

I found that a 5 server MOSS07 farm was very sluggish in terms of windows explorer view performance compared to a single farm running on a vmware box. This seemed on the surface to make no sense, but some further digging uncovered the issue. I was using a host header and the site name was not the same name as the server itself. However in my VMware farm, the server and site names were the same.

Eg

My WFE server was WEBSERVER1

My Web site was MYWEBSITE

The problem as it turns out is with Windows Server 2003, SMB, and strict name checking.

XP Clients, will by default, use the SMB redirector before using the WebDav redirector. But by default, Windows Server 2003 does not respond to SMB queries that use a server name other than the server’s true NetBIOS name or FQDN. If this is attempted, the server will respond with a STATUS_DUPLICATE_NAME error that looks like this in a Network Monitor trace:

SMB: C session setup & X
SMB: R session setup & X
SMB: C tree connect & X, Share = \\WWW.ADATUM.COM\IPC$
SMB: R tree connect & X – NT error, System, Error, Code = (189) STATUS_DUPLICATE_NAME

Because of the robust nature of the Microsoft SMB implementation, the client will attempt this connection many more times before failing. This can cause significant delays in rendering of the Explorer View.

We can force the server to respond to SMB requests regardless of the server name being used and thereby improving the performance of the SMB portion of the Explorer View protocol negotiation. While this will not result in a successful SMB connection being created, it will result in failing over to WebDAV much faster.

KB article 281308, “Connecting to SMB share on a Windows 2000-based computer or a Windows Server 2003-based computer may not work with an alias name” describes how to use the DisableStrictNameChecking registry key to resolve this problem.

As per the KB article http://support.microsoft.com/kb/281308 I changed the registry key on the affected server.

Start Registry Editor (Regedt32.exe).

  • Locate and click the following key in the registry: HKEY_LOCAL_MACHINE\System\CurrentControlSet\Services\LanmanServer\Parameters
  • On the Edit menu, click Add Value, and then add the following registry value:
  • Value name: DisableStrictNameChecking
  • Data type: REG_DWORD
  • Radix: Decimal
  • Value: 1 
  • Quit Registry Editor.
  • Restart your computer. 


Careful with pre-requisite SharePoint Features

After a web designer applied a new master page to a site, he killed the site. We saw these messages (debug logging was enabled on the site)

Server Error in ‘/’ Application.

——————————————————————————–

Compilation Error

Description: An error occurred during the compilation of a resource required to service this request. Please review the following specific error details and modify your source code appropriately.

Continue reading “Careful with pre-requisite SharePoint Features”


Today is: Wednesday 3 June 2026 -