Optimising SSP User Profile Import – Part 1
This post discusses SharePoint User Profiles. In SharePoint 2007, each user has their own profile stored about them and includes properties such as a user’s title, e-mail, distribution list membership, and contact details. It is by default (and required to) import this information from Active Directory, but it can also import from other sources, as well as be manually created directly inside SharePoint. User profiles can be customized in SharePoint to include additional details, such as country of work. User profiles are used throughout SharePoint Server 2007 to disseminate or target information to users, help users locate colleagues with similar interests, and return search results on people.
In this post, I will demonstrate how to import a user’s country in Active Directory into SharePoint as by default, SharePoint does not import this from AD. I am assuming that you have some Active Directory familiarity.
A users country of work is stored and tracked in Active Directory as shown below
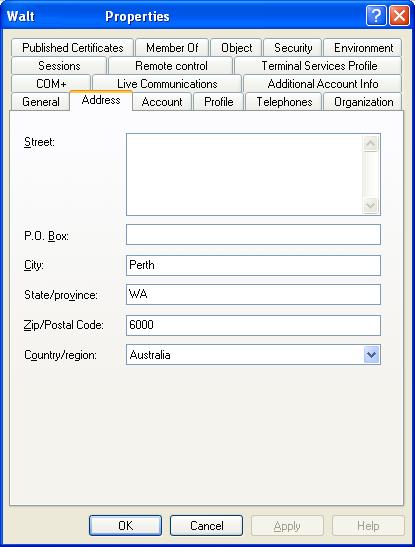
Note the “Country/region” field above.
A component of each Shared Service provider (that I will cover another time) is “User profile import’. By default this is not enabled and if enabled, many Active Directory fields are imported into SharePoint. As previously mentioned however, the user’s country is not a field that is imported by default.
Thus we have three tasks to perform.
- Configure the ‘country’ to be imported from Active Directory into SharePoint.
- Configure the scheduled import of Active Directory into SharePoint profiles
- Create two audiences based on country
Task 1: Add Country to be imported from Active Directory
The first thing we had to do is examine Active directory and find out the distinguished name (DN) of the ‘Country’ property attached to a user. This was performed on a domain controller using the LDP utility.
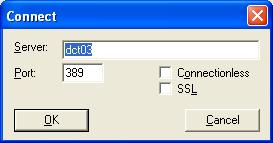
Click ‘Connection’ Menu and choose connect. Connect to a domain controller.
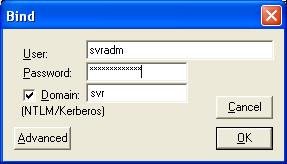
Click ‘Connection’ menu and choose ‘bind’. Enter domain credentials to bind to Active Directory so its content can be queried.
Click the ‘View’ menu and choose ‘Tree’. Choose your domain in DN format
(eg “DC=co,DC=group,DC=net” for co.group.net)

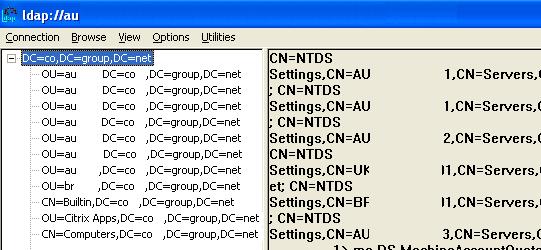
Now you should be able to browse Active Directory via LDAP view as shown below (image edited to protect the innocent).
Now navigate to the OU that your user accounts reside.
Click on the user account and examine the right pane of LDP. All of the properties associated with that user will be listed. For example here is the left pane showing the user account in an OU called “Internal”

Note to readers: No there is no “Alan Boon” you have witnessed my 3l1t3 mspaint skillz ![]()
Expanding base ‘CN=Alan Boon,OU=Internal,OU=Accounts,OU=za,DC=co,DC=group,DC=net’…
Result <0>: (null)Matched DNs: Getting 1 entries:>>
Dn: CN=Alan Boon,OU=Internal,OU=Accounts,OU=za,DC=co,DC=group,DC=net
4> objectClass: top; person; organizationalPerson; user;
1> cn: Alan Boon;
1> sn: Boon;
1> c: ZA;
[snip]
1> mail: alan.boon@somewhere.else
If we examine the output above we can see that line C:ZA. I have it marked in bold. It shows that the country is South Africa (ZA). Thus, the name of the country property is simply “C”.
So now we need to add the country property to the SharePoint user profile In Central Administration, navigate to Shared Services Administration: SSP_Default > User Profile and Properties
Click “Add profile property” and here are the parameters I entered.
- Property Settings/Name: Country
- Property Settings/Display Name: Country
- Property Settings/Type: String
- Property Settings/length: 25
- Property Settings/Allow multiple values: unchecked
- Property Settings/Allow Choice list: unchecked
- User Description/Description: Primary country for users work
- Policy Settings/Policy Setting: Optional
- Policy Settings/Default Privacy Setting: Everyone
- Edit Settings: Do not allow users to edit values for this property
- Display Settings/ Show in the profile properties section of the user’s profile page: checked
- Display Settings/Show on the edit details page: Checked
- Display Settings/Show changes in the colleague Tracker Web Part: Checked
- Search Settings/Alias: unchecked
- SearchSettings/Indexed: checked
- Property Import Mapping/Source Data Connection: Master Connection
- Property Import Mapping/Data source field to map: c
Note the last parameter matches the field name we discovered from Active Directory.
Now we click OK and we can now examine a user profile and see ‘Country’ listed under ‘Custom properties’.

Great! Thats it for now. In part 2 I will cover the user profile import and audience creation based on country. (thats the easy part)


September 26th, 2008 at 8:07 pm |
Absolutely excellent article, which took me 4 months to dig up.
This should be advertised all around, as it was damn hard to figure everything out by myself.
This helped a great deal.
Thank you very much.
Best regards,
V
December 30th, 2011 at 1:14 am |
Where has this article been? Absolutely amazing. Thank you for taking the time to put this all together