If you check my introductory post, I discussed the concept of SharePoint features in a real world scenario. In this post I actually show an example of features from end to end, to illustrate that scenario.
So, first to recap the scenario, slightly simplified from my other post: A webdesigner has a new CSS file that is the new corporate branding standard. They must package it up as a ‘feature’. A misunderstood sysadmin nazi installs the feature onto the SharePoint farm once only, then sends a mail to the 35 site collection owners advising them to activate the "branding feature" on their sites. Each site collection owner who does so has the identical configuration modified so it is all nice and consistent.
Now also before we start, this demo requires the "Office SharePoint Server Publishing Infrastructure" feature to be enabled. If this is not enabled, the "Style Library" document library that we rely on, will not exist.

Step 1: Create the Feature
Our web designer of course has a development box so they can’t kill production. On this box they navigate to the
C:\Program Files\Common Files\Microsoft Shared\web server extensions\12\TEMPLATE\FEATURES
and create a new folder called CustomBranding
C:\Program Files\Common Files\Microsoft Shared\web server extensions\12\TEMPLATE\FEATURES\CustomBranding
Inside this folder we place our CSS file (in this case, called CustomBrand.CSS) and we create a file called FEATURE.XML.
Now in real life, you will copy a FEATURE.XML from one of the many other features here and work off that. But in our case, we will just type it in. The contents of FEATURE.XML is this:
<Feature Id="01c34560-6561-11dc-8314-0800200c9a66″
Title="Pimp my SharePoint"
Description="This is a feature that adds a new sexy CSS"
Version="1.0.0.0″
Scope="Site"
xmlns="http://schemas.microsoft.com/sharepoint/">
<ElementManifests>
<ElementManifest Location="ProvisionedFiles.xml"/>
</ElementManifests>
</Feature>
So we have a <feature> element and inside that an <elementmanifests> element. The required parameters for the <feature> element are below (lifted straight from MSDN)
| Attribute |
Description |
| Description |
Optional String. Returns a longer representation of what the Feature does. |
| Id |
Required Text. Contains the globally unique identifier (GUID) for the Feature. |
| Scope |
Required Text. Can contain one of the following values: Farm (farm), WebApplication (Web application), Site (site collection), Web (Web site). |
| Title |
Optional Text. Returns the title of the Feature. Limited to 255 characters. |
| Version |
Optional Text. Specifies a System.Version-compliant representation of the version of a Feature. This can be up to four numbers delimited by decimals that represent a version. |
So the first thing to do is generate a GUID. You can do this a number of ways, but I typically use an online generator like the one here to do it.
My GUID from the online generator is: 01c34560-6561-11dc-8314-0800200c9a66. Feel free to use it for this example but you should substitute with your own.
Title and description parameters should be plainly obvious and version is optional, but whack it in anyway.
Scope is important, a feature can be activated at various points in the farm. "Site" means it is activated once per site collection. All sub-sites under this site collection can make use of the feature without having to activate it. This will become clear later.
Next we refer to an <element manifest>. This is a reference to another XML file that actually tells Sharepoint what to do (provisionedfiles.xml). In our case, it is going to tell SharePoint to upload the CustomBrand.CSS file to the site collection style library.
Let’s take a look.
<Elements xmlns="http://schemas.microsoft.com/sharepoint/">
<Module Name="MyPimpedStyles" Url="Style Library" RootWebOnly="TRUE">
<File Url="CustomBrand.css" Type="GhostableInLibrary" />
</Module>
</Elements>
In this file, the top-level Elements element defines the elements comprising the Feature. In my previous post, I outlined a table of elements that can be used to install SharePoint features.
- Content Types: Contains a definition of a SharePoint content type.
- Content Type Binding: Actually applies a content type to a document library.
- Control: Allows you to replace existing controls on the page, such as the search or navigation with your own custom control.
- Custom Action: You can define custom actions such as add a new menu item in "Site Actions".
- Feature/Site Template Association: This allows you to bind a feature to a site template so that the feature is included in new sites based on that template.
- Field: Contains a field, or column definition that can be reused in multiple lists.
- Hide Custom Action: Opposite to "Custom Action", where you want to hide menu items.
- List Instance: Provisions a SharePoint site with a list which includes specific data.
- List Template: A list definition or template, which defines a list that can be provisioned to a SharePoint site.
- Module: Deploys files which are included when provisioning sites.
- Receiver: Defines an event handler for a list, or document library
- Workflow: Defines a workflow for a list, or document library.
So as you can see in the above XML file, we have used the MODULE element to install 1 single file. Let’s examine the <MODULE> and <FILE> element in detail.
<Module Name="MyPimpedStyles" Url="Style Library" RootWebOnly="TRUE">
<File Url="CustomBrand.css" Type="GhostableInLibrary" />
</Module>
| Module Attribute |
Description |
| Name |
Required Text. Contains the name of the file set. |
| RootWebOnly |
Optional Boolean. TRUE if the files specified in the module are installed only in the top-level Web site of the site collection. |
| Url |
Optional Text. Specifies the virtual path of the folder in which to place the files when a site is instantiated. If Path is not specified, the value of Url is used for the physical path. Use the Url attribute to provision a folder through the Feature. |
File
Attribute |
Description |
| IgnoreIfAlreadyExists |
Optional Boolean. TRUE to provision the view even if the file aready exists at the specified URL; otherwise, FALSE. |
| Type |
Optional Text. Specifies that the file be cached in memory on the front-end Web server. Possible values include Ghostable and GhostableInLibrary. Both values specify that the file be cached, but GhostableInLibrary specifies that the file be cached as part of a list whose base type is Document Library.When changes are made, for example, to the home page through the UI, only the differences from the original page definition are stored in the database, while default.aspx is cached in memory along with the schema files. The HTML page that is displayed in the browser is constructed through the combined definition resulting from the original definition cached in memory and from changes stored in the database. |
So, the module section is specifying where any <file> elements be copied to. We are going to copy this to the document library called "Style Library" in the root web site for the site collection.
Step 2. Installing and testing the Feature
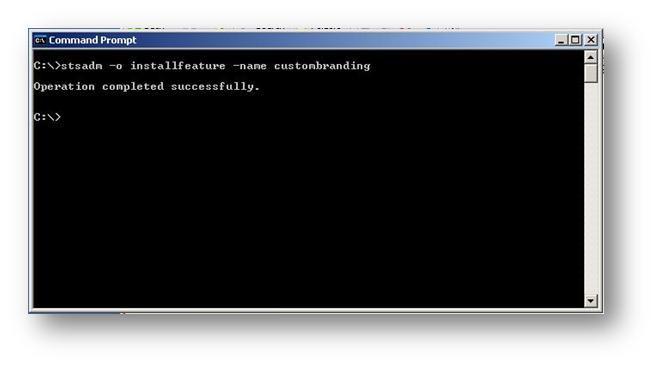
Now that our web developer has created the feature, they test it on their development SharePoint server. Open command prompt and execute the STSADM -installfeature command. When the -name parameter is specified, SharePoint knows to look in the TEMPLTE\FEATUIRES folder already, so you do not have to specify a full path.
Step 3. Test the feature
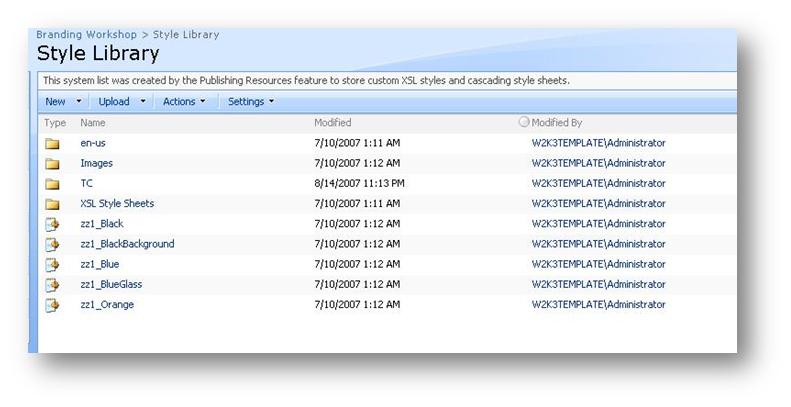
Okay, so the feature is installed. Now what? Now we need to activate this feature on a site collection. Here is the "Style Library" of my test site. (Remember that this library will not exist unless the SharePoint Publishing Infrastructure feature has been installed). Note that at this time, there is no CSS file called CUSTOMBRAND.CSS
So now let’s Activate the feature. Browse to Site Actions>Site Settings and from the Site Collection Administration menu, choose "Site Collection Features". Lo and behold! We have our feature listed! Note the title and description is as per our FEATURE.XML file.

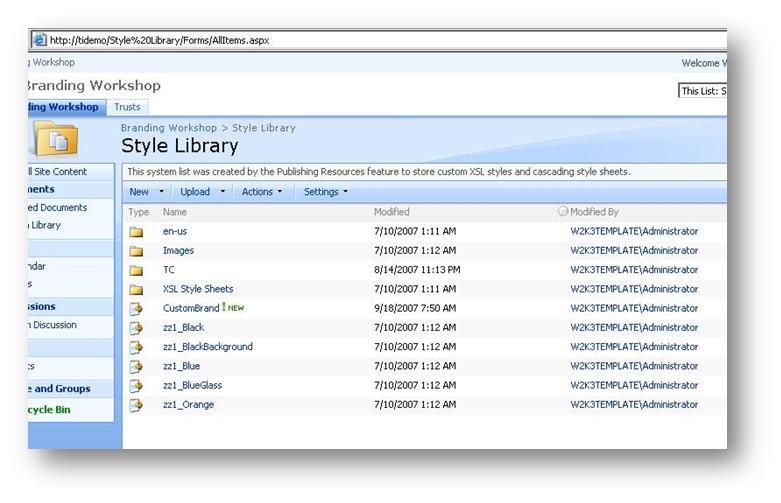
Click "Activate" to activate the feature (you can also do this on the command line via STSADM -o activatefeature command). Once it is marked as active, re-examine the style library. Woo freakin hoo! There is our CSS file!
Step 5. Test and deploy the Feature
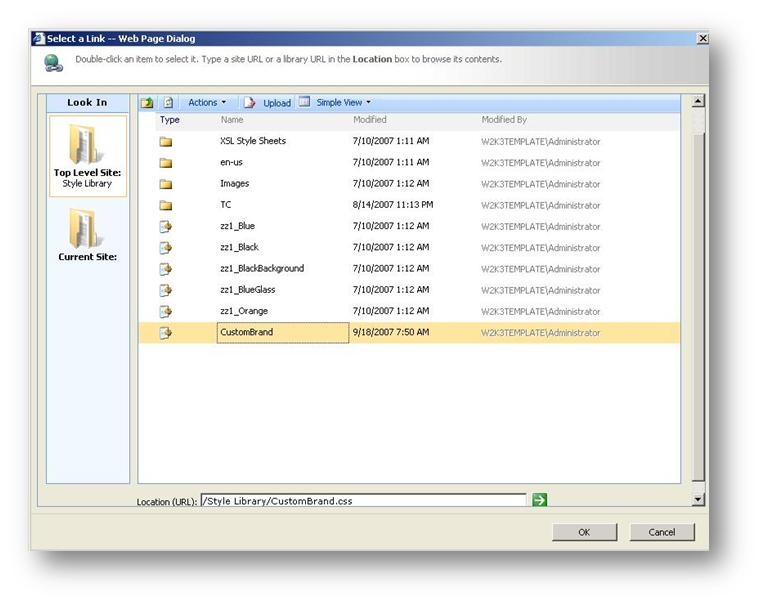
In our example here, we can test this feature, by choosing to use this new CSS file in the master page settings of any site within the site collection. The Site Collection administrator navigates to site settings->look and feel->master page settings and specifies the CSS file override as shown below.
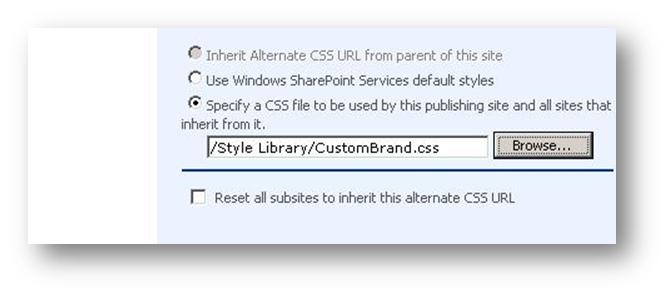
By clicking on the "Browse" button, they can select the CSS file from the style library in the site collection.
This highlights the relationship between the web designer and the farm, site collection and site owners. In a large production farm the sequence would look something like this.
- The developer creates and tests the feature
- The developer hands the tested and approved feature to the the SharePoint farm administrator
- The SharePoint farm administrator copies this feature into the FEATURES folder on the web front end servers on the farm and notifies the site collection administrators that the feature has been installed
- Each site collection administrator activates the feature and informs the site owners that the feature is now available.
- Each site owner optinally chooses to use this new CSS installed by the feature.
Summing Up
I hope that you found this article useful. Now you are going to totally hate me, because now I am going to tell you that features are only half of the solution to SharePoint customisation. "What is the other half"? you may ask. Well the other half of the solution is "solutions" … don’t you just love generic terminology! 


